Richmond Park Photo Walk

If you're reading this page, then you have probably been given the link by me after attending a photo walk or a 1-2-1 tuition session. If you've managed to stumble in to this page, then you can find details of these activities here:
● Photo walks in Richmond Park (you can request a date if none are listed)
Below you will find additional info and links I have prepared as a follow-up to these sessions to help you further with photographing the deer and accessing & finding your way around the park.
For anyone who unfortunately did not encounter many deer on a photo walk, please use the first link above to check future dates for a free second event and contact me to arrange (don't book again on the website as you will be charged by Funzing). Limited places so it's first come first served.
Safety & Welfare
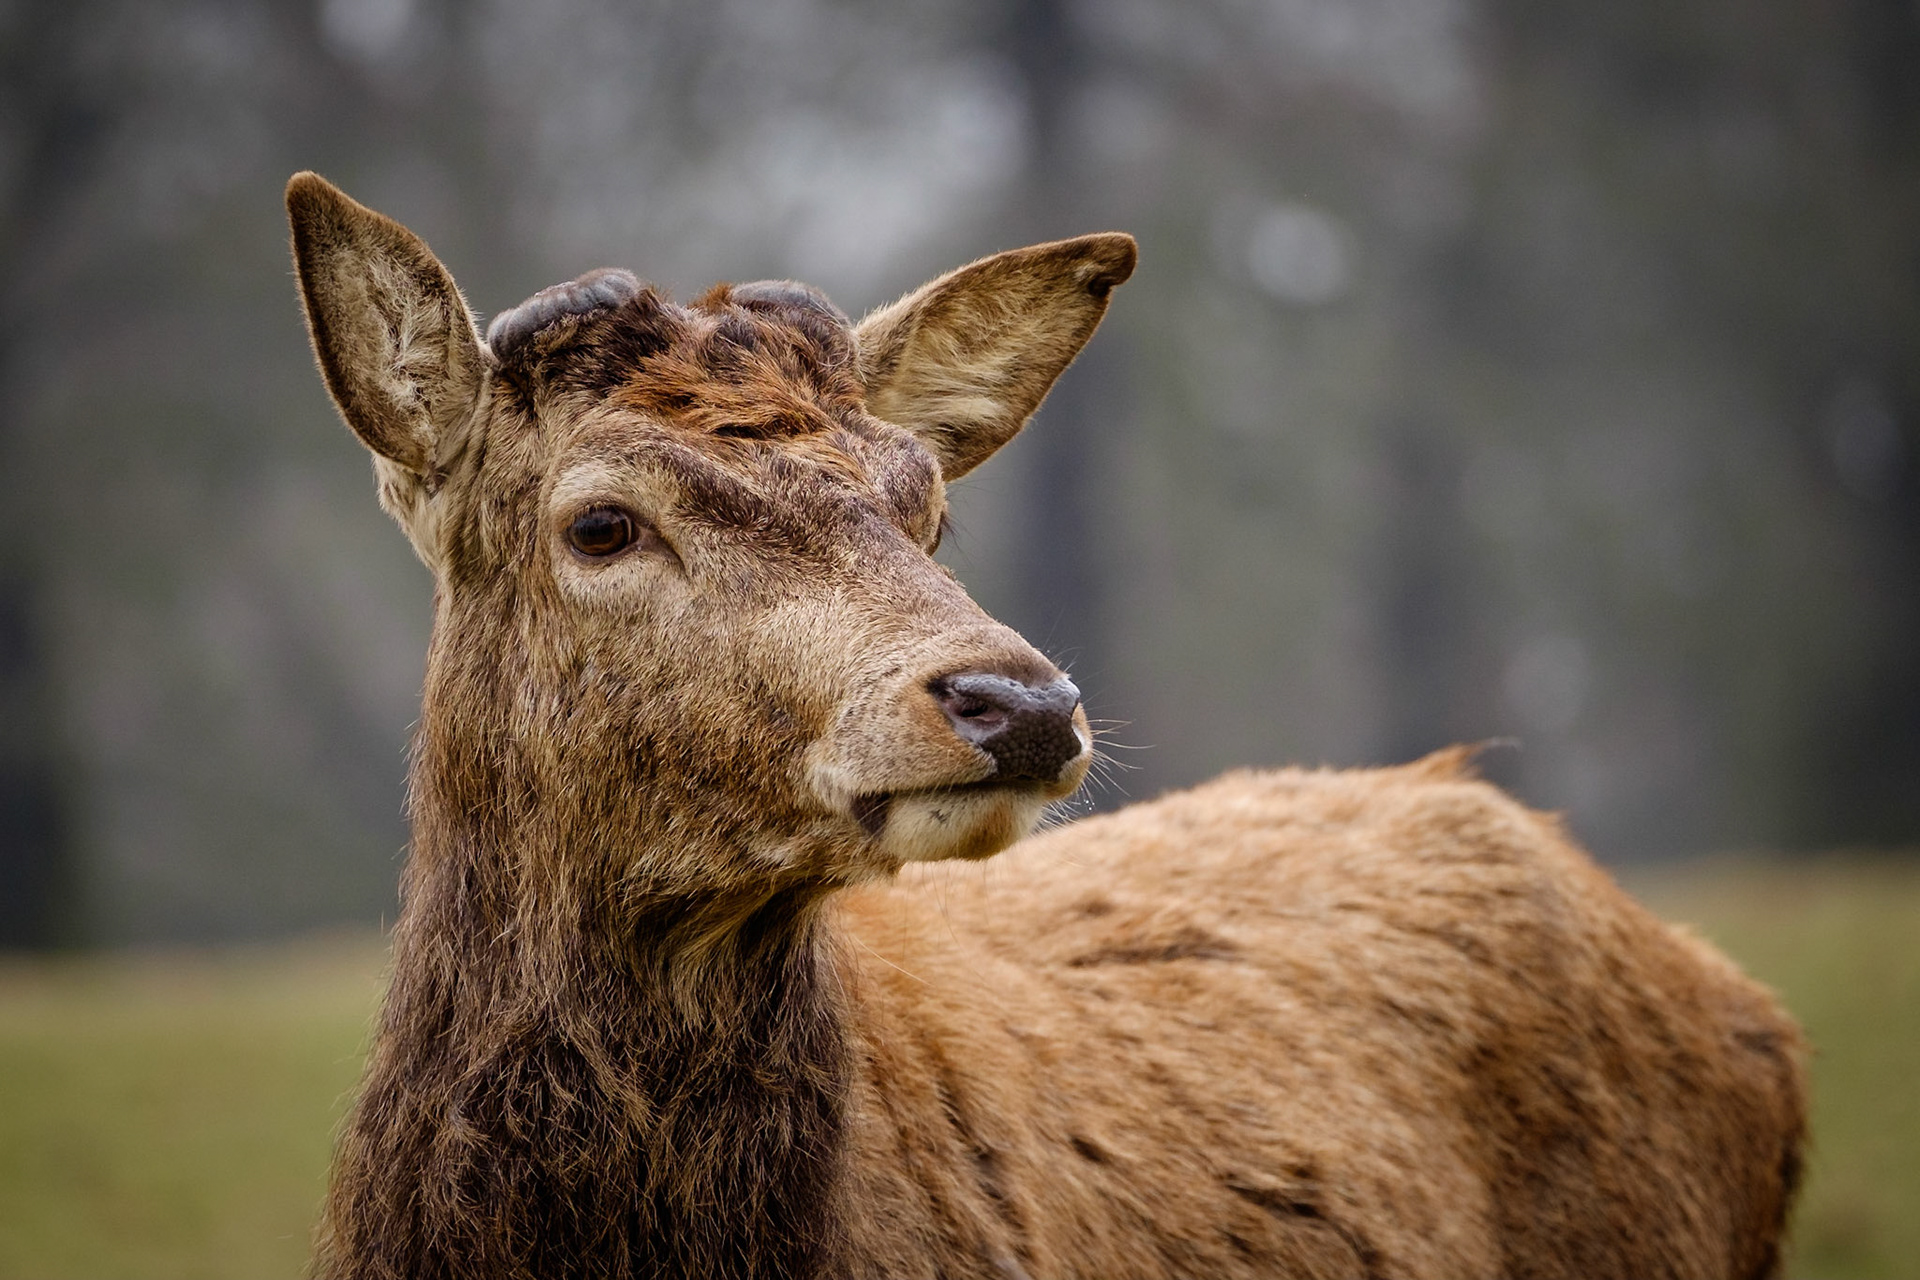
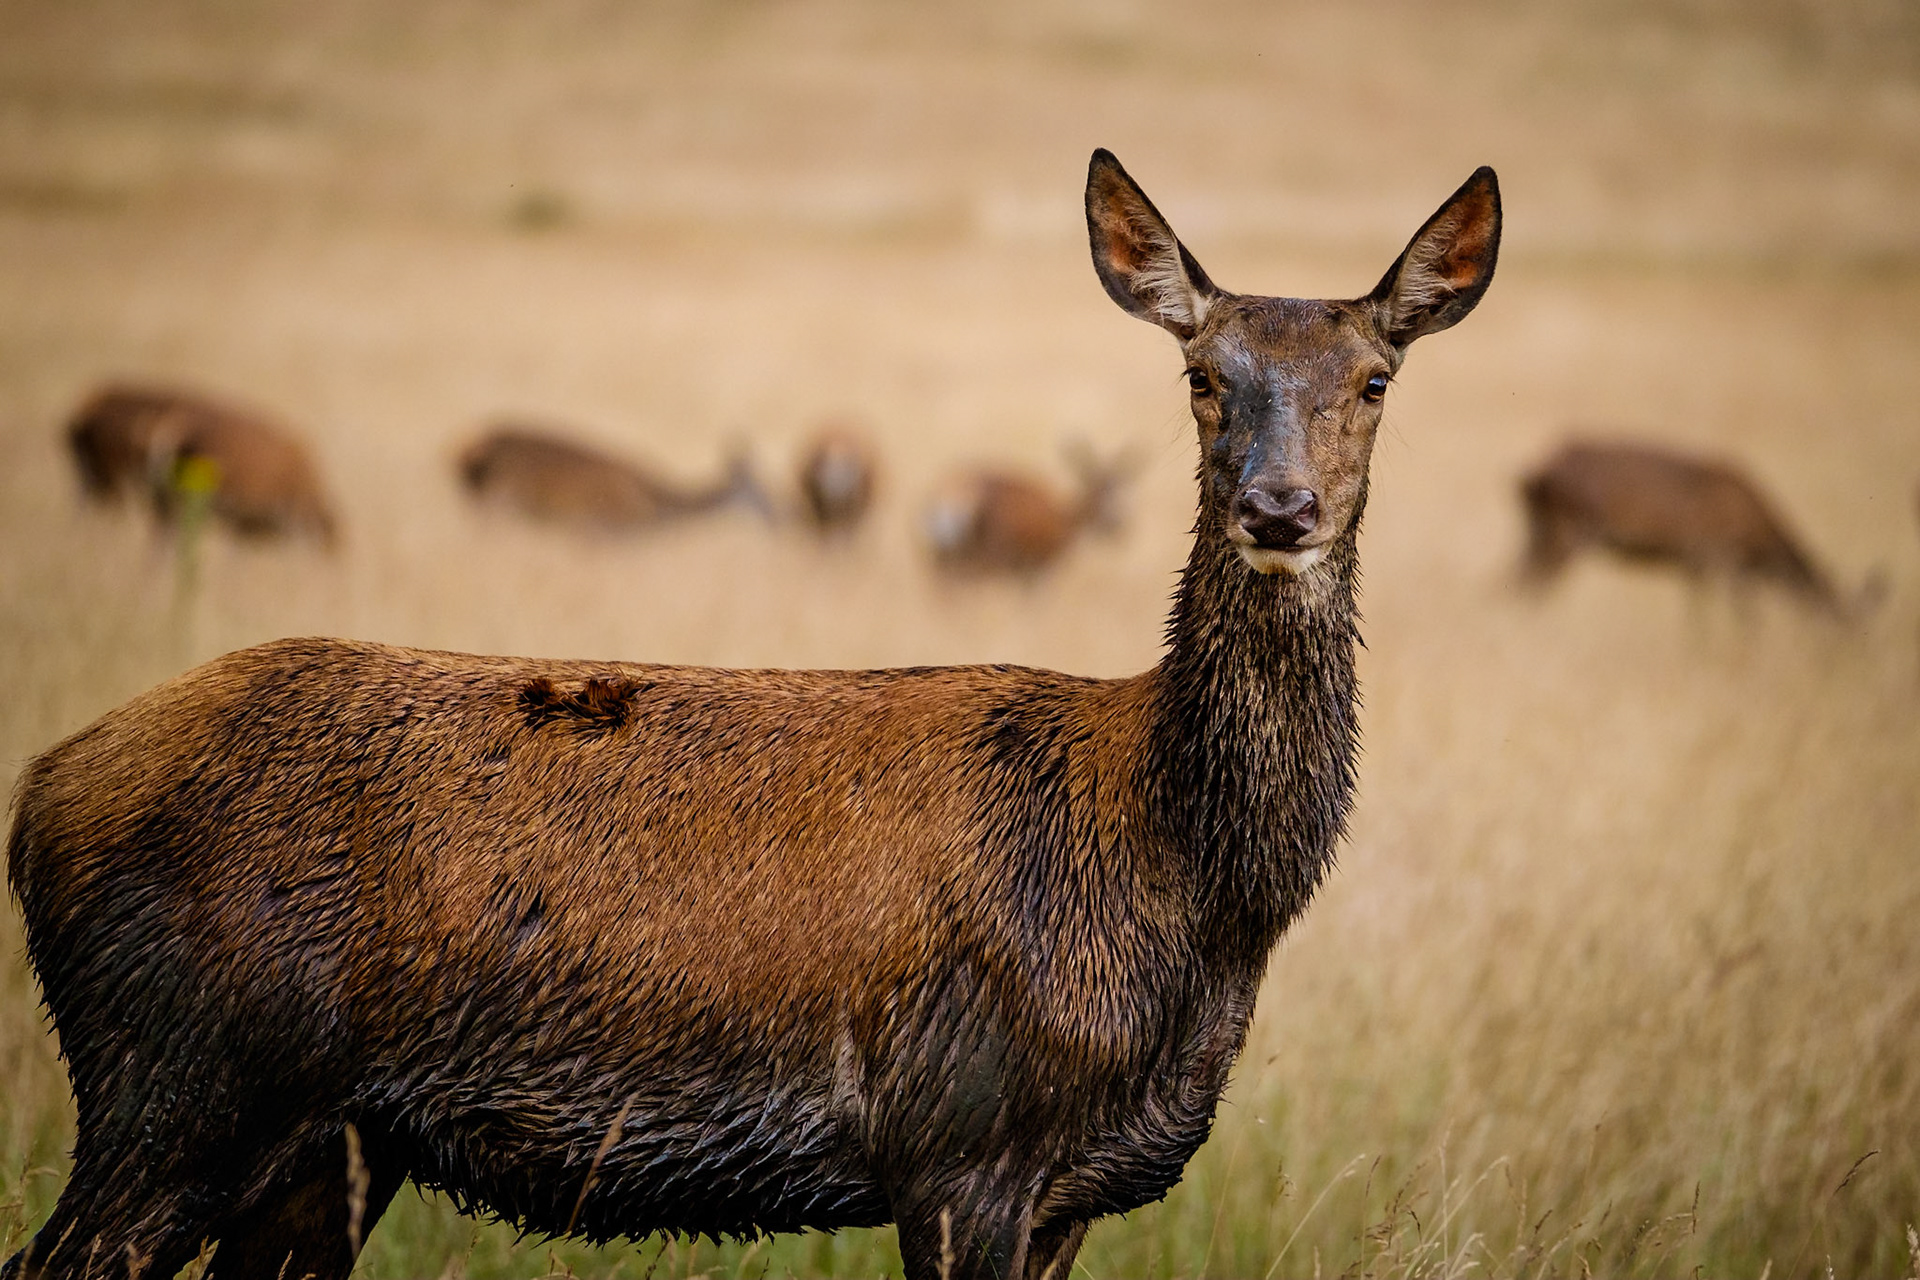
Remember to keep your distance (50 metres) and be aware of all the deer around you. Use a longer lens (200-300mm advised) so you don't have to get too close for a good image.
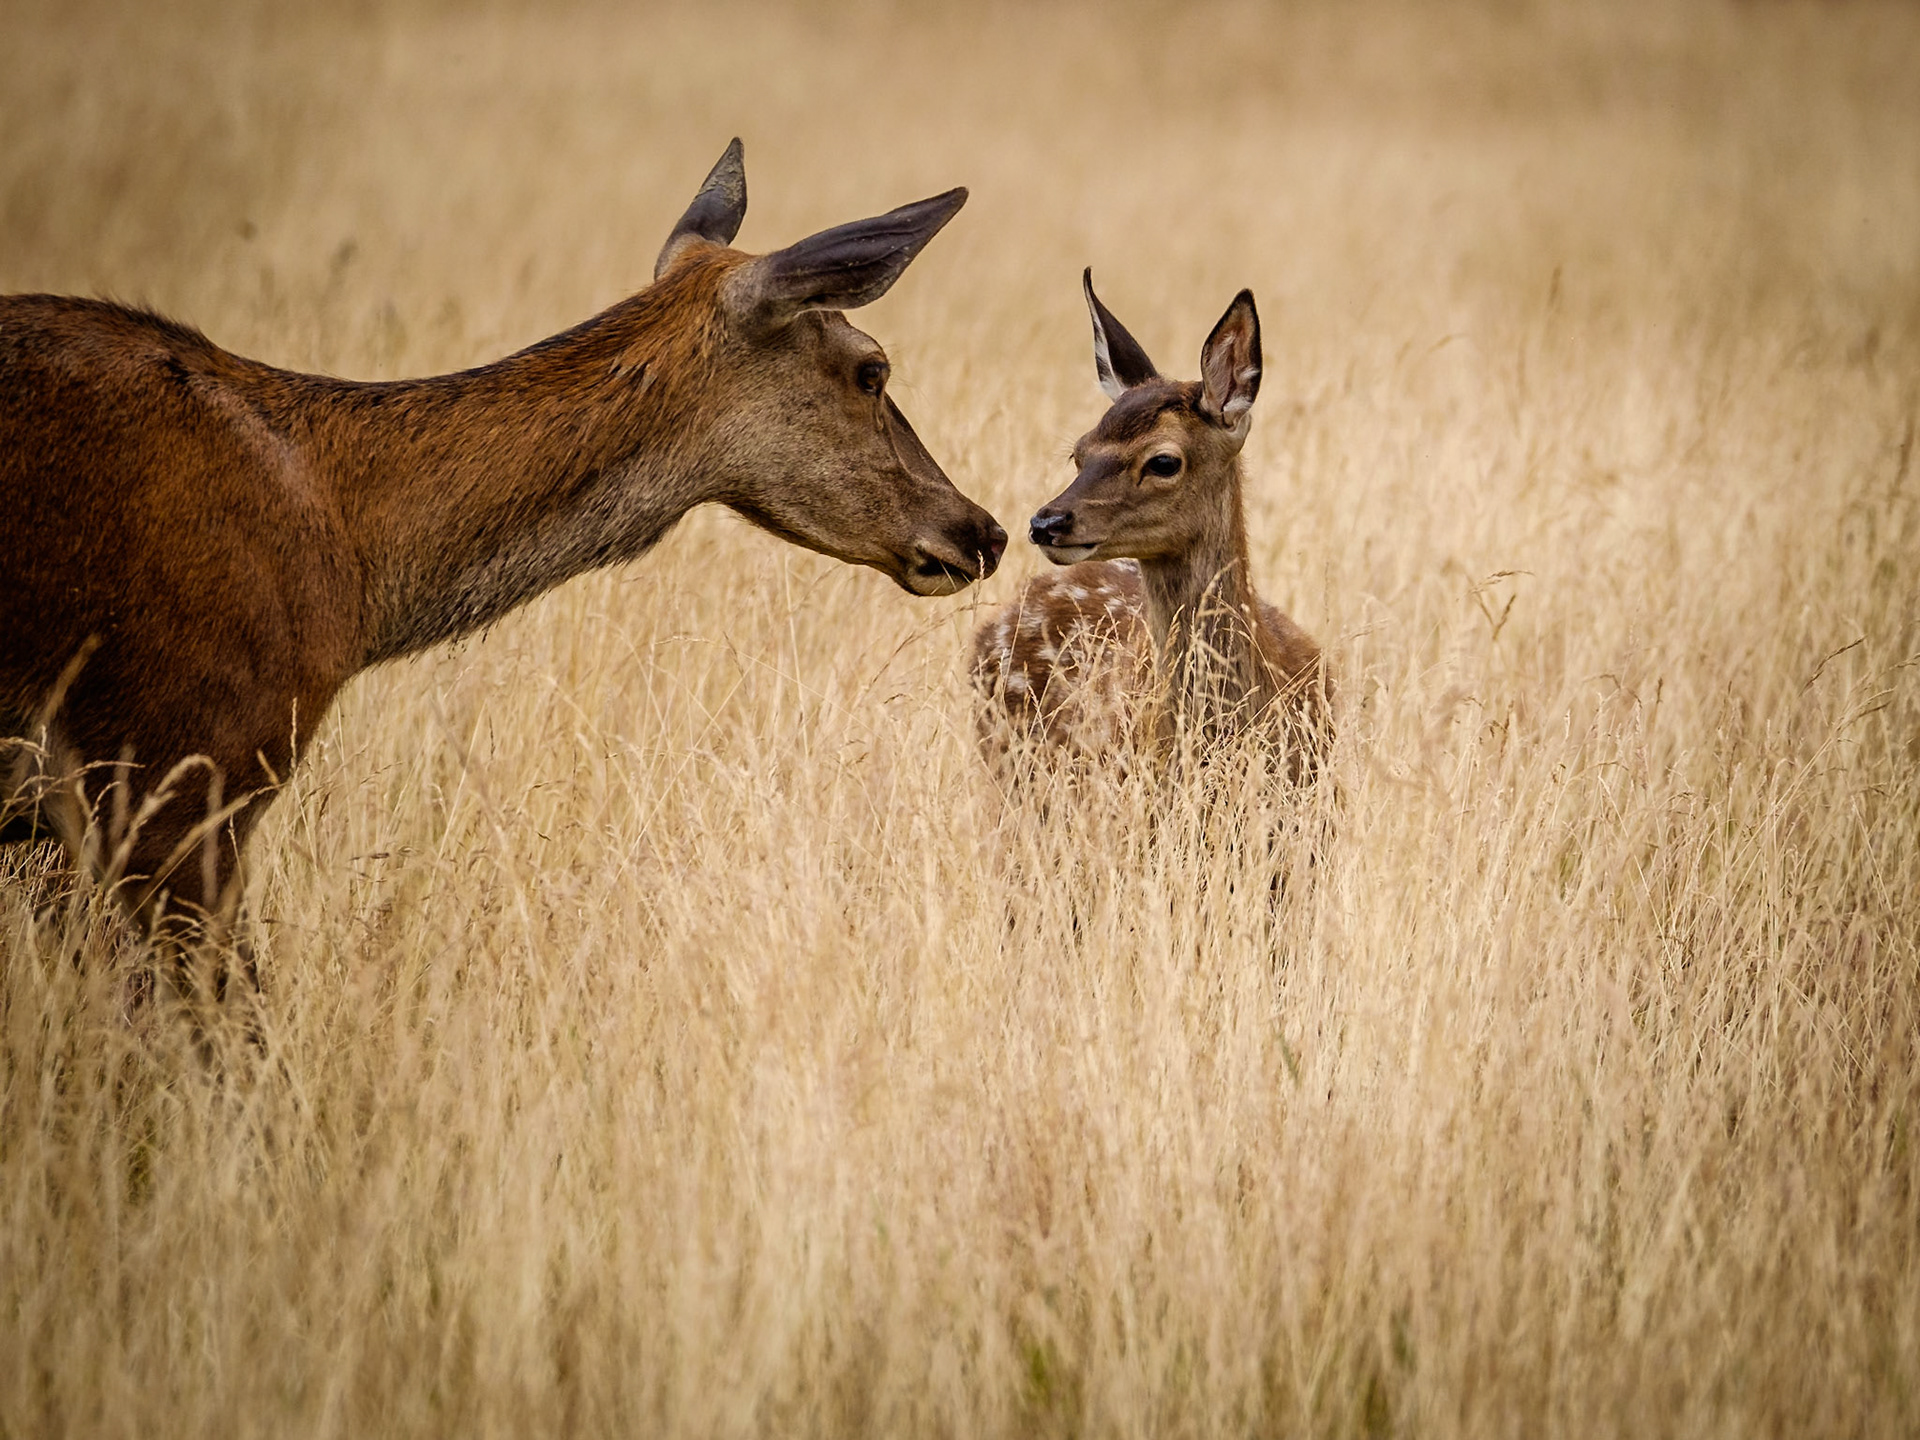
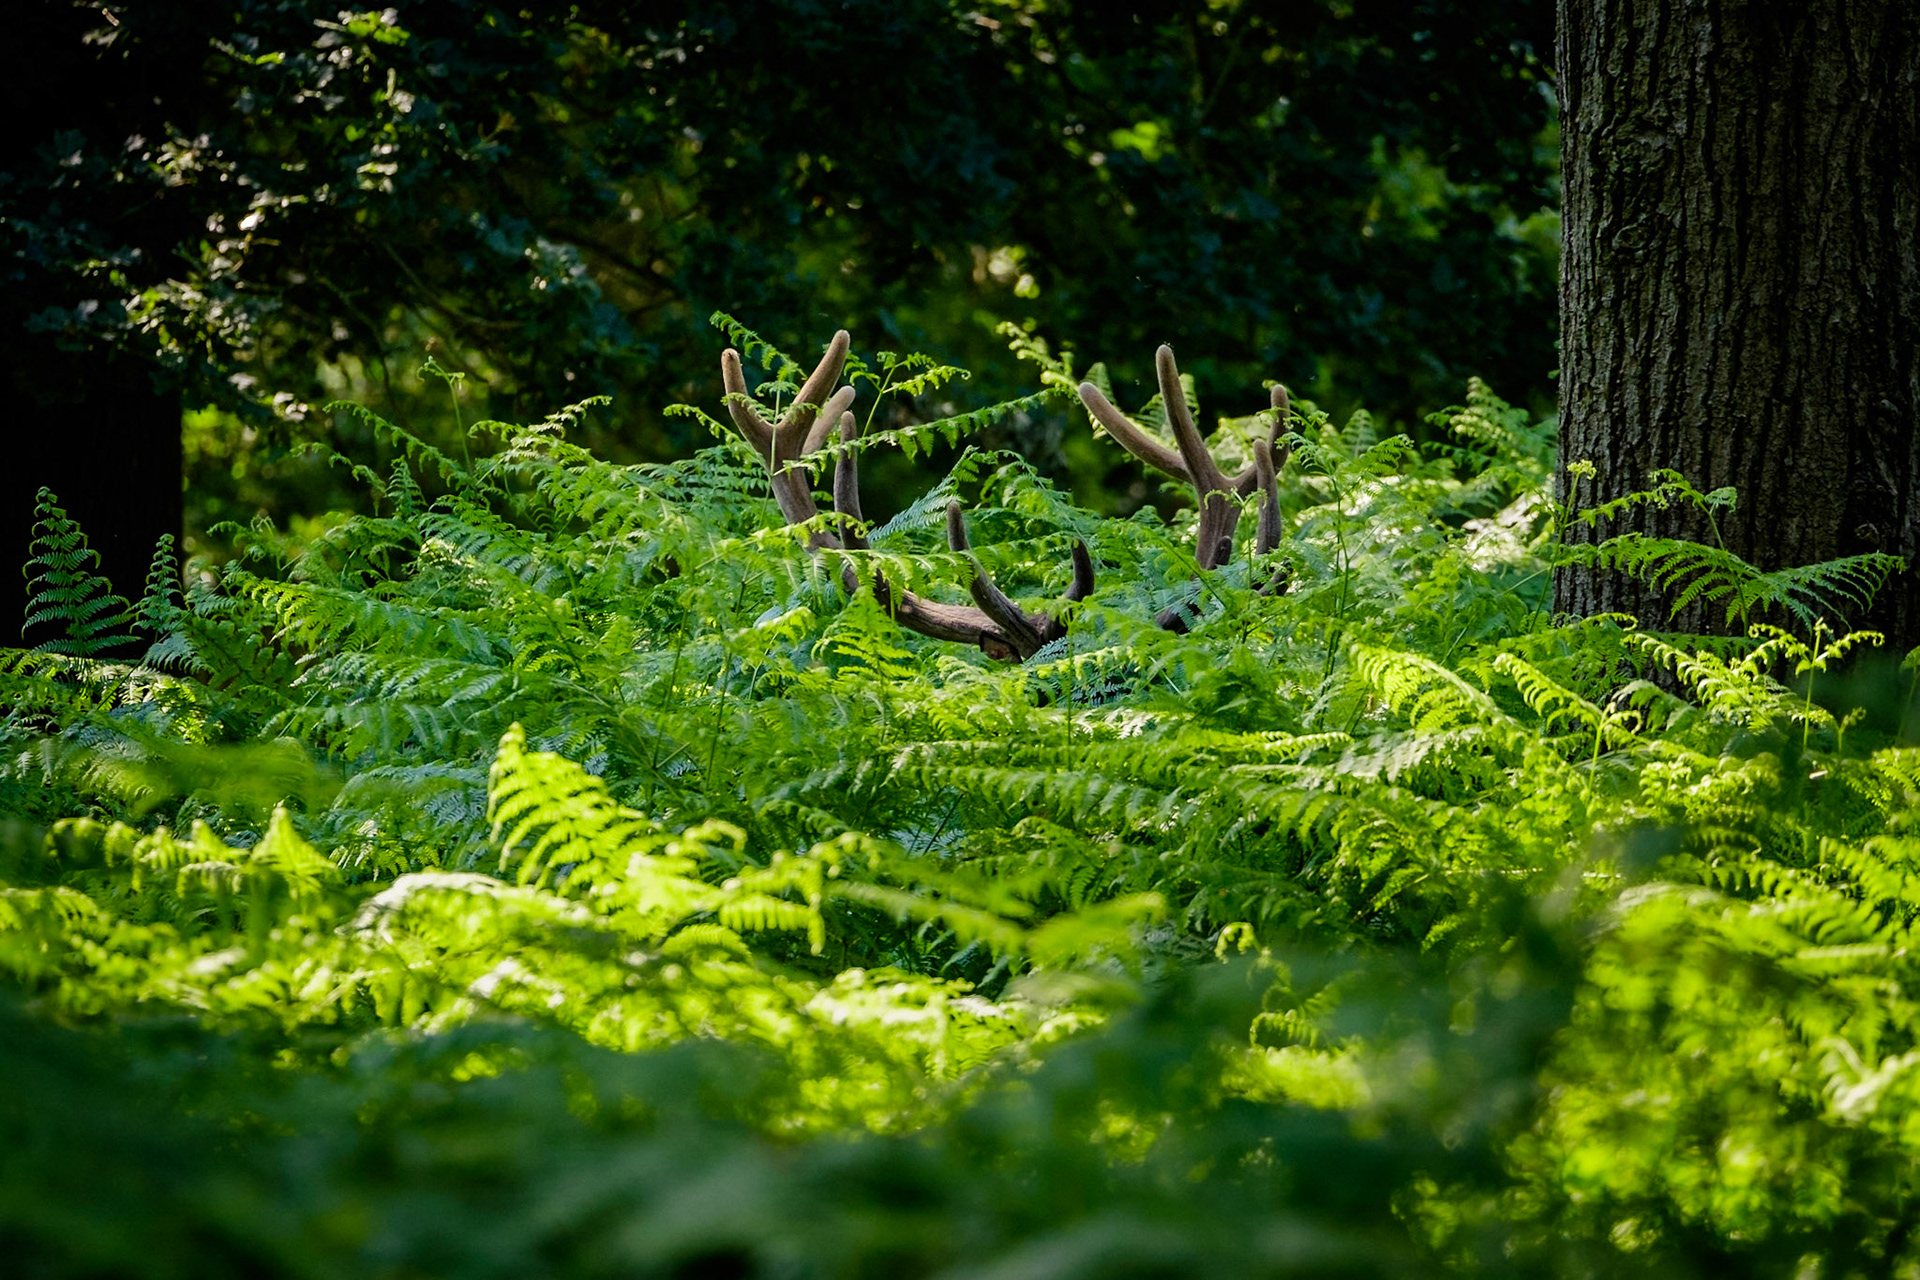
It can be especially dangerous during the autumn rut (September to November) when stags are challenging each other, so make sure you don't get between them. Be careful during the birthing season (May to July) as mothers will be protective of their young. Be careful not to blunder into long grass or ferns during this time as newborns may be hiding nearby.
The welfare of the deer should be your number one priority at all times. Understand and follow the code of conduct published by the British Deer Society. Also available as a short video on YouTube.
Read more about the deer of the Royal Parks by clicking here.
Remember to keep your distance (50 metres) and be aware of all the deer around you. Use a longer lens (200-300mm advised) so you don't have to get too close for a good image.
It can be especially dangerous during the autumn rut (September to November) when stags are challenging each other, so make sure you don't get between them. Be careful during the birthing season (May to July) as mothers will be protective of their young. Be careful not to blunder into long grass or ferns during this time as newborns may be hiding nearby.
The welfare of the deer should be your number one priority at all times. Understand and follow the code of conduct published by the British Deer Society. Also available as a short video on YouTube.
Read more about the deer of the Royal Parks by clicking here.
For more detailed information on red deer (and others) click here.
Be aware of the risk of infection from ticks, especially in warmer seasons. More info is available here. If you need a tick removal tool, I use the Tick Twister.
Another useful guide for wildlife photographers who want to ensure an ethical approach can be found here.
General tips on technique
Aperture - generally use the widest you have, around f/2.8 or f/4, to blur the background and help to increase shutter speed.
ISO - increase it in order to maintain a high shutter speed, but above 800 you may notice noise degrading the image quality, depending on your camera model. The latest cameras generally have better noise handling than older models.
Shutter speed - the longer the lens focal length, the faster shutter speed you need to counteract camera shake. Around 1/500 sec and faster should be good enough, but it will depend on your steadiness, so practise your handheld technique.
Exposure compensation - useful to increase/decrease the brightness if your camera doesn't quite calculate the exposure you want.
Focusing - make sure you know how to reposition the focusing point. When you have time, choose your composition first and then move the focusing point onto the eye or head. Use continuous focusing for moving deer. Review shots to check focusing accuracy and reshoot if necessary. Get to know your camera, study the manual and practise different methods to see what suits you. Take a look at back-button focusing, it works well for some people.
Drive mode - continuous shooting could help you achieve a good shot, giving you several to choose from, although you will have hundreds of images to sift through!
Tripod - can be useful to aid stability but limiting to free movement and adjusting position quickly. Try with and without to see what you prefer. I generally use a tripod if I'm starting before sunrise when light levels can be low especially in the woods, but I go handheld later in the day. Monopods can work well and are not as limiting to free movement as tripods. I prefer a tripod as I can take a rest from carrying the weight!
Don't carry too much gear - there can be quite a bit of walking involved especially when it takes awhile to find some deer! Quite often, I'll go out with just one lens and the camera on a sling-style shoulder strap so it is comfortable to carry, with a spare battery in my pocket.
Get to know your camera! If you're still struggling to understand and use these controls, consider coming along for a one-to-one beginner's introduction.
Composition
Think about your position before approaching the deer, especially with regard to the background. Exclude distracting elements where possible and try to make the setting look natural.
Use a low viewpoint to create a more engaging image. Lying down and shooting through grass is a good option, but be aware of the risk from ticks. Read the advice on the Royal Parks website. If you don't want to lie down or kneel, try a small folding stool with a shoulder strap (I use one of these quite often during wet periods).
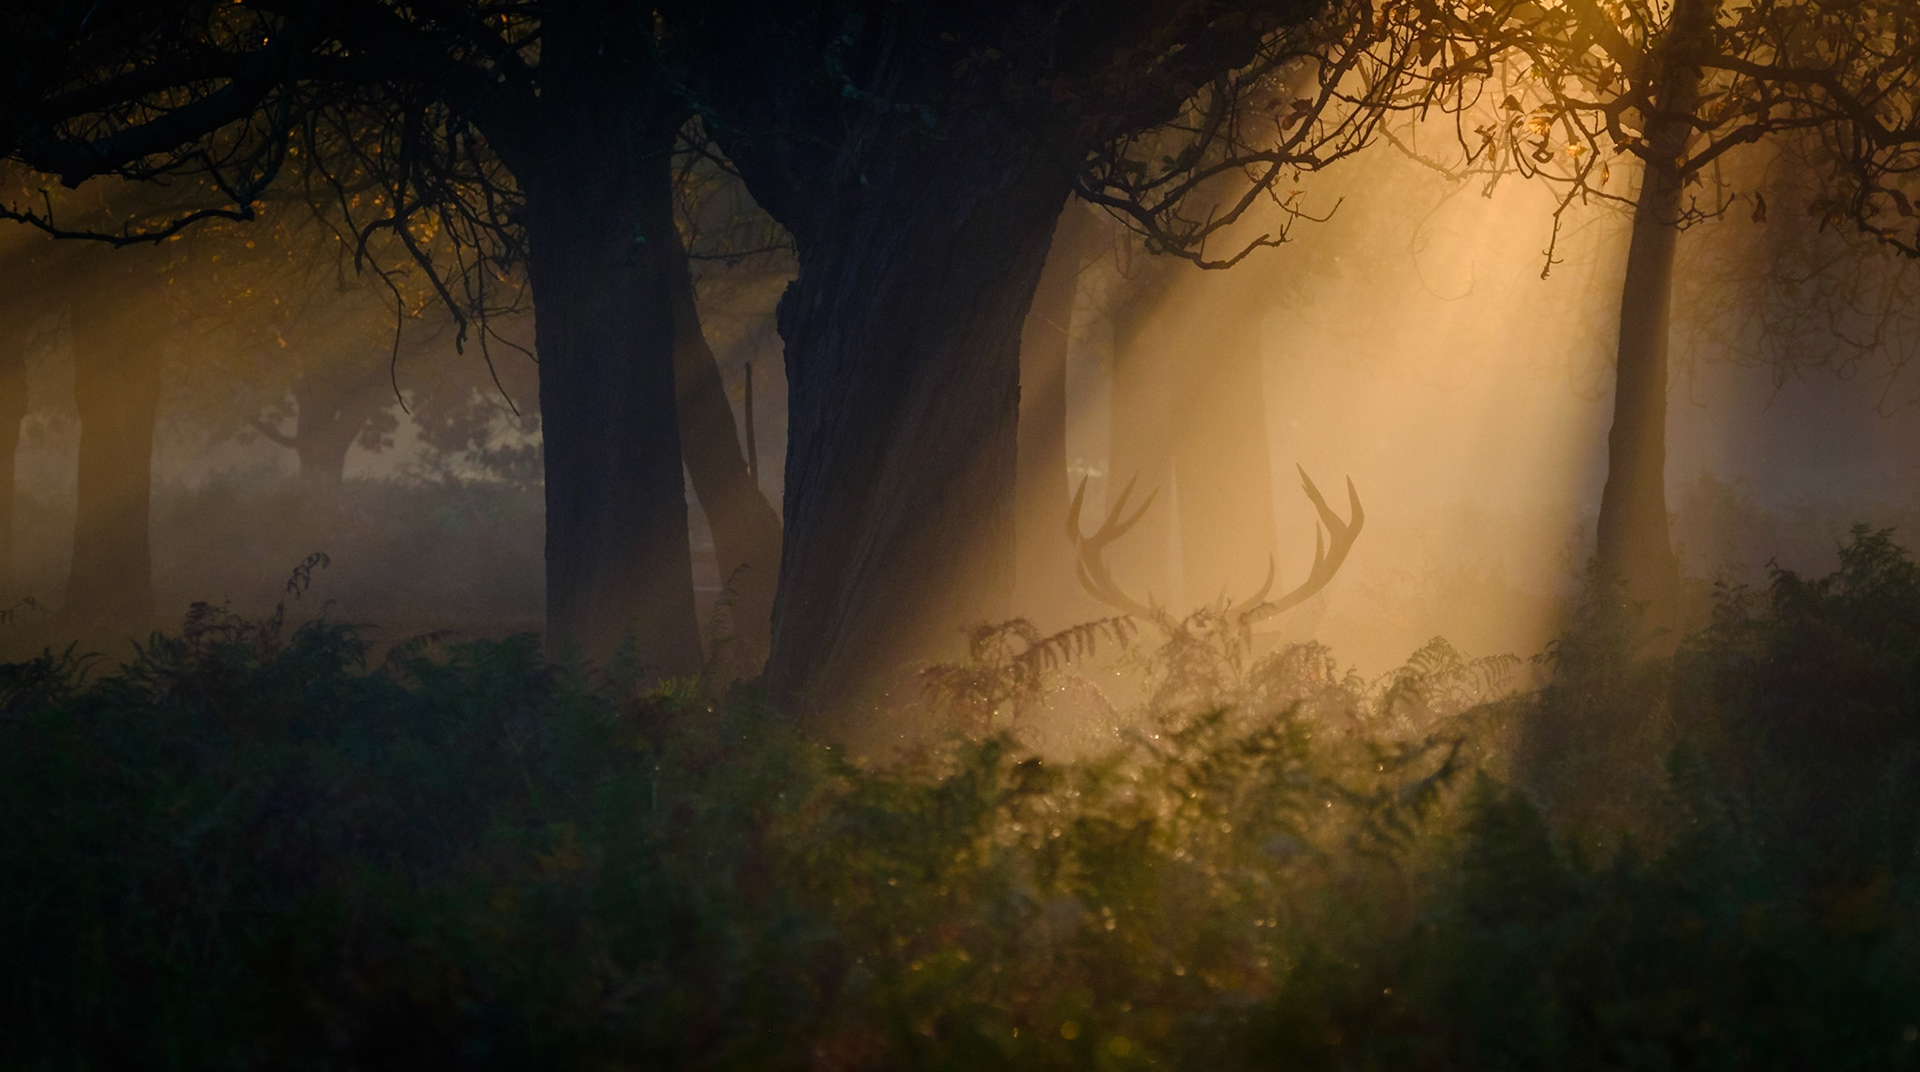
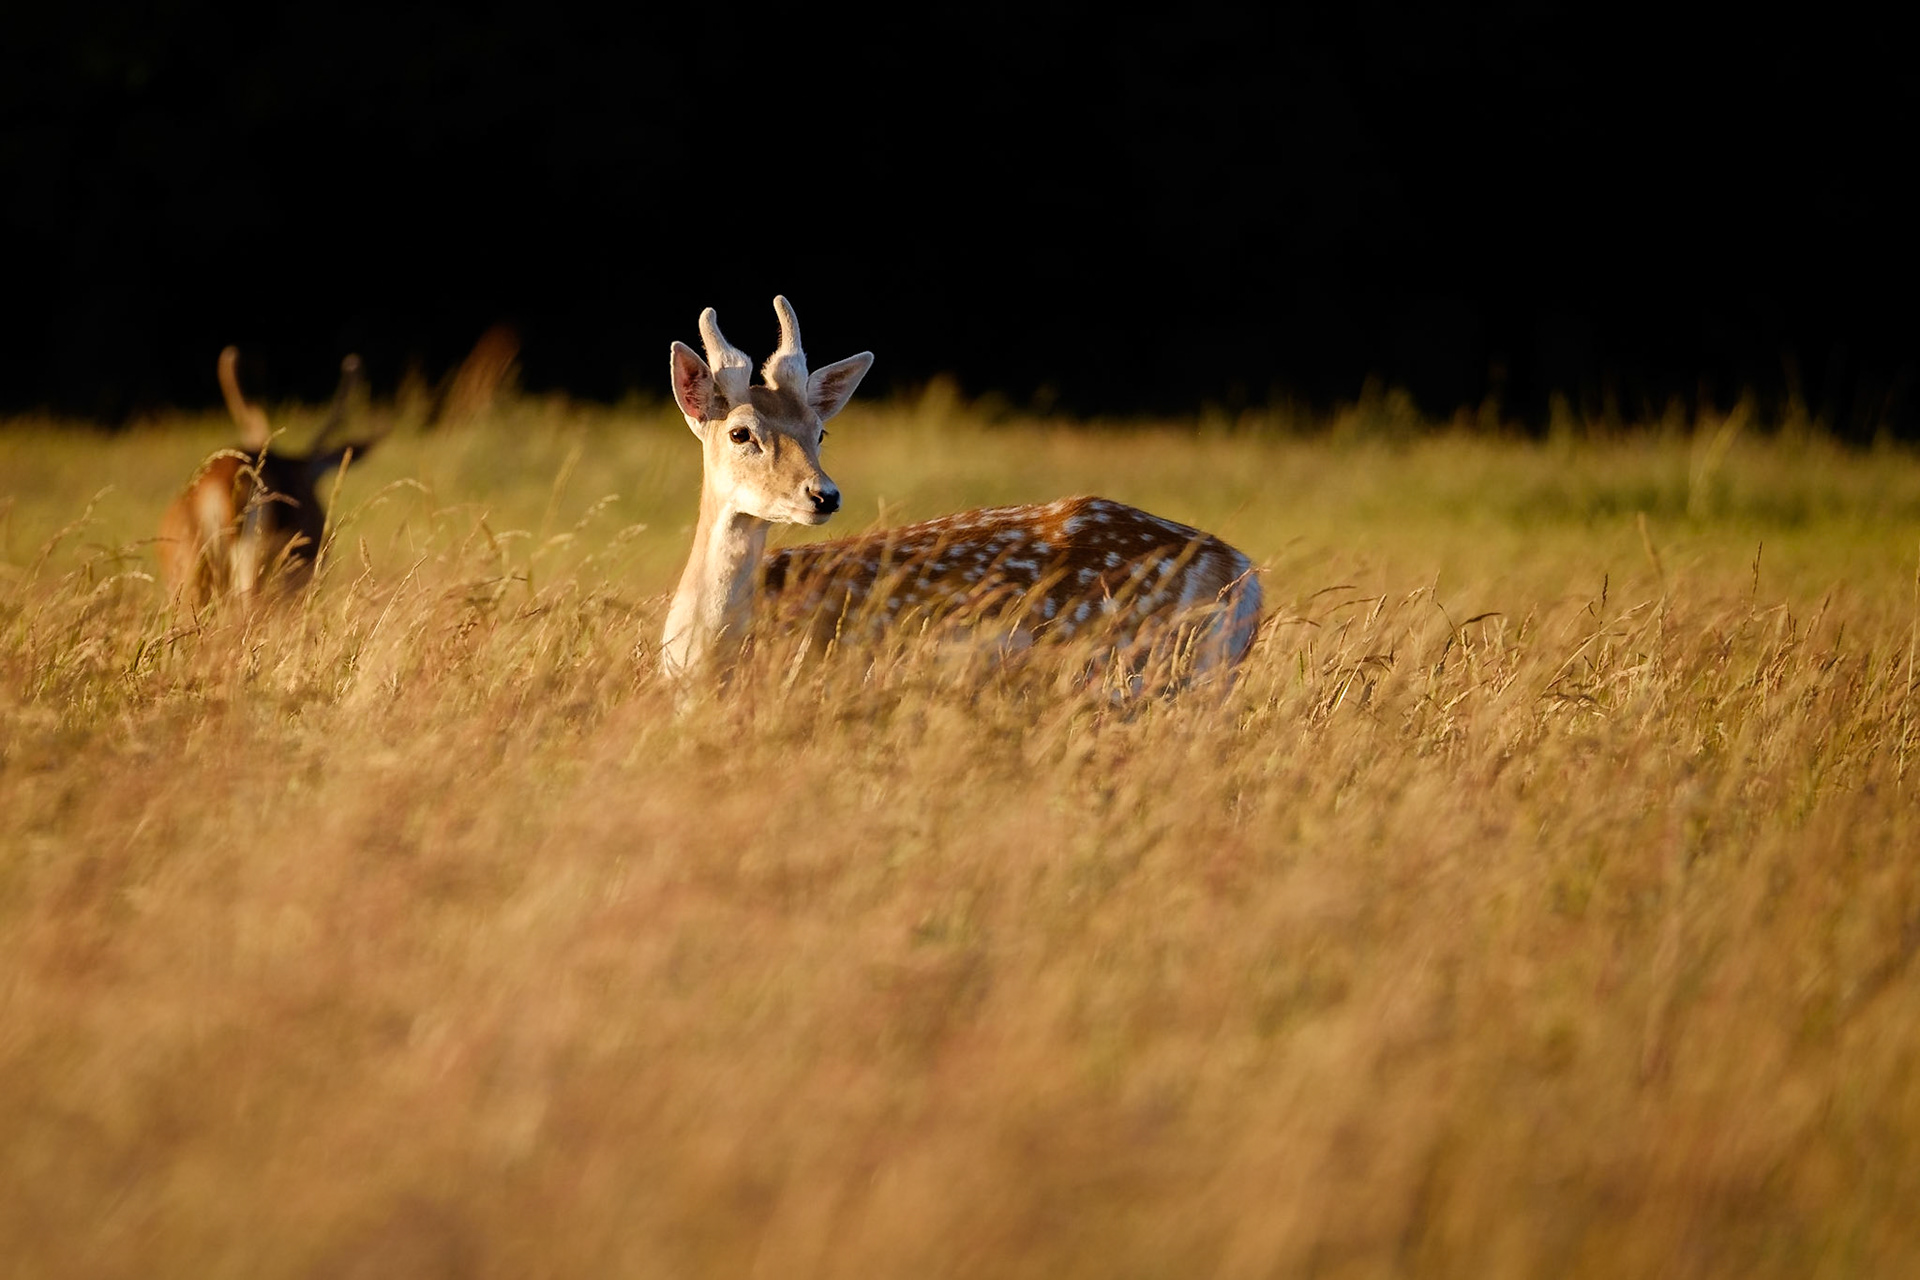
Try to time your shot to get some eye contact (see some of the sample shots below). Silhouettes in back lighting can be very atmospheric, especially if you have mist adding to the scene.
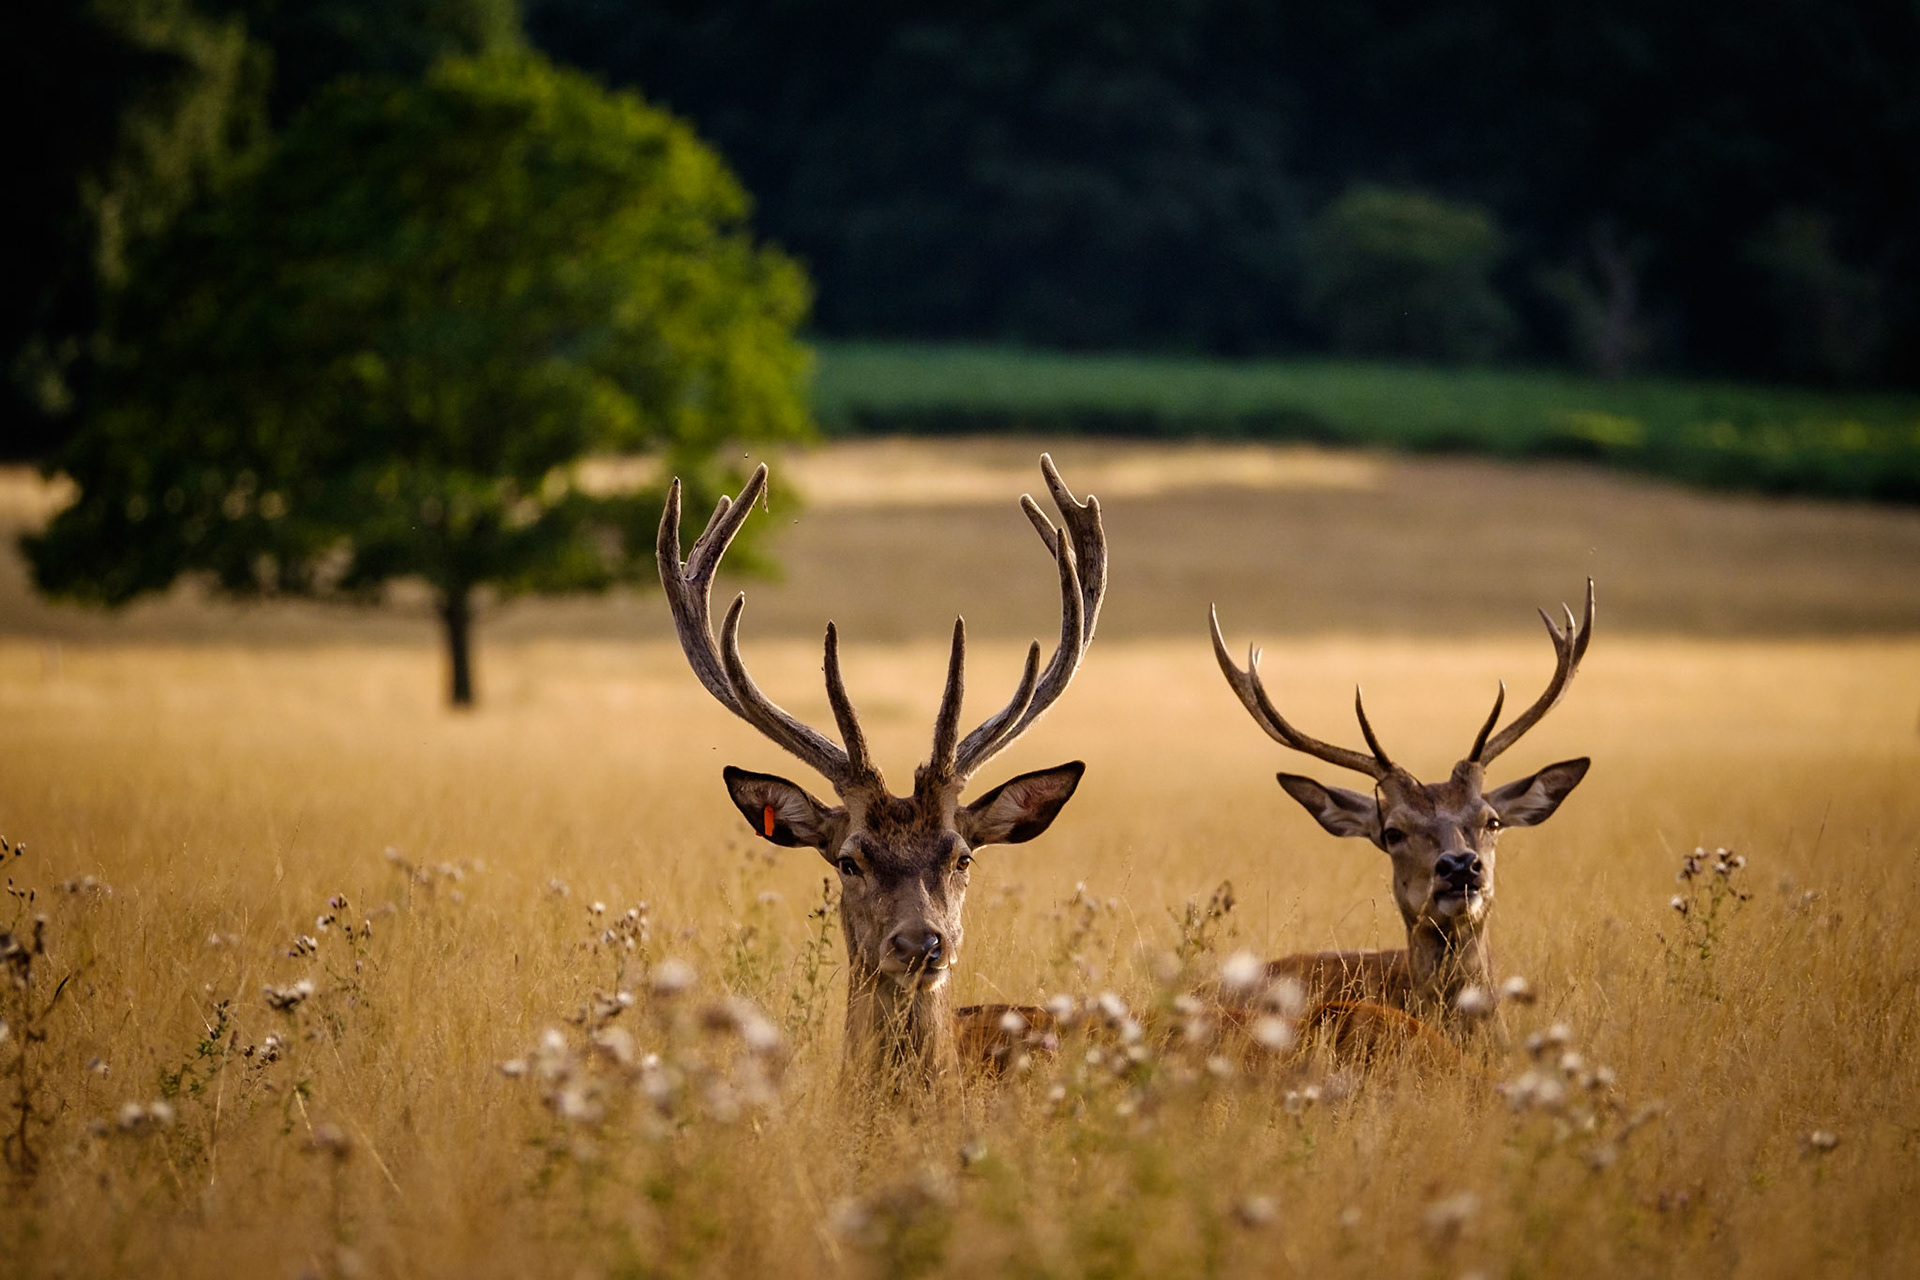
A large herd can make an image look "too busy", so try to isolate individuals. Think about their position relative to each other within the image frame so that their outlines and antlers don't interfere with each other and upset the composition.
Don't chase after the deer - try to anticipate their movement and look where they are heading. Sometimes it's worth finding a composition you like, waiting for the deer to move and then crossing your fingers!
Maps
This map is from the Royal Parks - map link
This is a map I have prepared with additional useful info - map link
Access
As most photographers know, the best light usually occurs around sunrise and sunset, with sunrise being my favourite as you can also find mist & frost and the park will be quieter. If I'm going for sunrise after the road gates open (either 7:00 or 7:30 am), I always head for Pen Ponds as mist can be common. If sunrise is too early I will park outside and walk in, either at Ham gate or Ladderstile gate as they are my closest. This is not possible when the cull occurs as the pedestrian gates are locked overnight and reopen in unison with the road gates. This usually happens from the first Monday in November and again in February, both for a period of six weeks. Check the Royal Parks website for accuarate info. The second map link above includes info on parking outside the park.
Locations
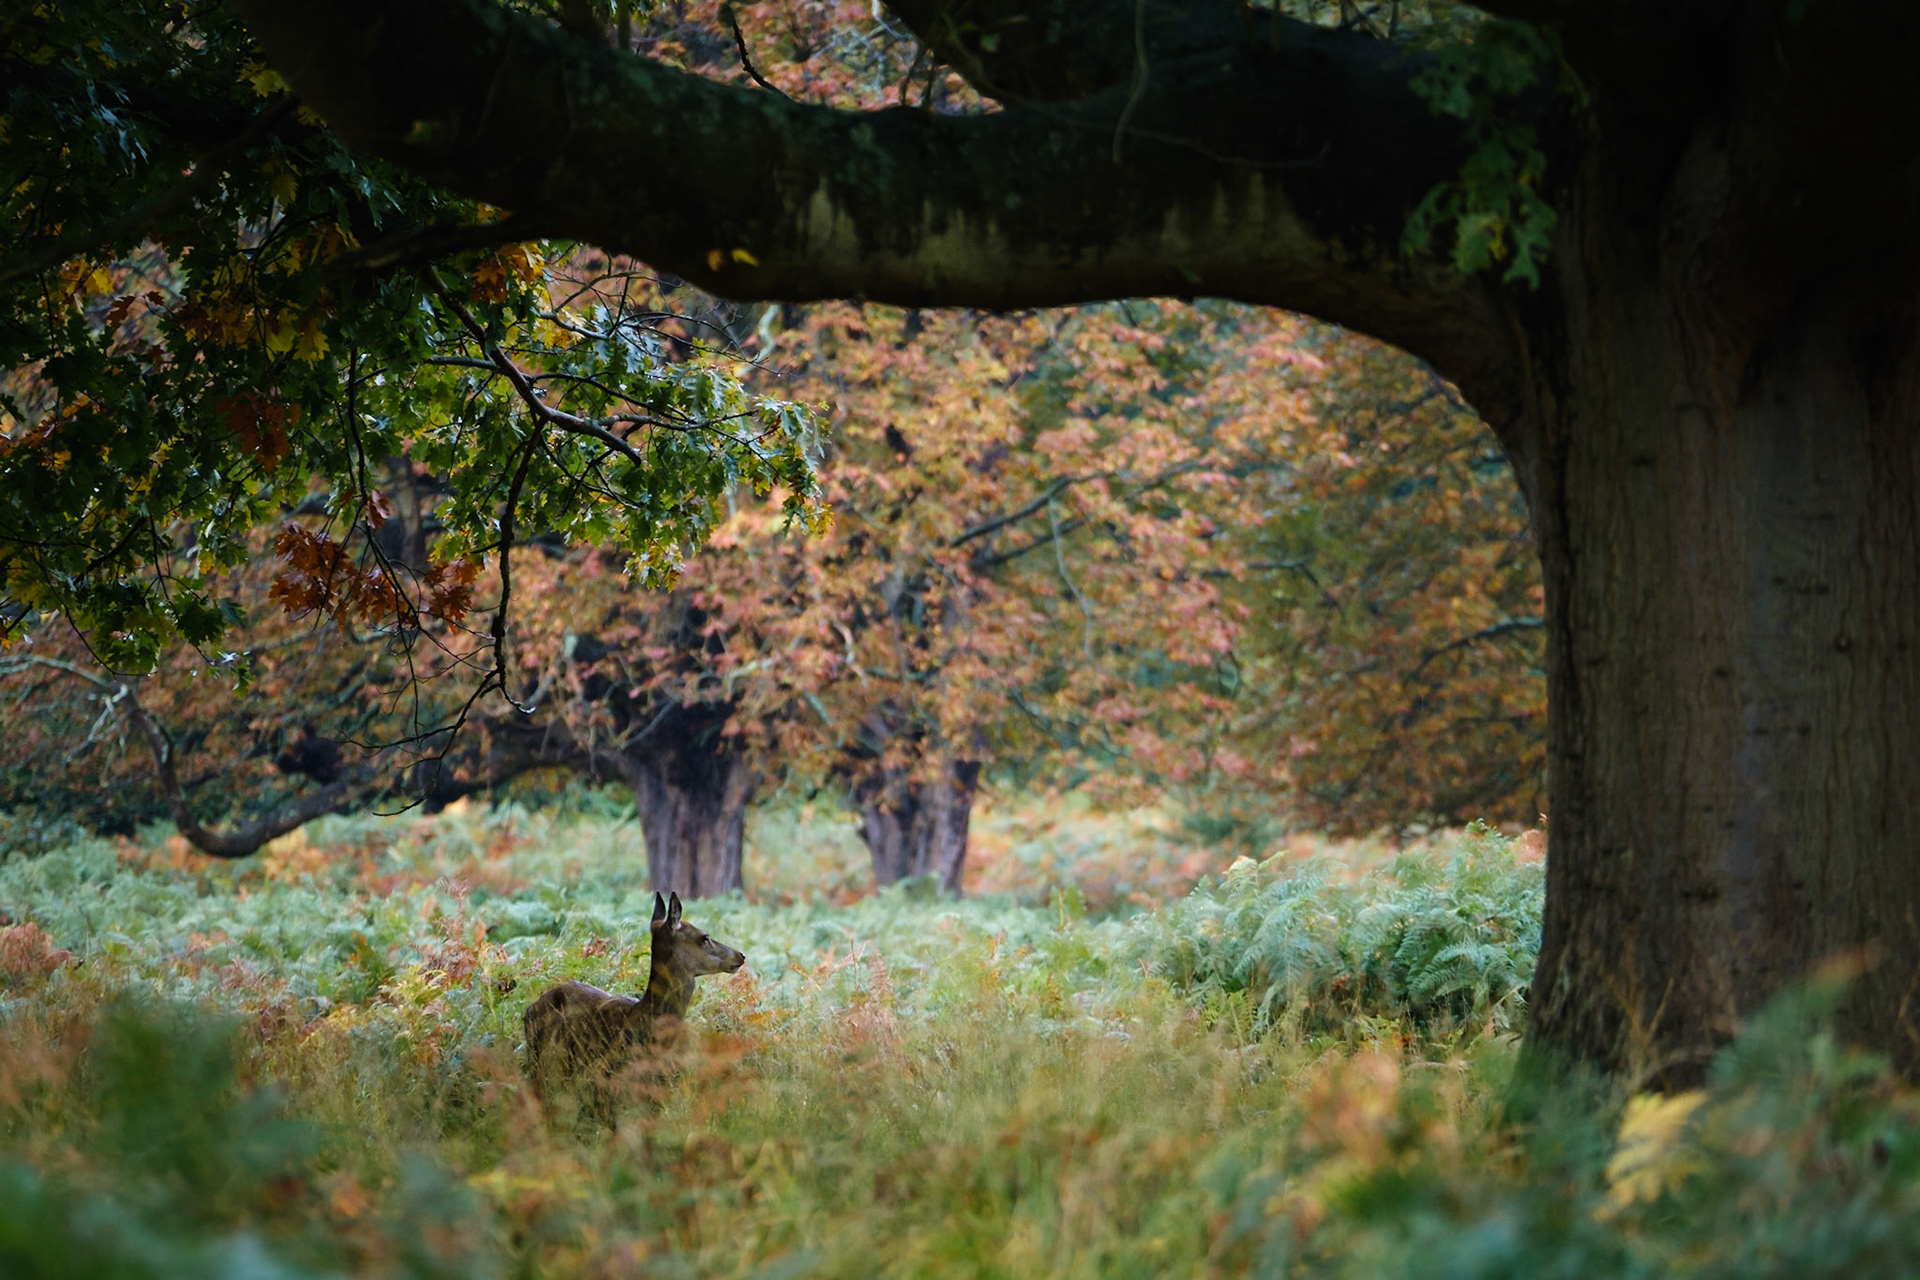
A favoured location of mine is Duchess Wood, which is just below White Lodge. Being lower down, in winter the early rising sun is hidden behind Spankers Hill Wood, so it hits Duchess Wood slightly later. This means you can be somewhere more open to catch the first of the sunlight, then head over there to catch more sunlight as it streams into the wood. It has mature trees so there are fewer of the little fenced tree protectors to clutter your composition.
North west of Duchess Wood is Saw Pit Plantation, which is also mature woodland and contains the Queen's Ride pathway with a lovely view back towards White Lodge.
Another mature wood can be found between Ladderstile Gate and Isabella Plantation.
Pen Ponds at sunrise can be beautiful with mist and early light and all the wildfowl moving around. Keep an ear open for increased volume of squawking geese, as this usually means they're about to take off in formation. I quite often forget the camera and just watch them - I love to see them sweeping low over the water!
Isabella Plantation is a must during spring with the colour of all the flowering bushes and plants. Try it from mid-April to early May.
If you live closer to Bushy Park you may prefer to go there, so check here for info. An advantage there is earlier opening times and later closing times, so it can be easier to accommodate sunrise & sunset.
Personally, I prefer Richmond Park as it's more "rugged" and natural looking with less distractions in the background, although the deer can be harder to find as it's much larger!
Access
As most photographers know, the best light usually occurs around sunrise and sunset, with sunrise being my favourite as you can also find mist & frost and the park will be quieter. If I'm going for sunrise after the road gates open (either 7:00 or 7:30 am), I always head for Pen Ponds as mist can be common. If sunrise is too early I will park outside and walk in, either at Ham gate or Ladderstile gate as they are my closest. This is not possible when the cull occurs as the pedestrian gates are locked overnight and reopen in unison with the road gates. This usually happens from the first Monday in November and again in February, both for a period of six weeks. Check the Royal Parks website for accuarate info. The second map link above includes info on parking outside the park.
Locations
A favoured location of mine is Duchess Wood, which is just below White Lodge. Being lower down, in winter the early rising sun is hidden behind Spankers Hill Wood, so it hits Duchess Wood slightly later. This means you can be somewhere more open to catch the first of the sunlight, then head over there to catch more sunlight as it streams into the wood. It has mature trees so there are fewer of the little fenced tree protectors to clutter your composition.
North west of Duchess Wood is Saw Pit Plantation, which is also mature woodland and contains the Queen's Ride pathway with a lovely view back towards White Lodge.
Another mature wood can be found between Ladderstile Gate and Isabella Plantation.
Pen Ponds at sunrise can be beautiful with mist and early light and all the wildfowl moving around. Keep an ear open for increased volume of squawking geese, as this usually means they're about to take off in formation. I quite often forget the camera and just watch them - I love to see them sweeping low over the water!
Isabella Plantation is a must during spring with the colour of all the flowering bushes and plants. Try it from mid-April to early May.
If you live closer to Bushy Park you may prefer to go there, so check here for info. An advantage there is earlier opening times and later closing times, so it can be easier to accommodate sunrise & sunset.
Personally, I prefer Richmond Park as it's more "rugged" and natural looking with less distractions in the background, although the deer can be harder to find as it's much larger!
Weather Conditions
I go out in all sorts of weather, well maybe not in torrential rain or very high winds, but cloudy or rainy days don't put me off, I just adapt to the conditions. The end result can be a different style of image to usual, but can still have interest.
Prime conditions for most deer photographers are early sunrise light coupled with mist. Learning to identify the prime indicators is a good skill to have. When checking the forecast, look for these conditions:
● high humidity, above 90% is good
● rain the previous day or nearby ponds/rivers can help increase it locally
● clear skies the night before giving lower temperatures
● dew point being within 2 degrees of the temperature
● low winds, preferably below 5 mph
The more of these you have the stonger the chance of mist forming, but get to know your preferred areas as mist can be localised. Areas such as high hills could be amongst low cloud and valleys can fill with mist, so the more knowledge you build up the better you become at identifying when and where mist can be found.
Apps
The Photographer's Ephemeris (TPE) is a great location planning app to have on your phone or tablet, especially for sunrise/sunset photographers (the only app I’ve ever paid money for). It can also be used on the desktop for free, this example will show you Richmond Park - TPE Desktop
Another alternative is PhotoPills which I might have bought if I didn't already have TPE, as it is very useful for planning night sky photography.
If you need help understanding depth of field, try the Set My Camera app, which helps to calculate depth of field for any given camera/focal length, aperture and focusing distance.
Photographers to Inspire You
Three photographers I follow on Twitter and Facebook as they regularly produce great wildlife images:
● Max Ellis - he's always out in Richmond and Bushy Parks
● Jon Hawkins - captures wildlife images in the Surrey Hills
● Alex Saberi - has authored a photography book about Richmond Park
Blowing my own trumpet
I started to write a series of articles on deer photography. One day, I might find time to write parts 2 & 3!
If you'd like to read about how I became keen on deer photography, you can peruse an article here.
You can find all my blog posts that are tagged with Richmond Park.
And remember ...
If you need any further help with your photography, please take a look at my tuition offerings and feel free to email me with any questions.
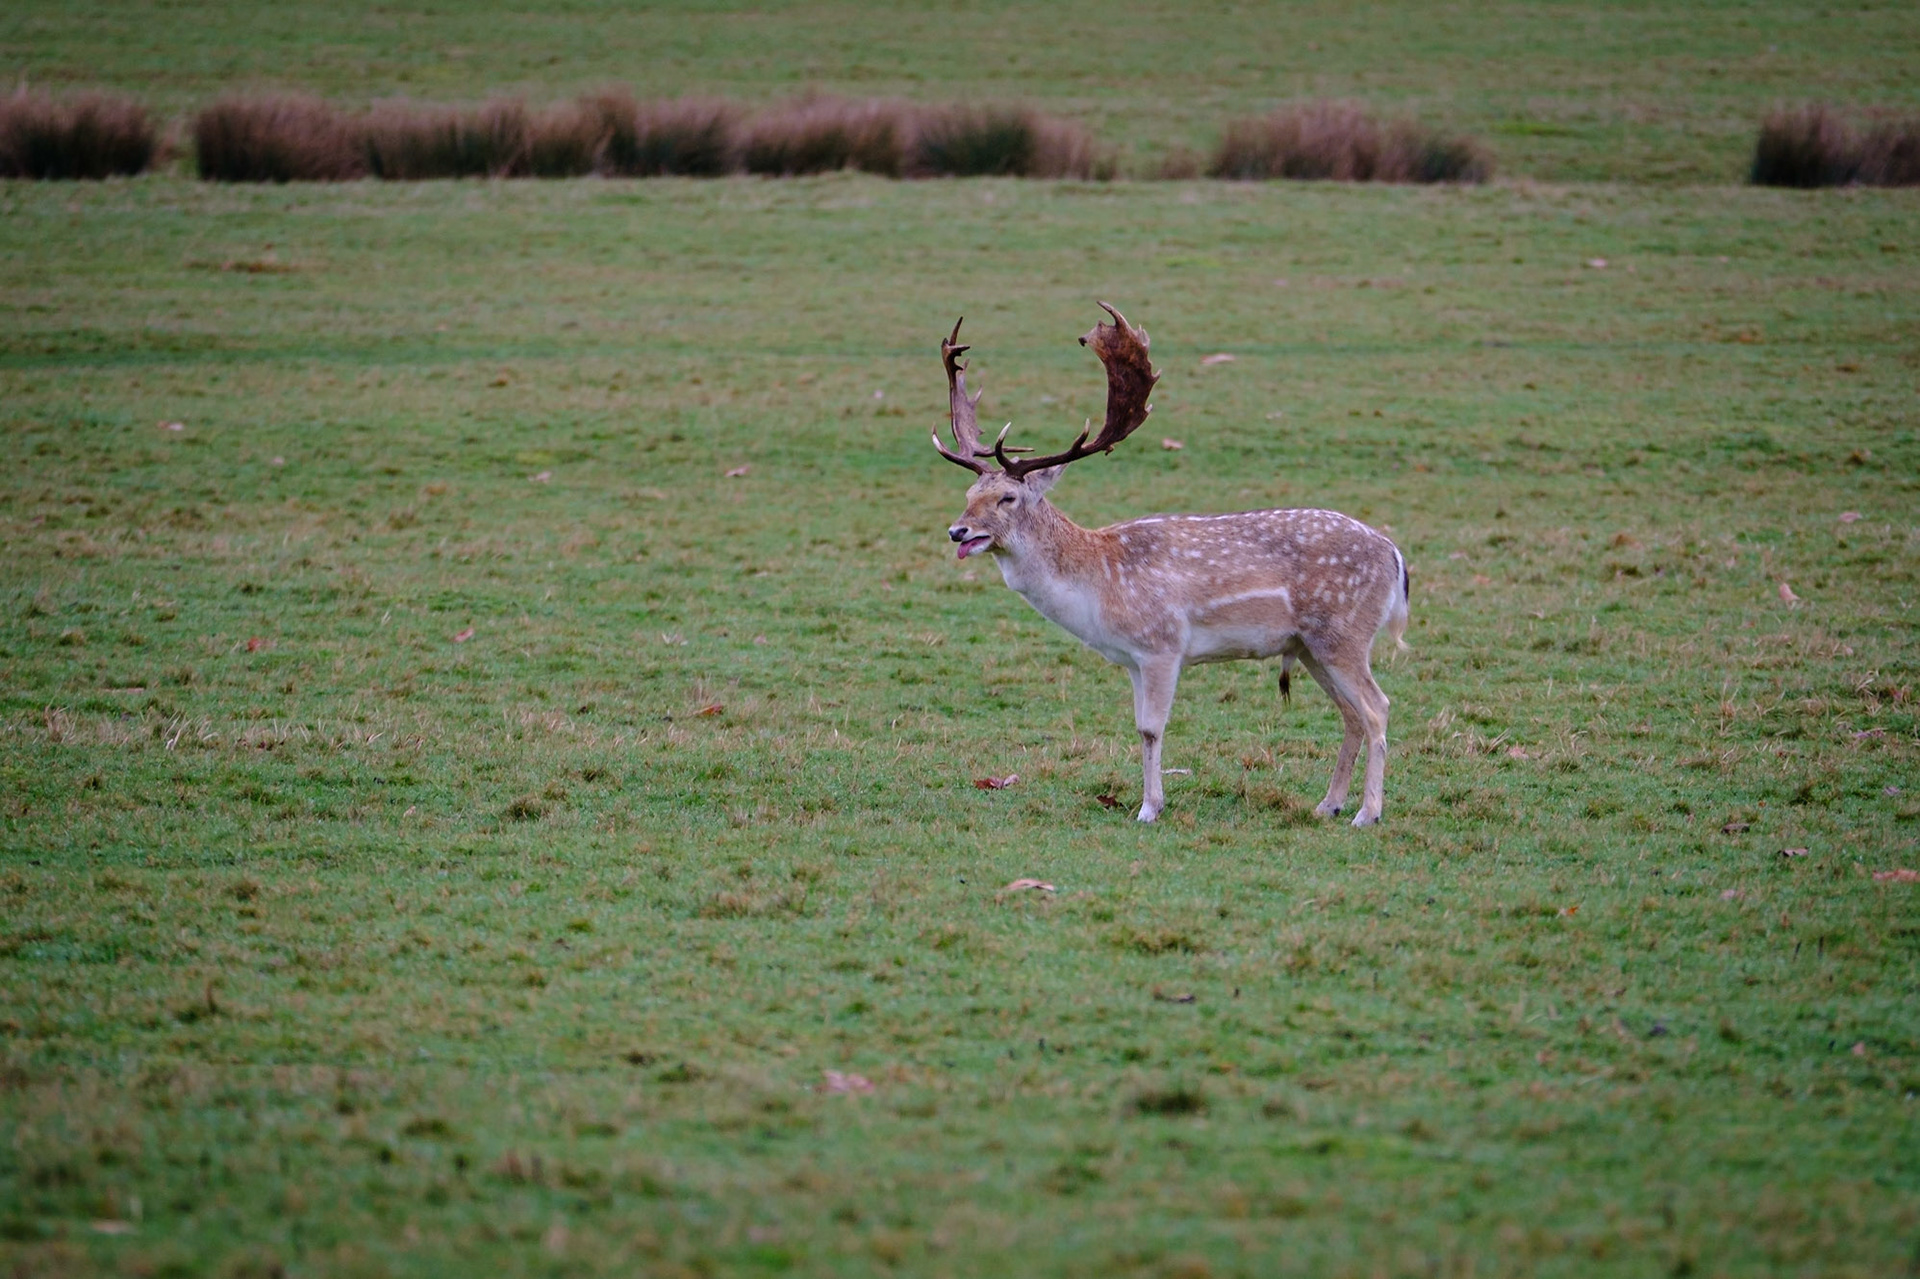
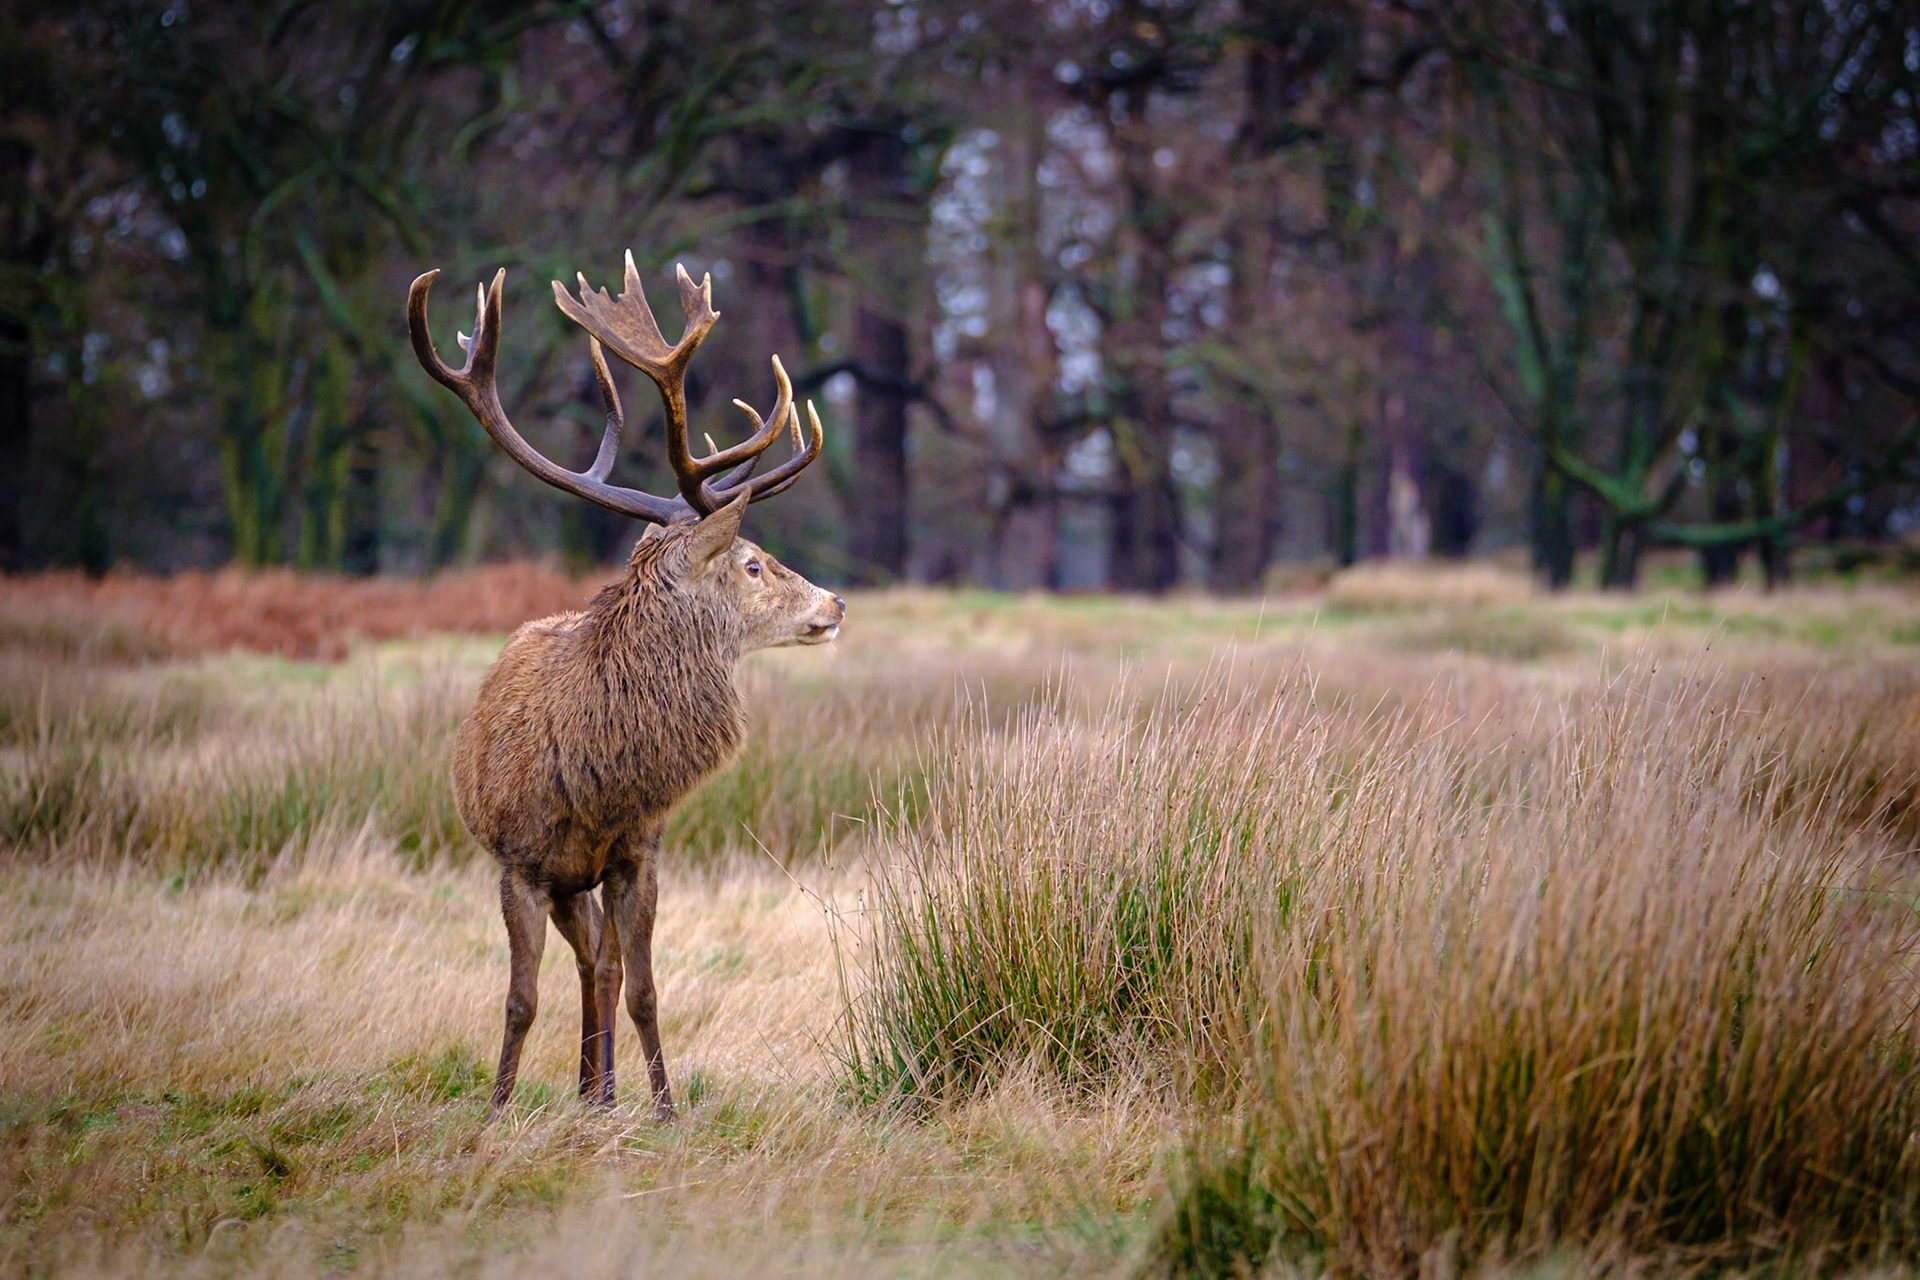
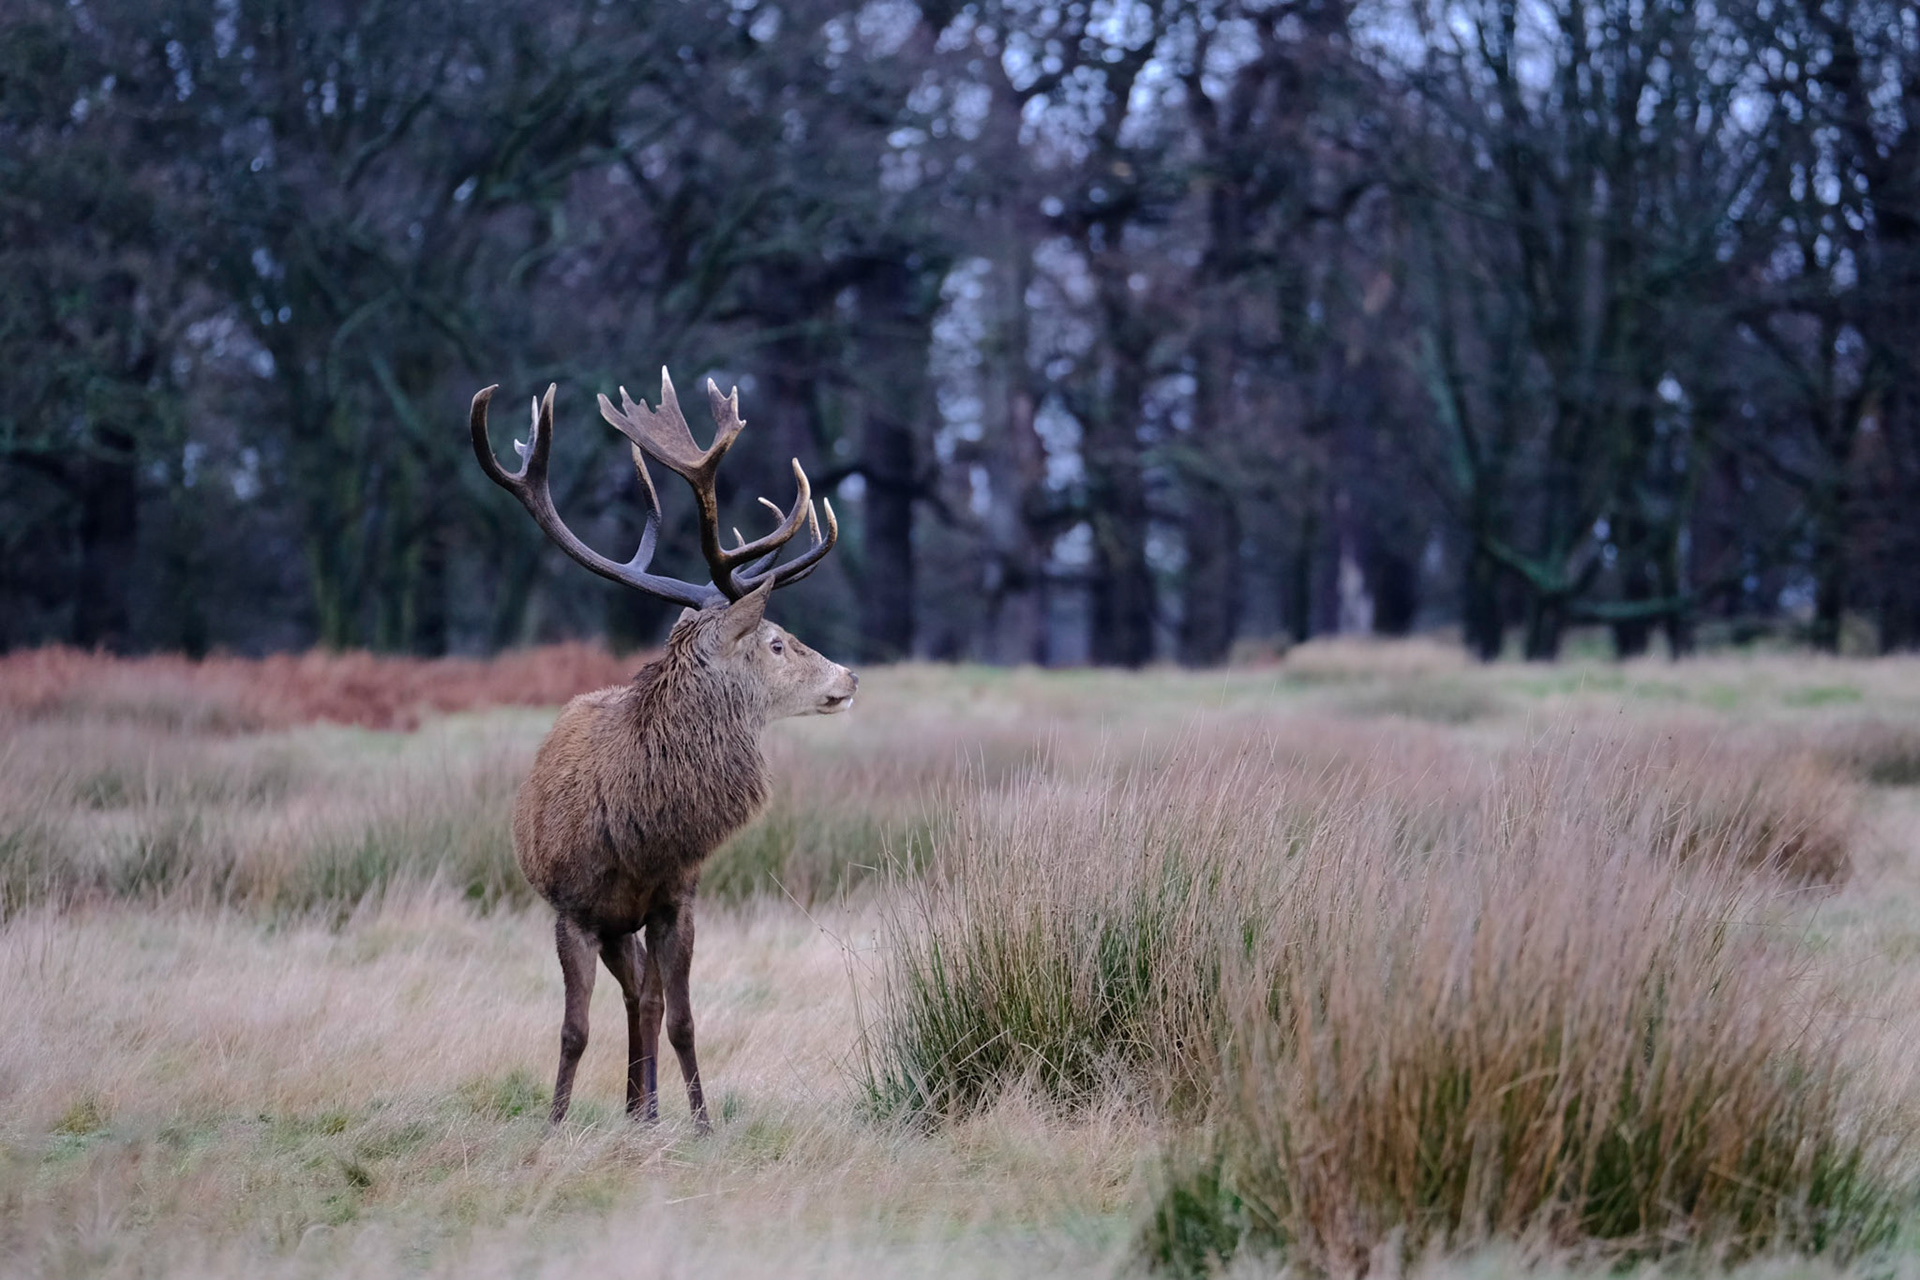
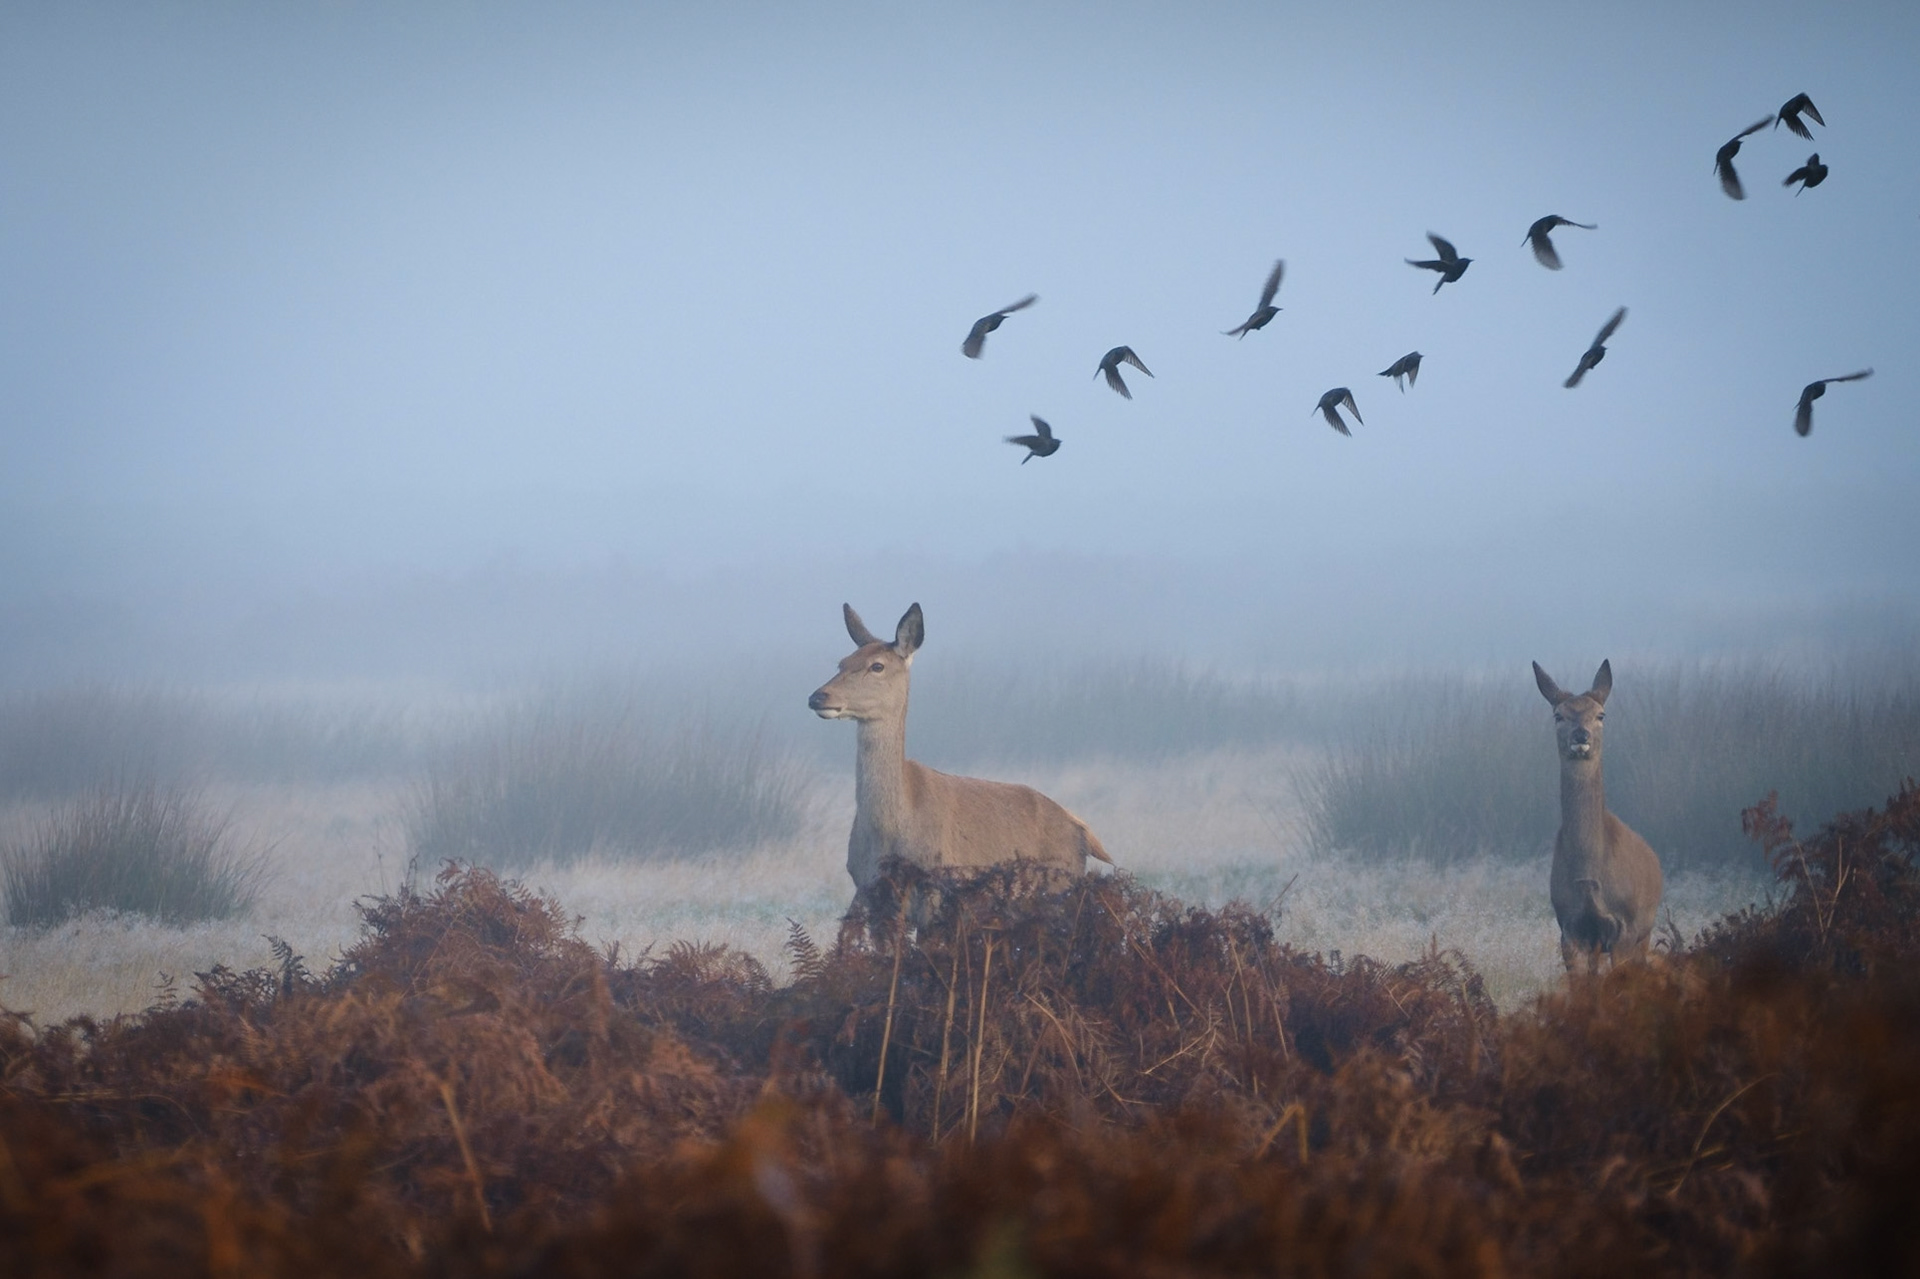
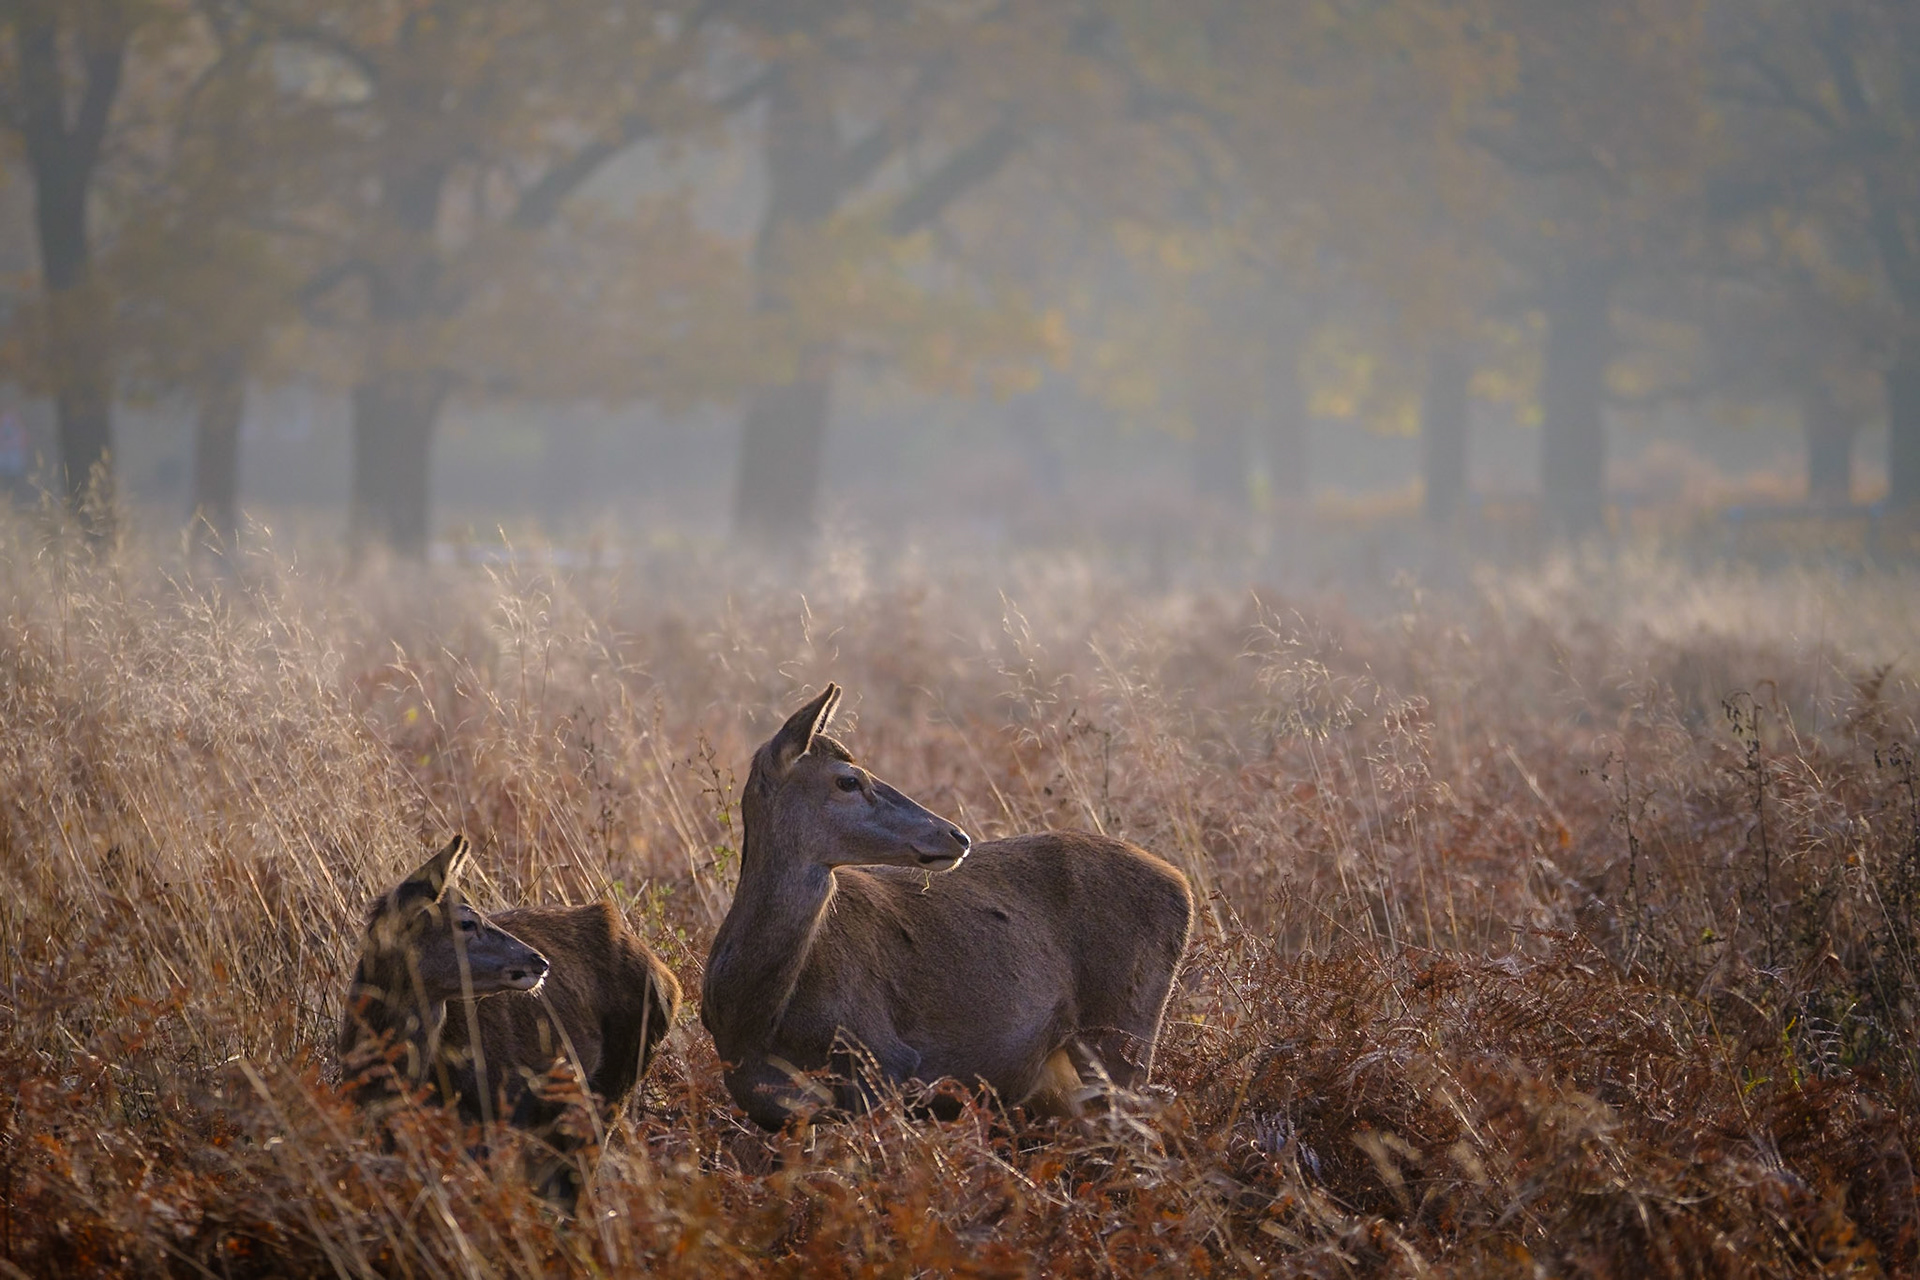
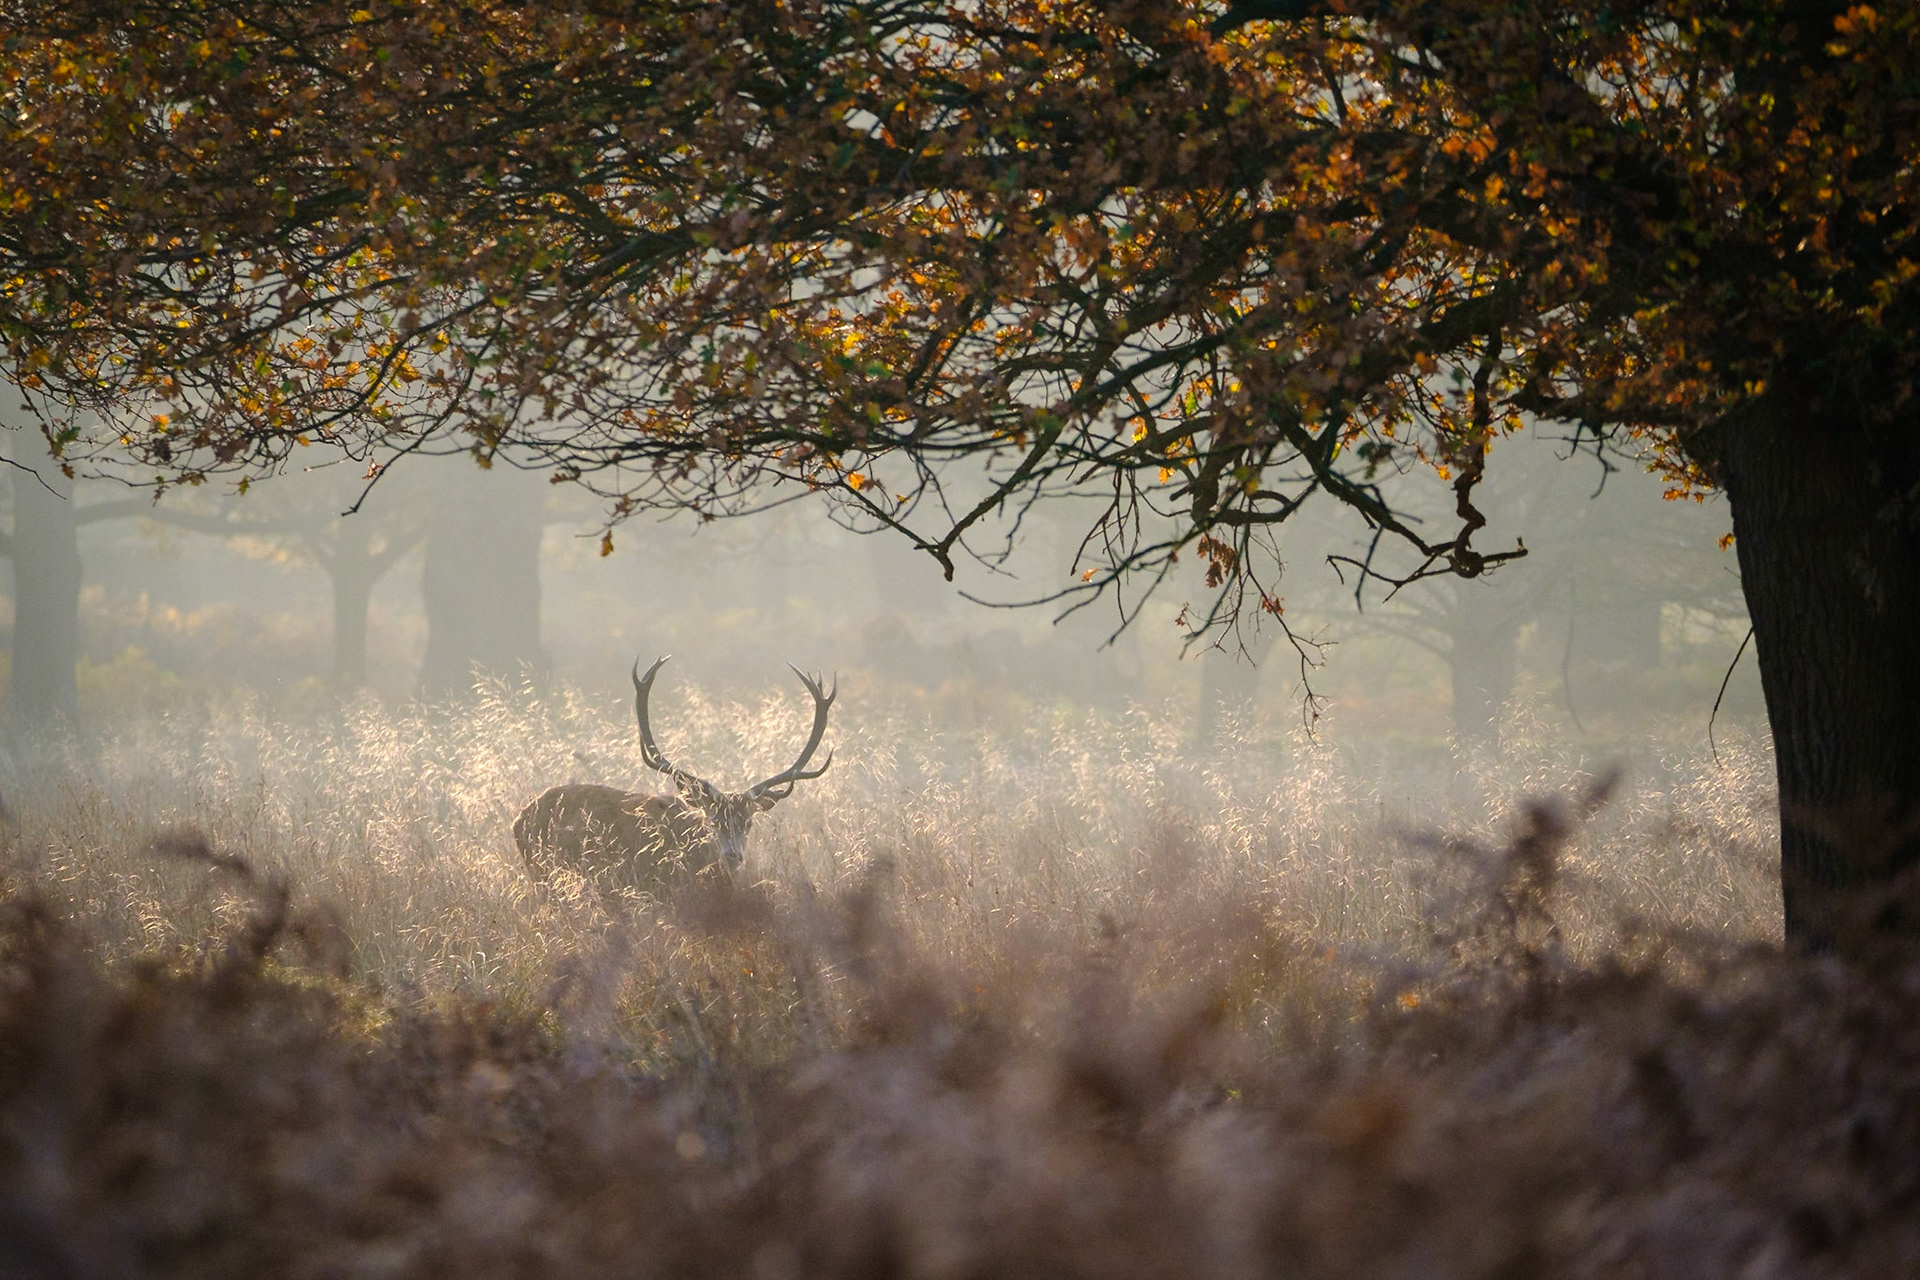
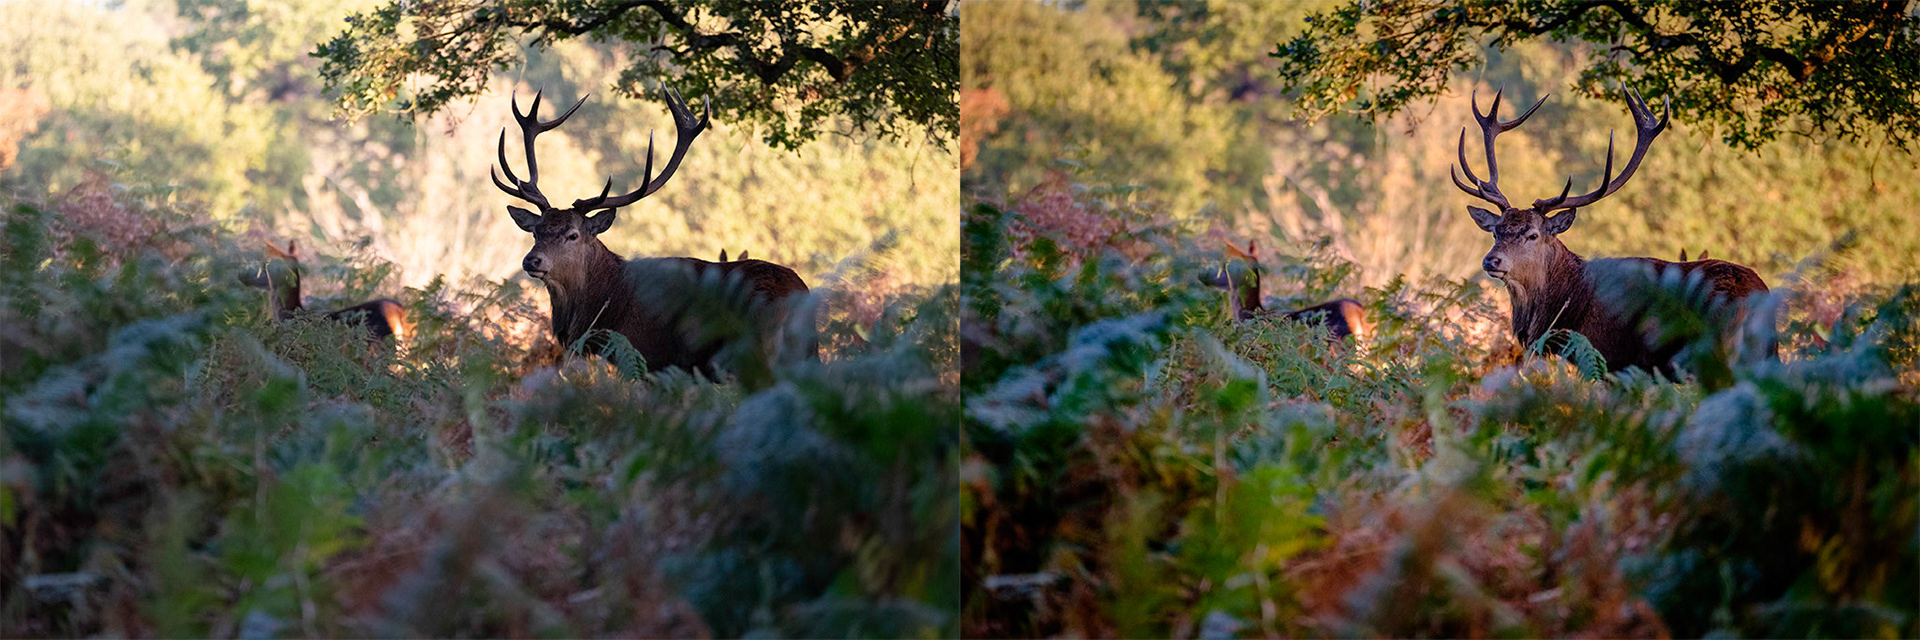
Sample Images
The following images were all taken on previous outings to demonstrate a tip or technique I was teaching. Nothing world beating as conditions are frequenlty less than great! Click to view larger and scroll through with captions.
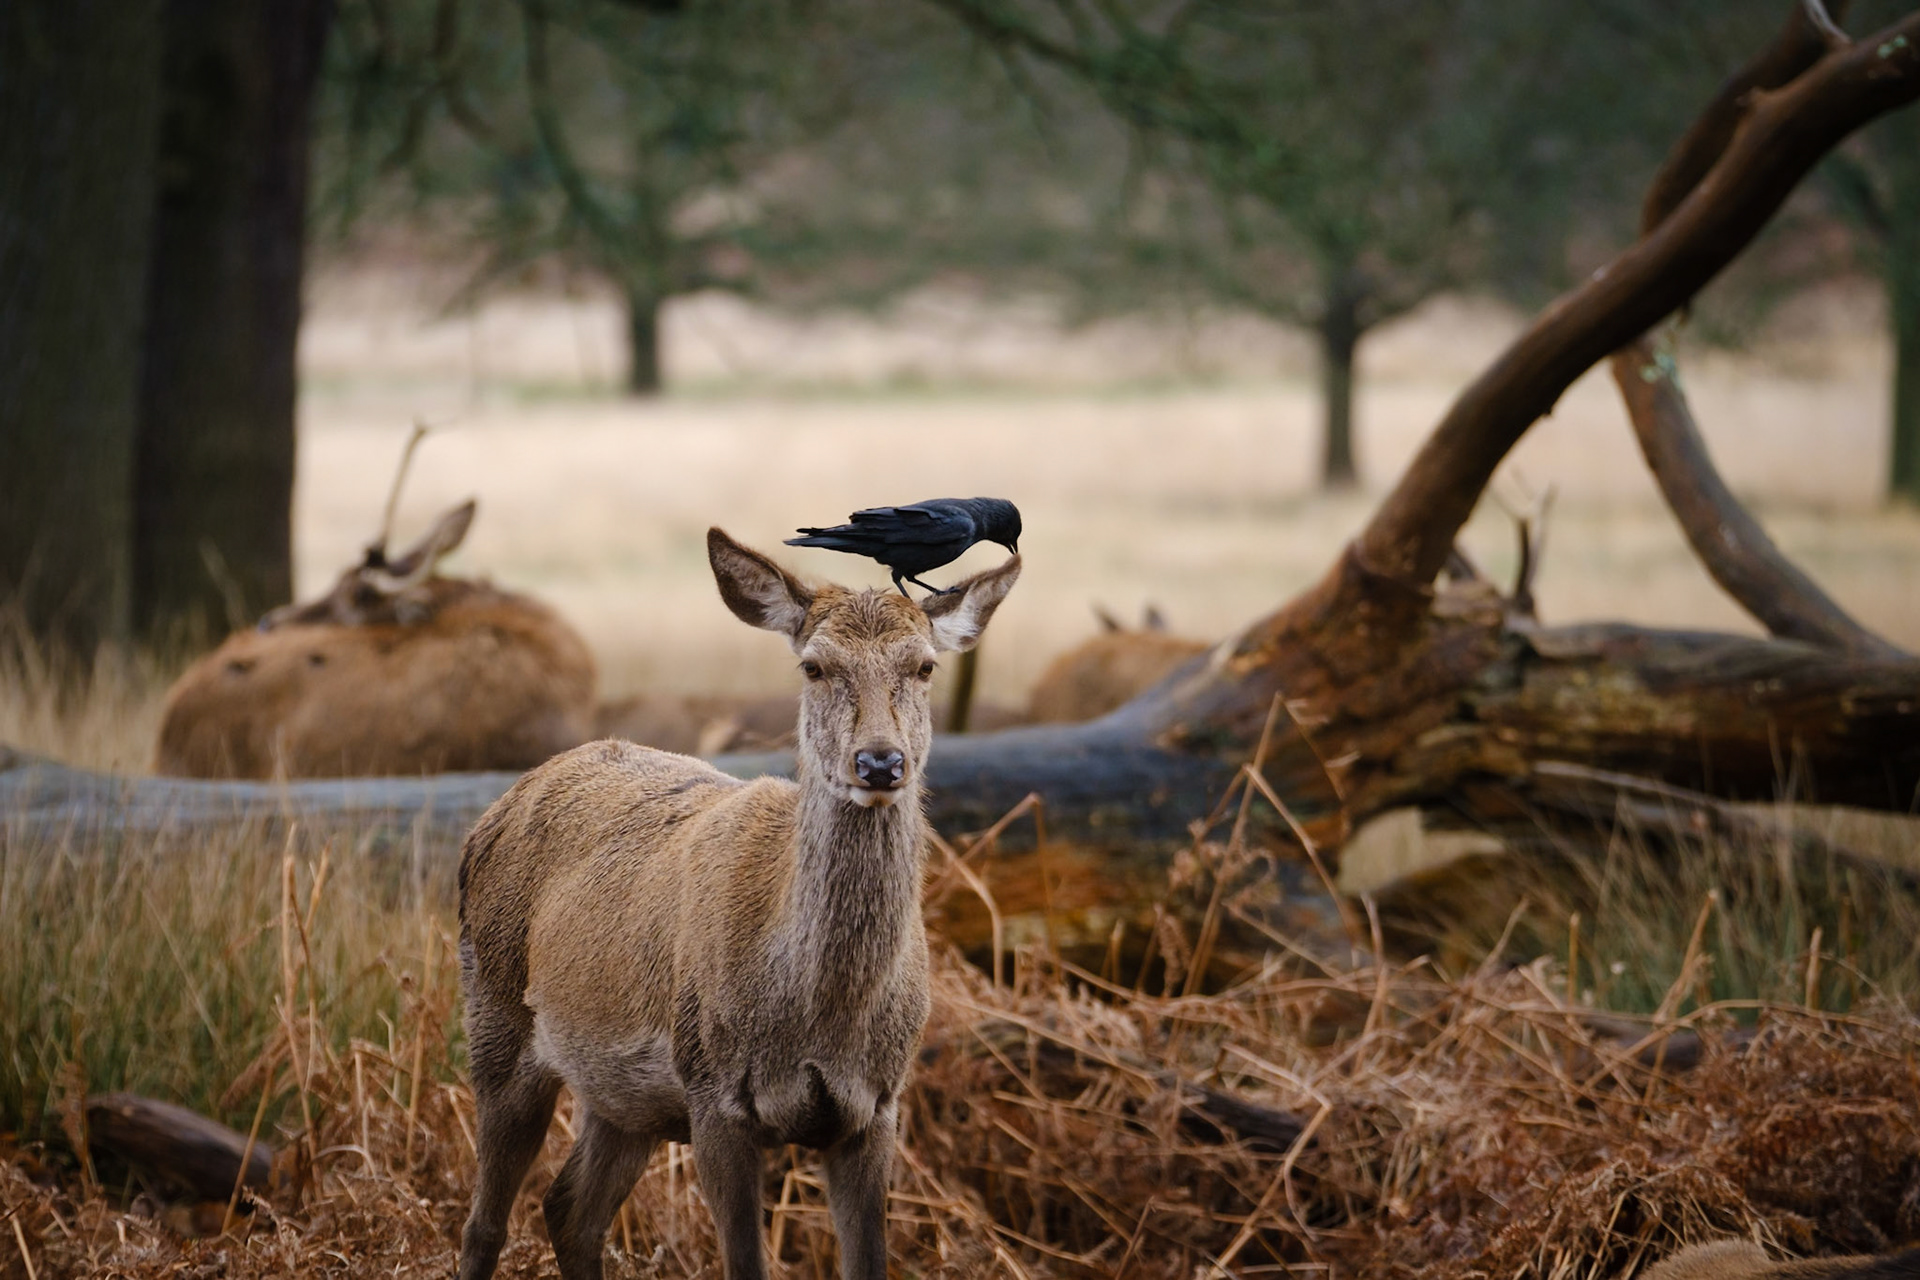
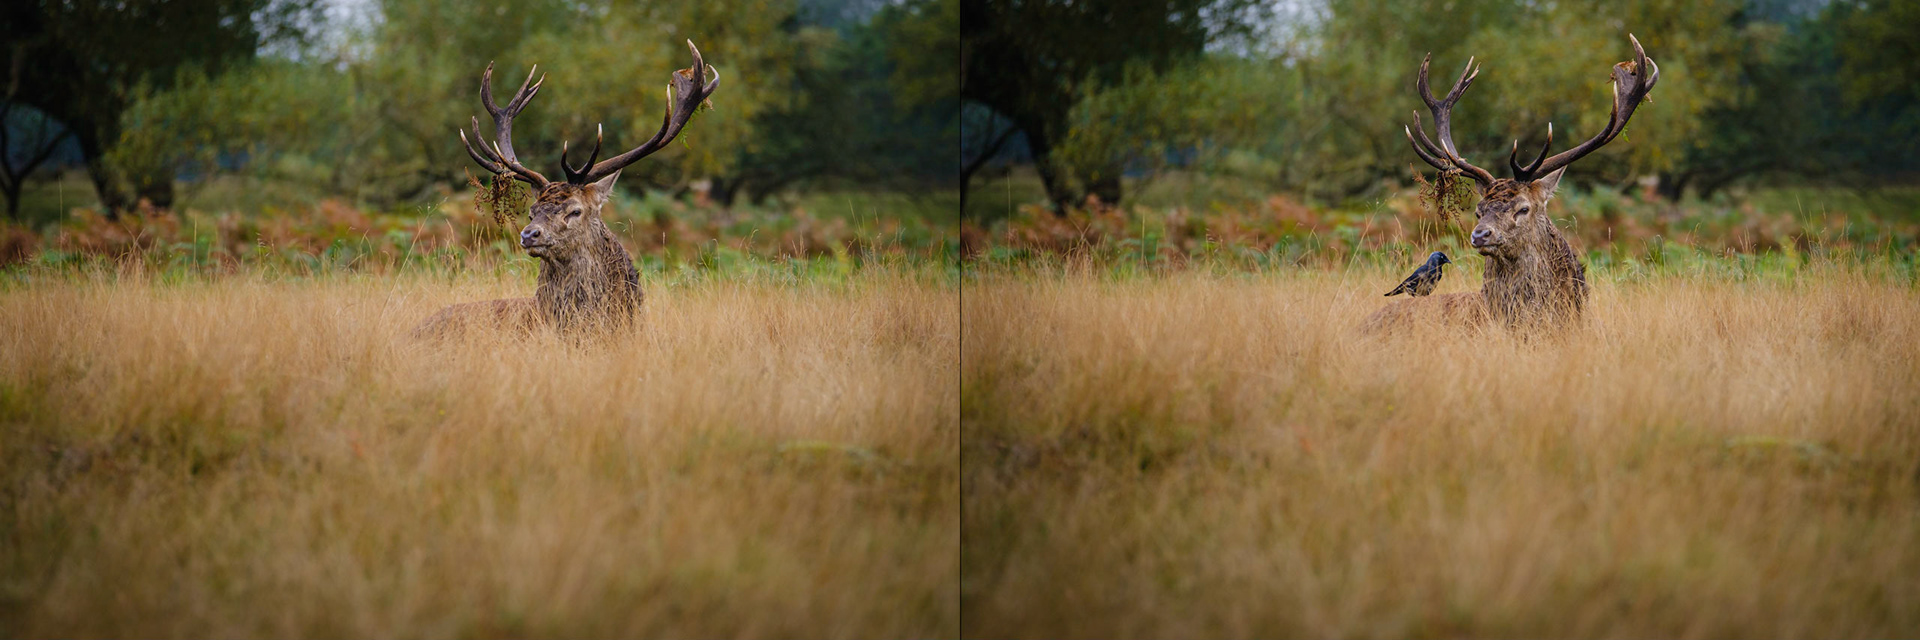
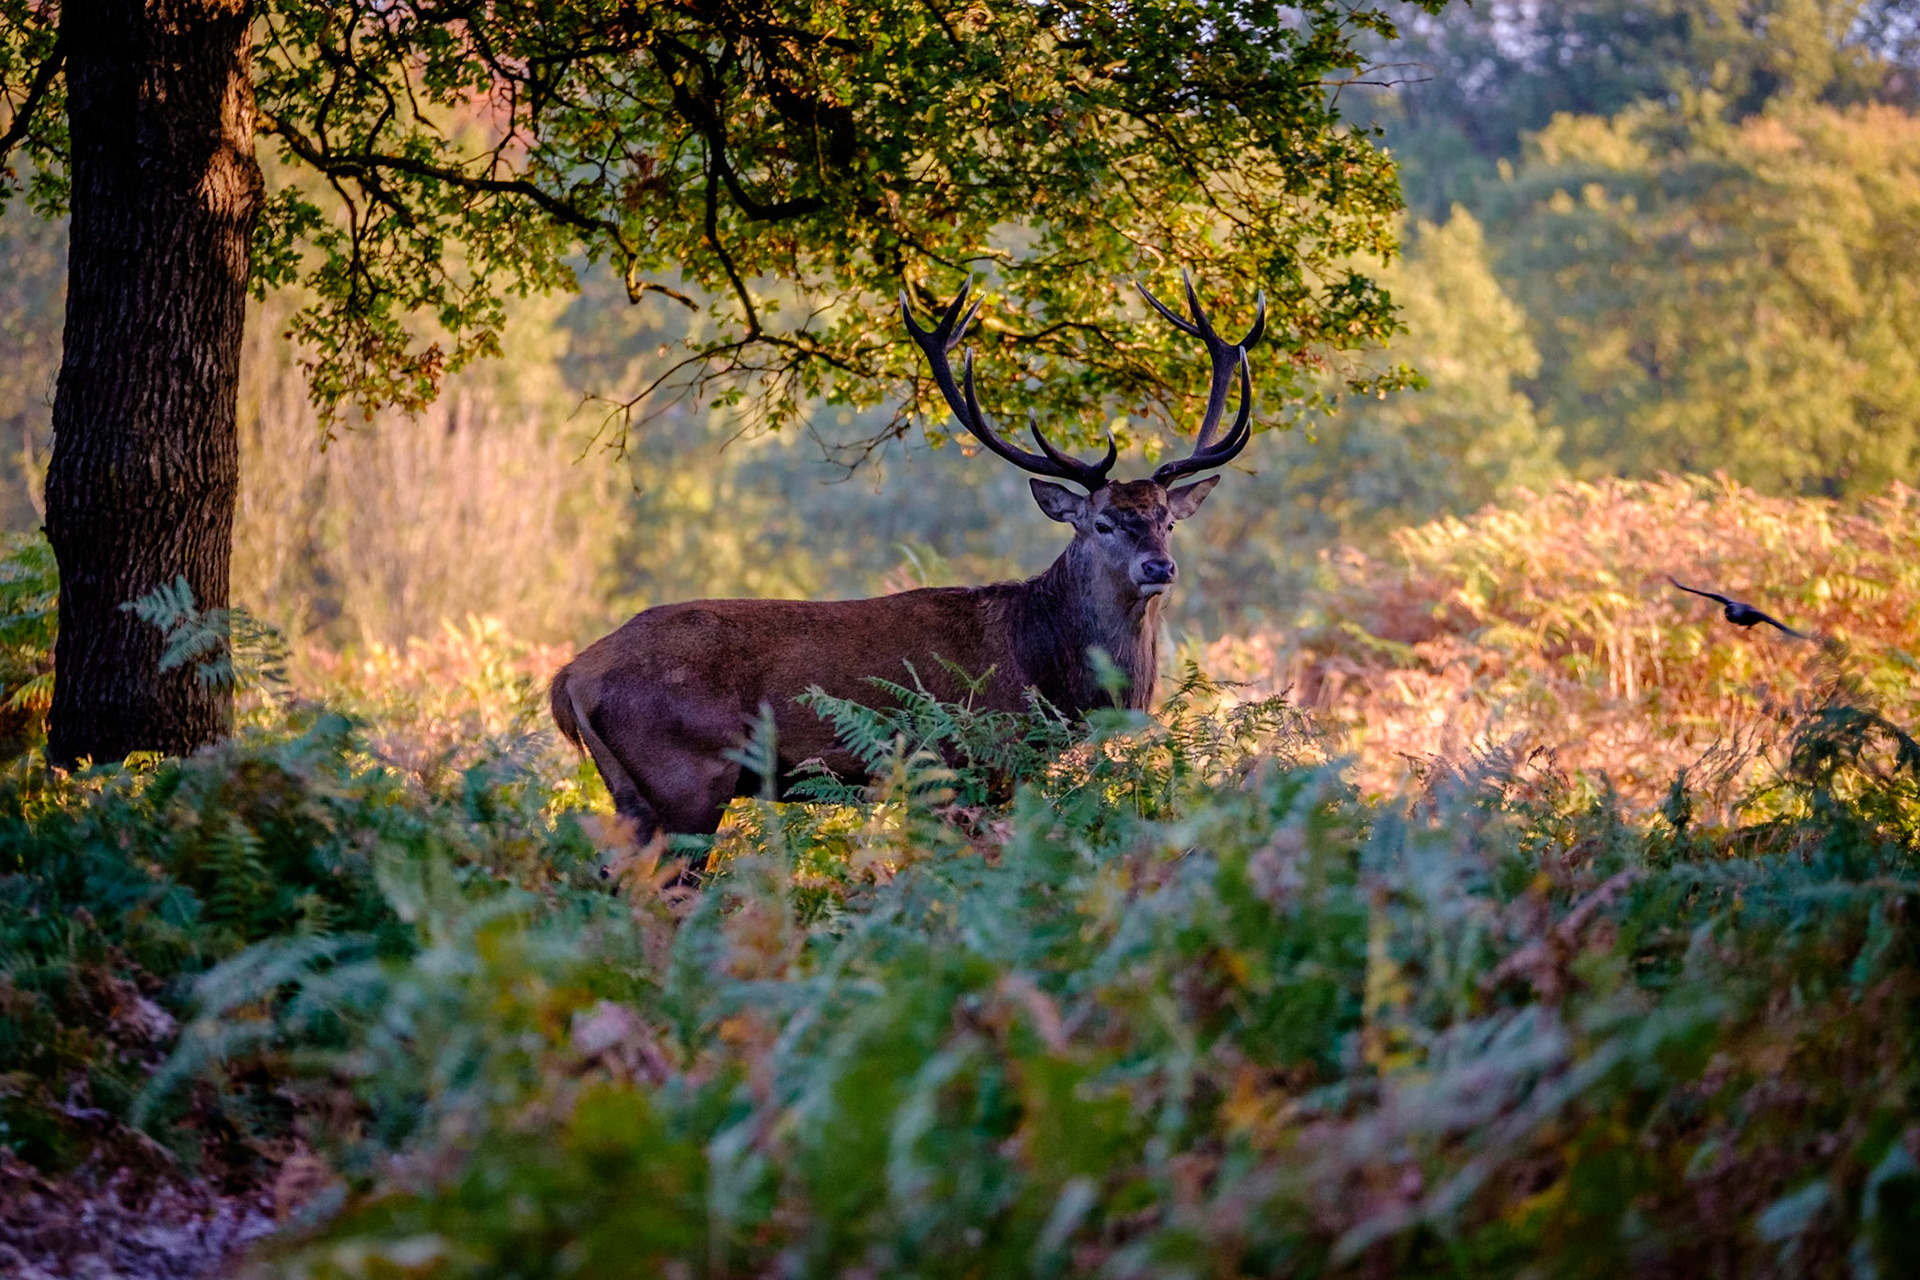
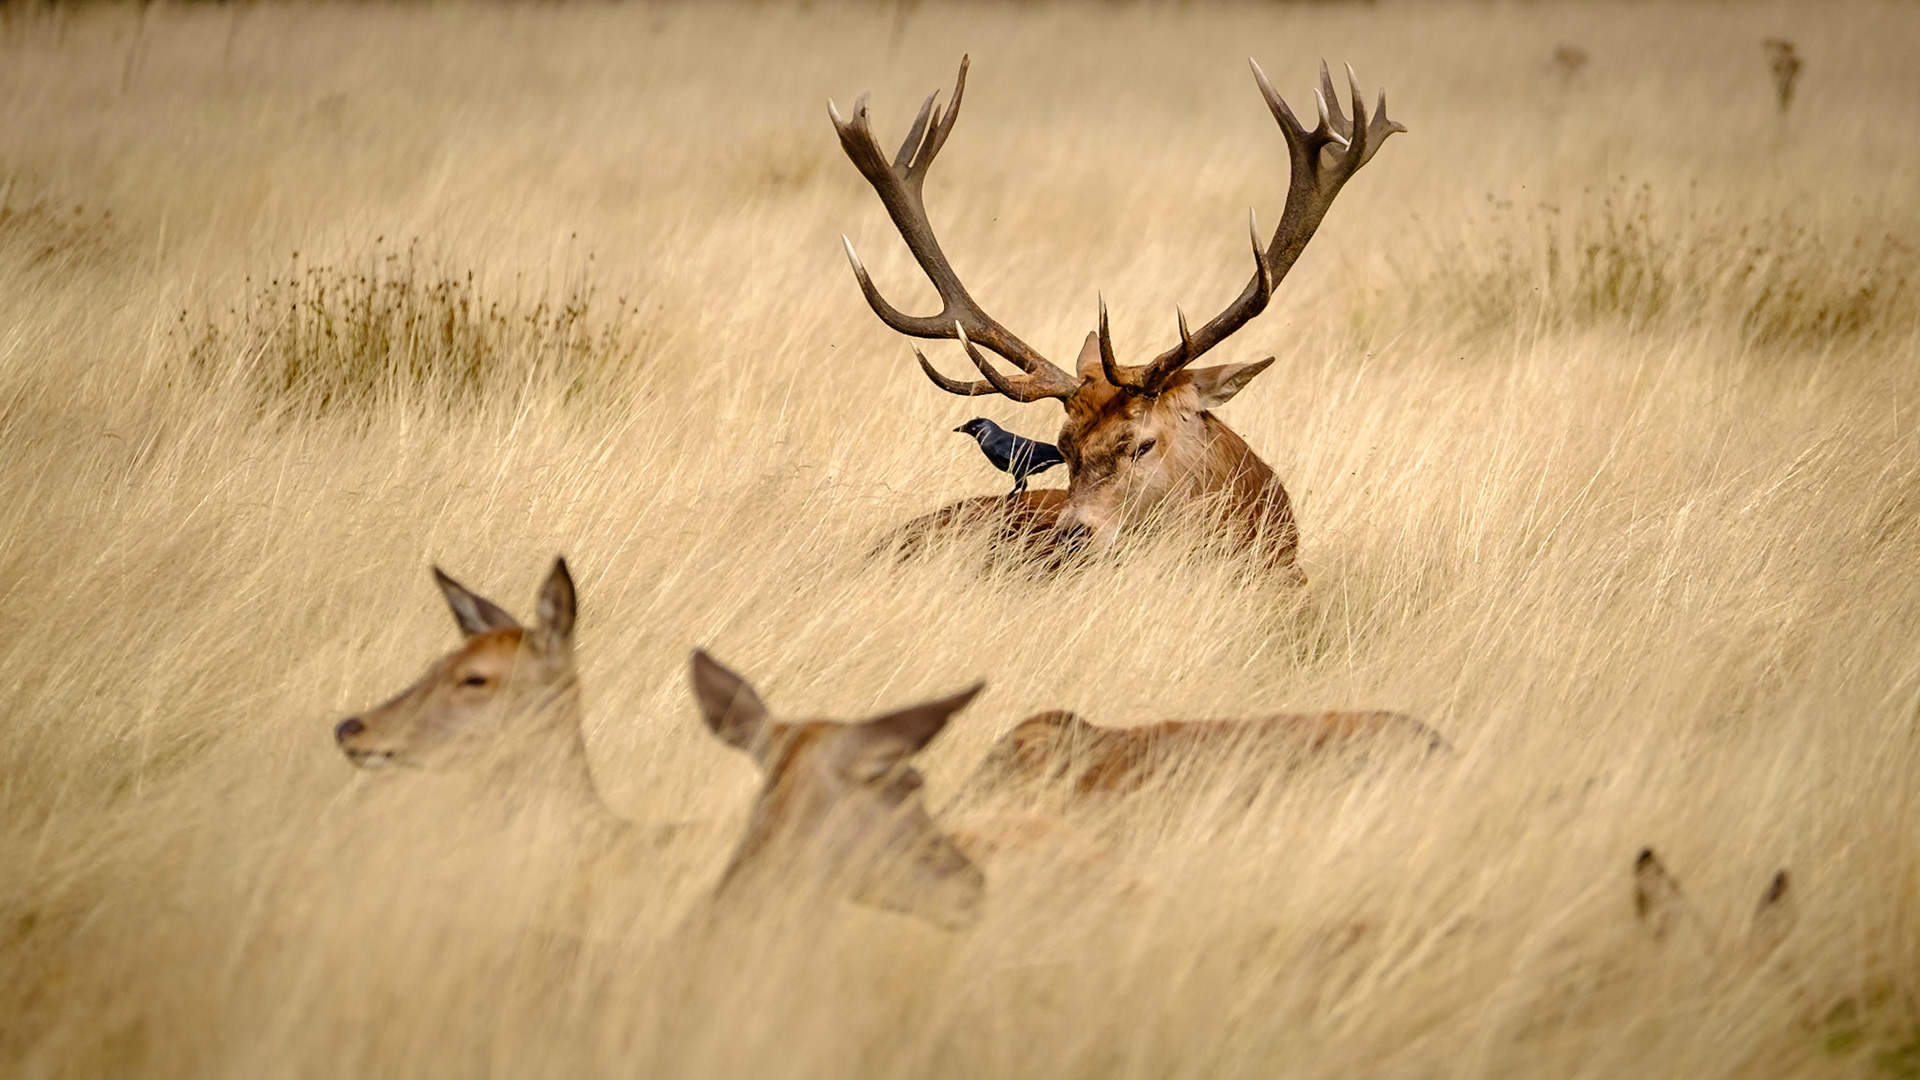
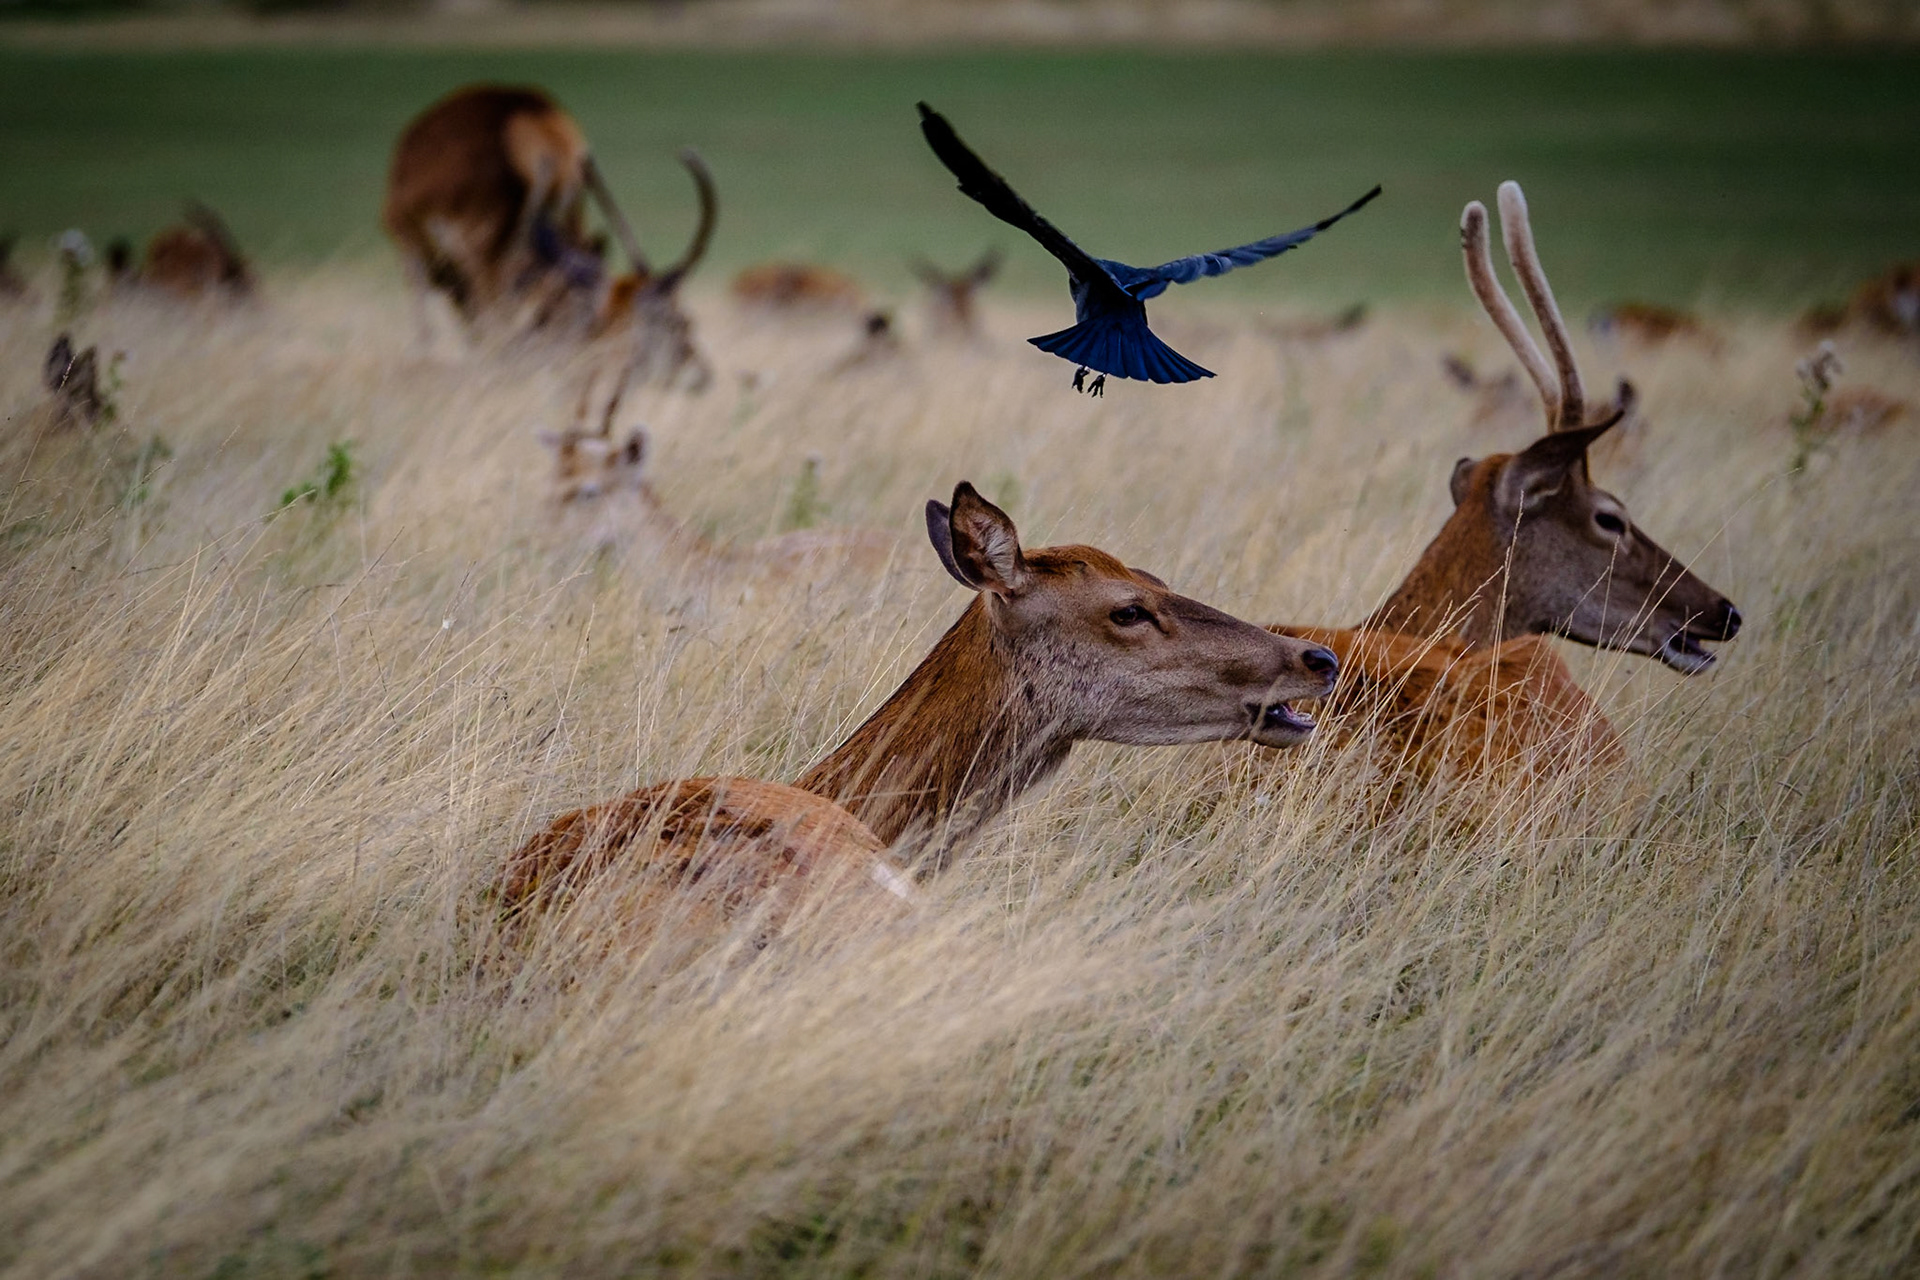
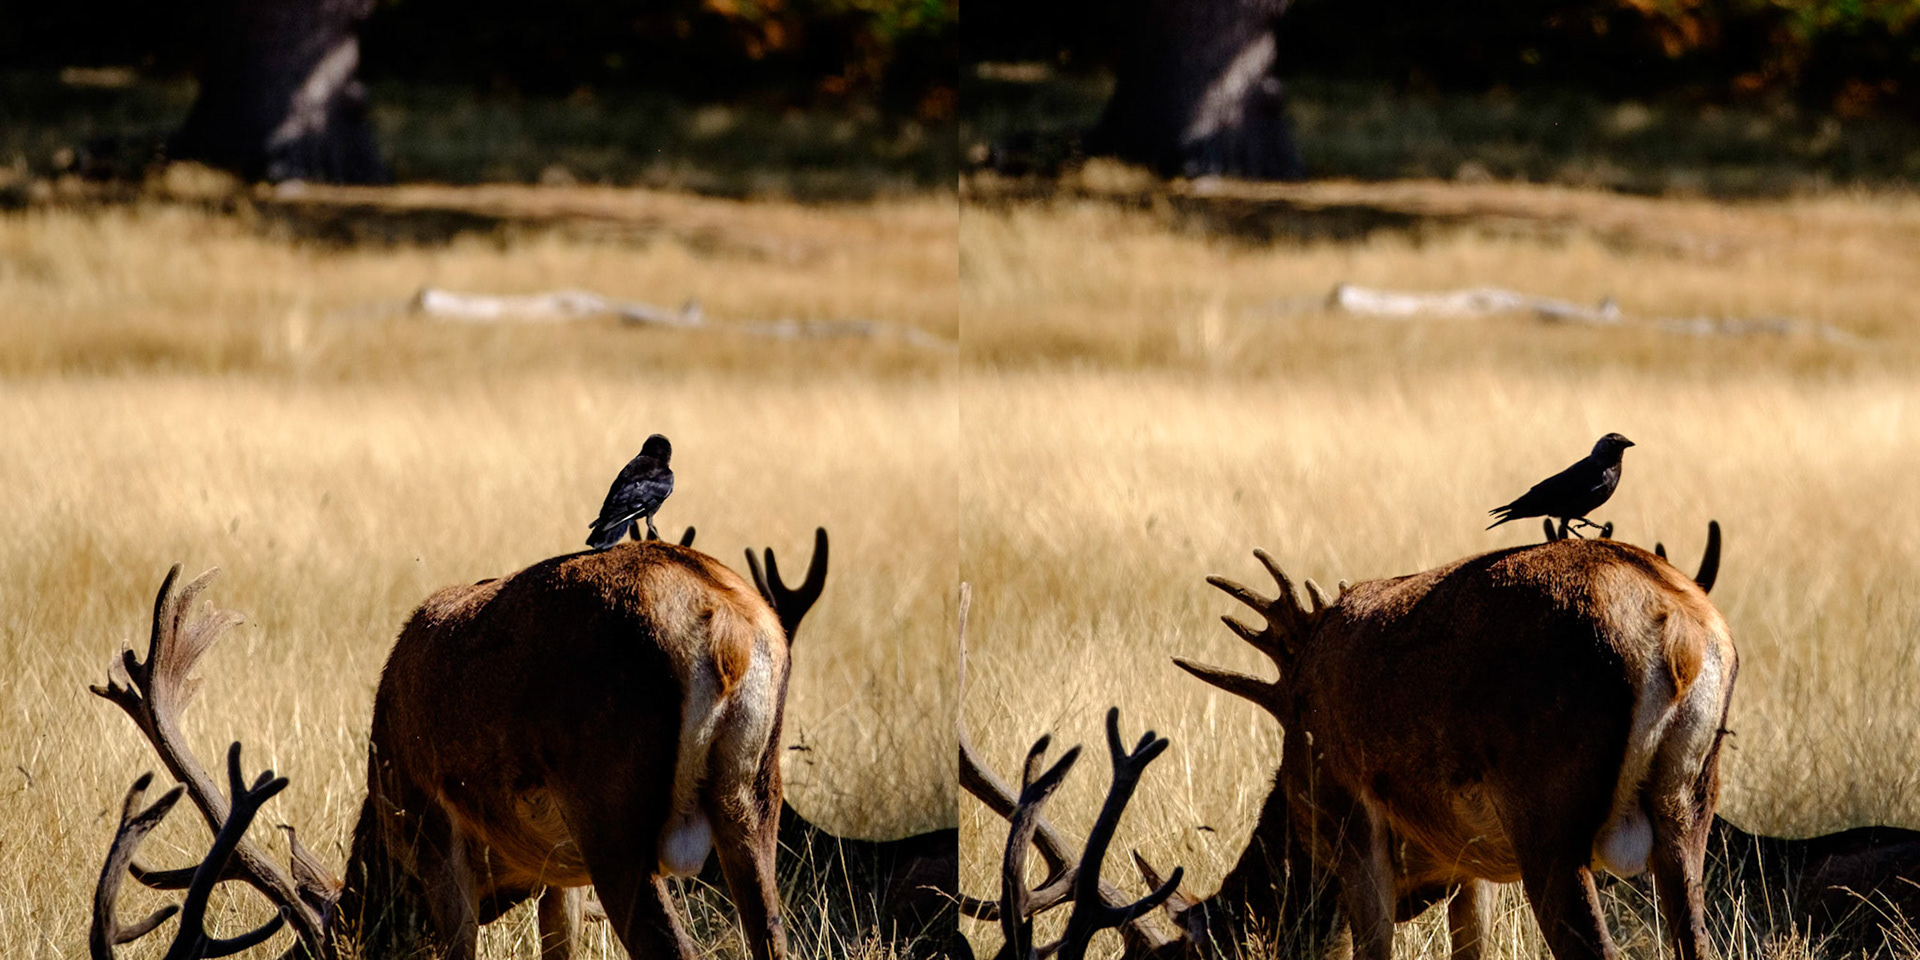
Sample image from 2nd February 2020 - the Jackdaw's profile stands out well against the pale yellow grass in the background. It was a pity the other deer behind didn't move away!
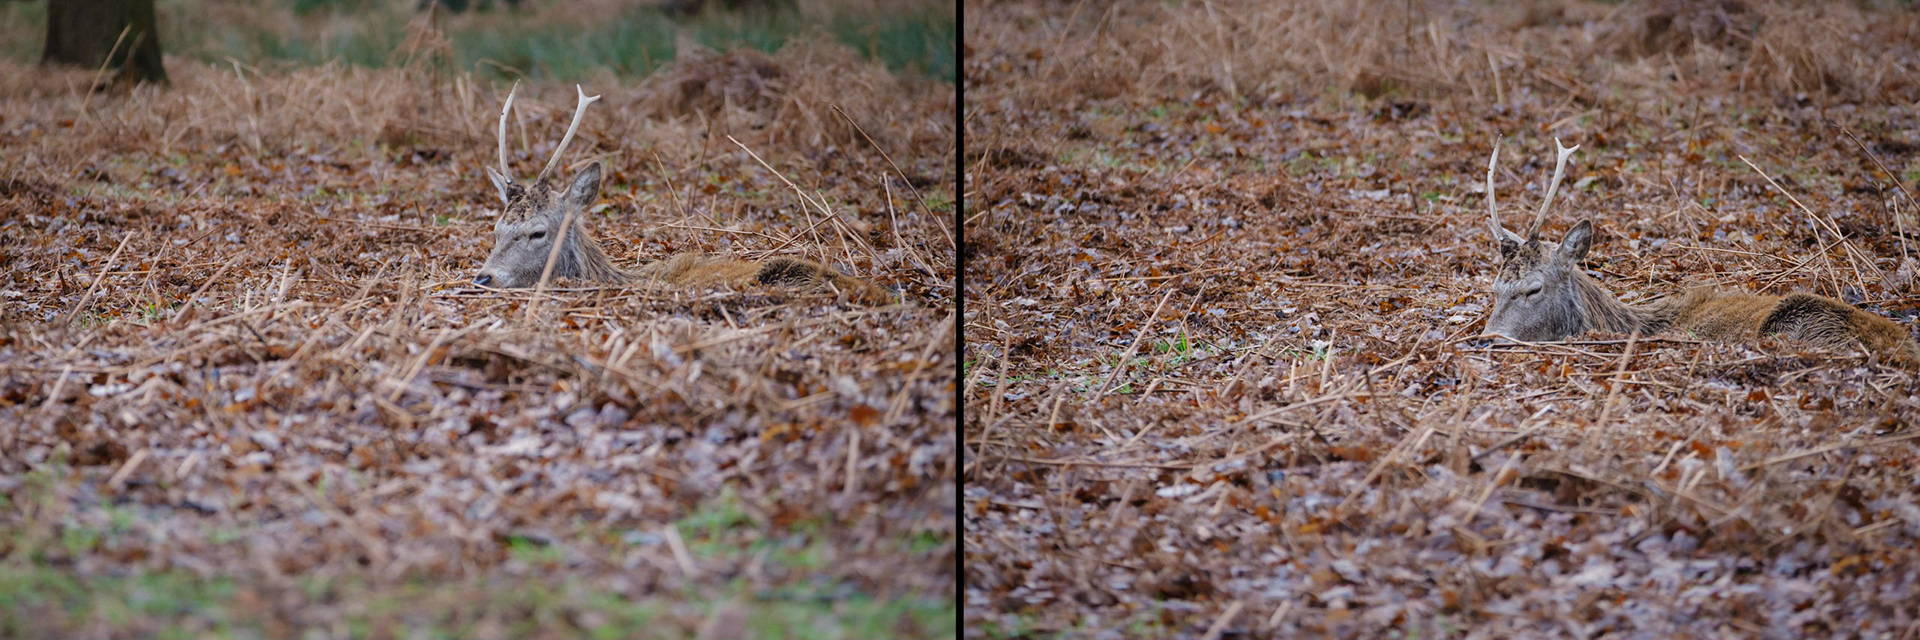
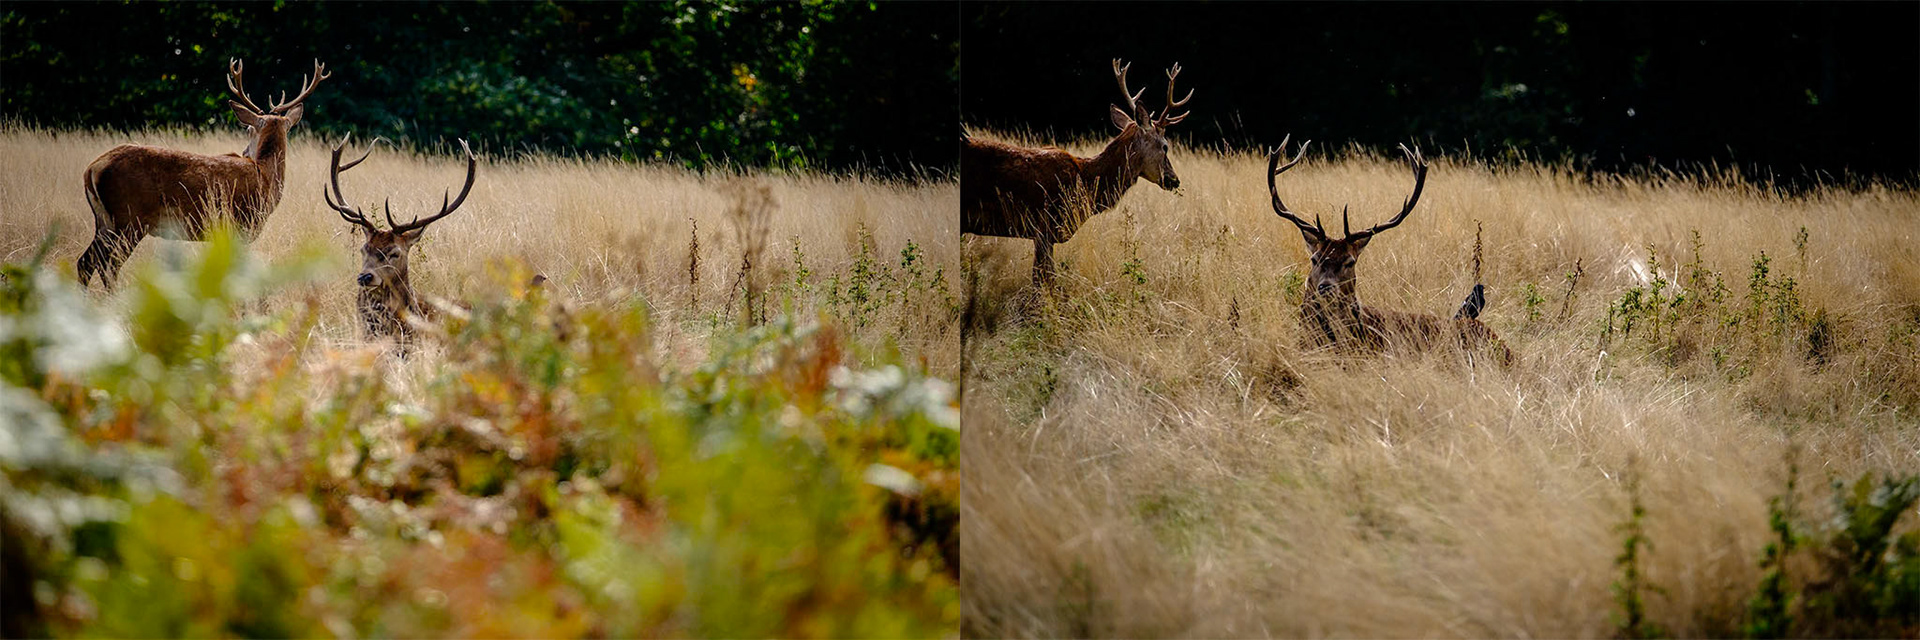
Sample image from 2nd February 2020 - avoid distractions especially around the eyes. A simple change of position will help, in this case a step to the left and a higher viewpont shifts the offending stalk further away.
Sample image from 2nd February 2020 - location is key! Out in the open, in very short grass, the setting is just too bland!
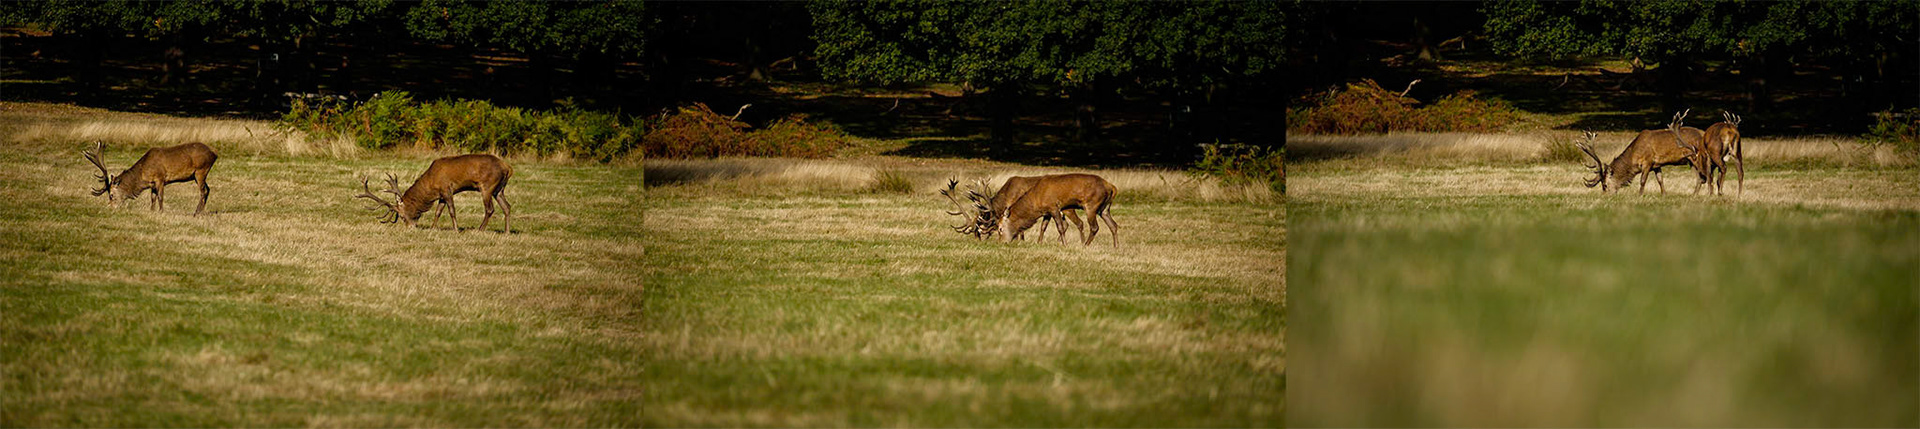
Sample image from 2nd February 2020 - the final processed version. Some slight modifications to white balance, highlights, shadows, clarity. Added a vignette and cropped to emphasisie the stag.
Sample image from 2nd February 2020 - an unprocessed image straight from the camera (JPG). This illustrates that you can achieve an acceptable result without using a RAW file. I’ll add a processed version from RAW later as a comparison.
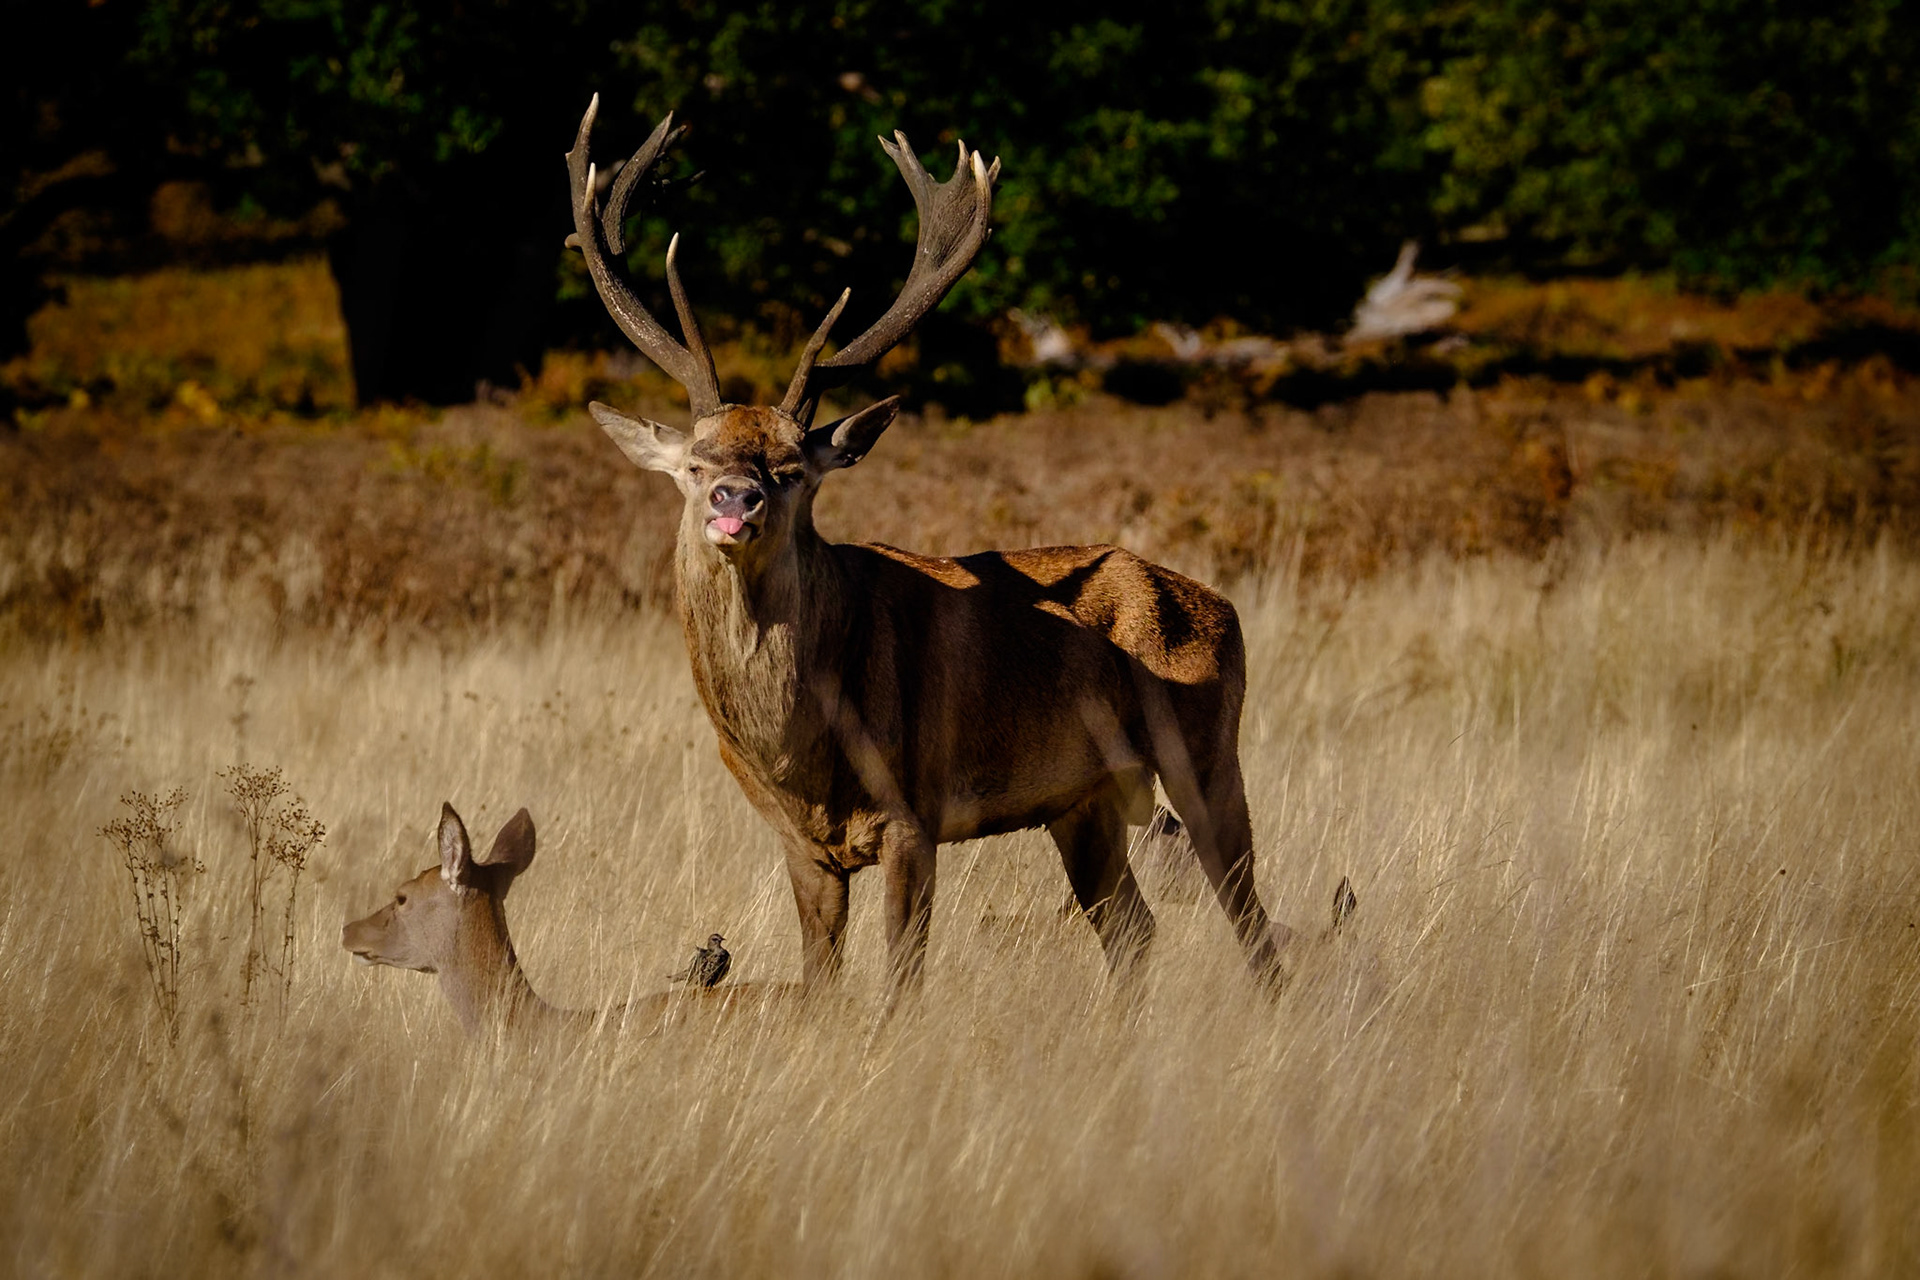
Sample image from 4th November 2019 - keep an eye out for flocks of jackdaws as they swoop around the deer. Use continuous shooting to give you options to choose from.
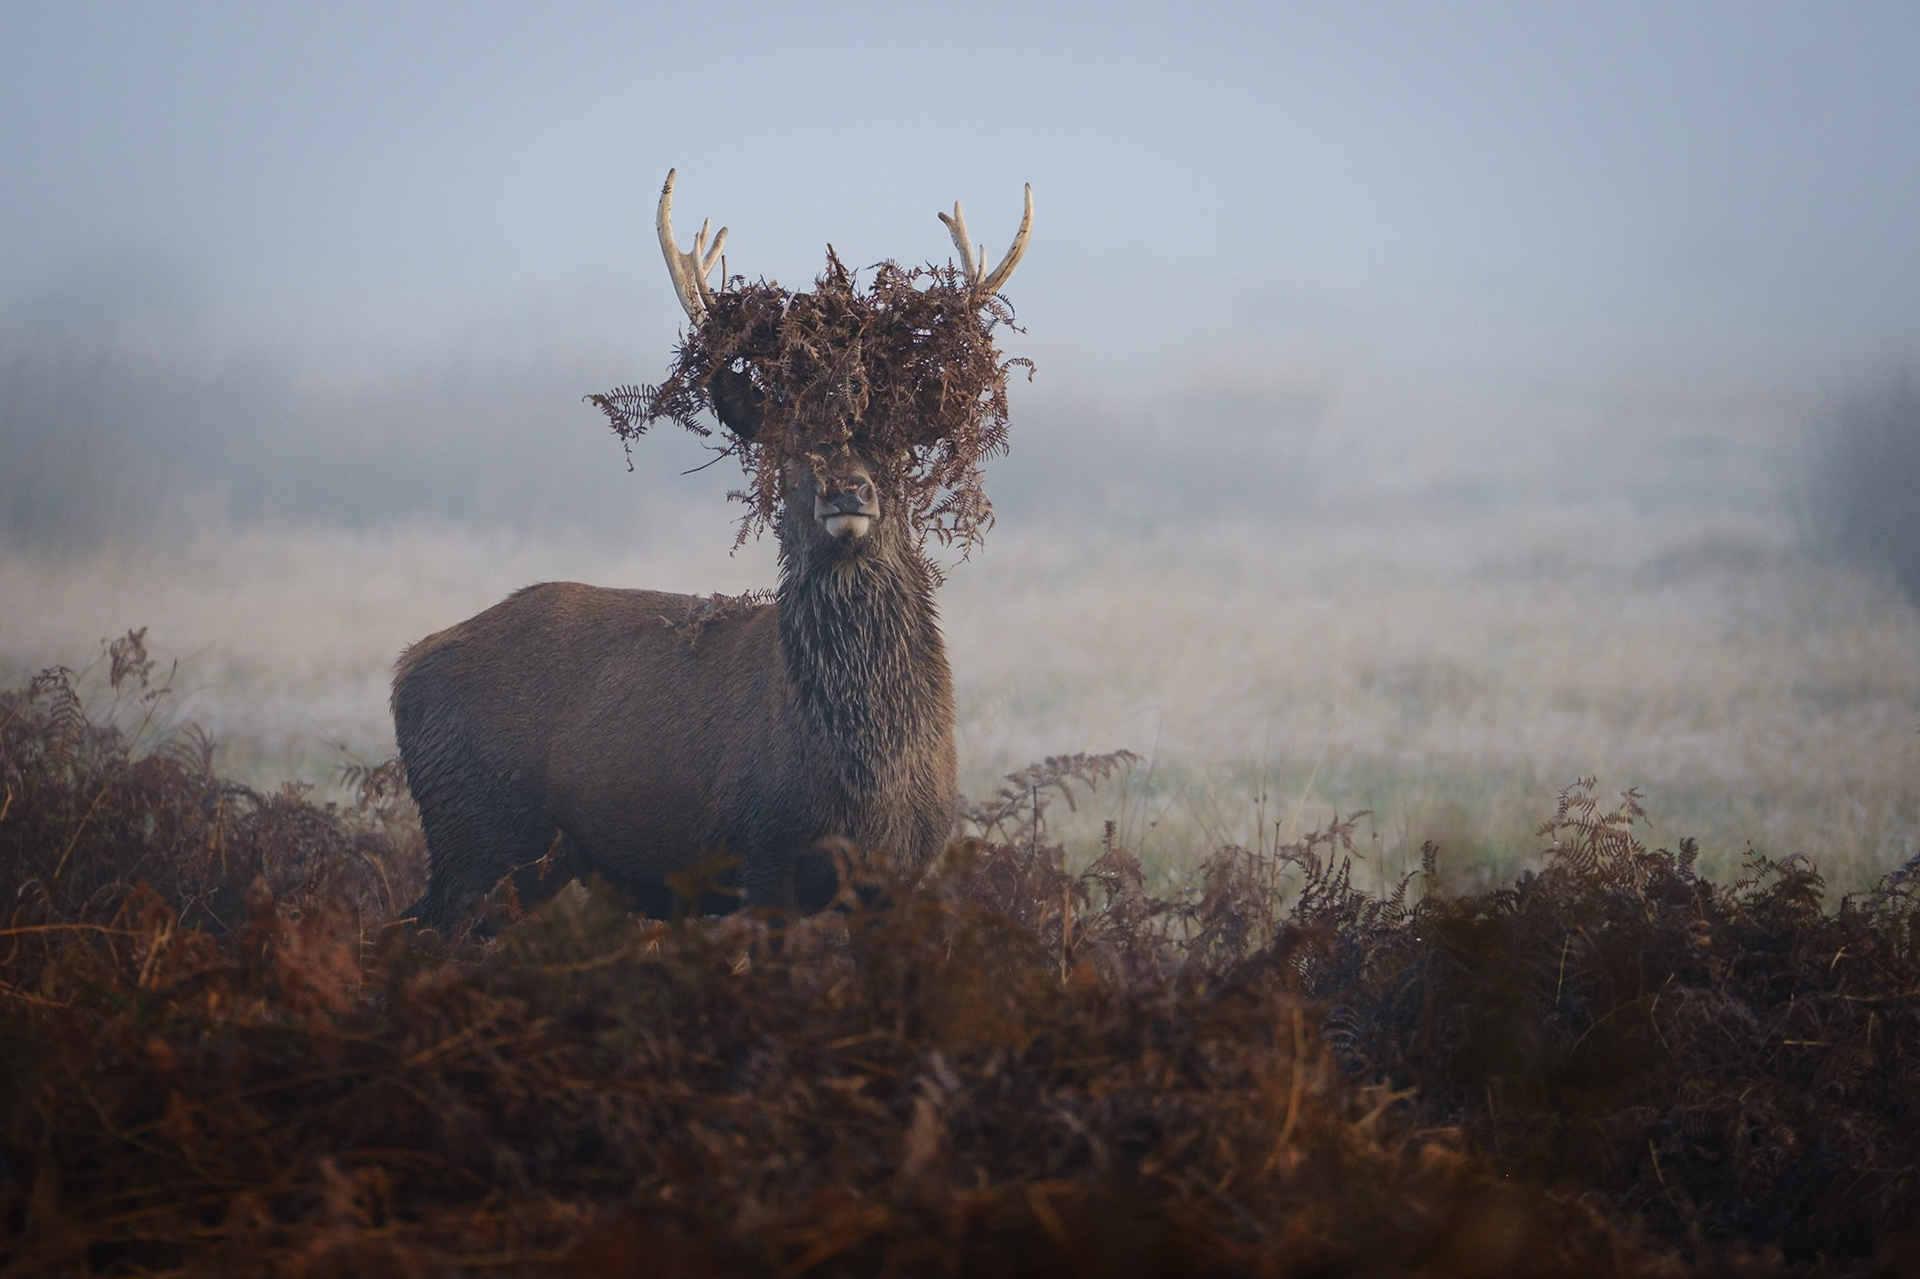
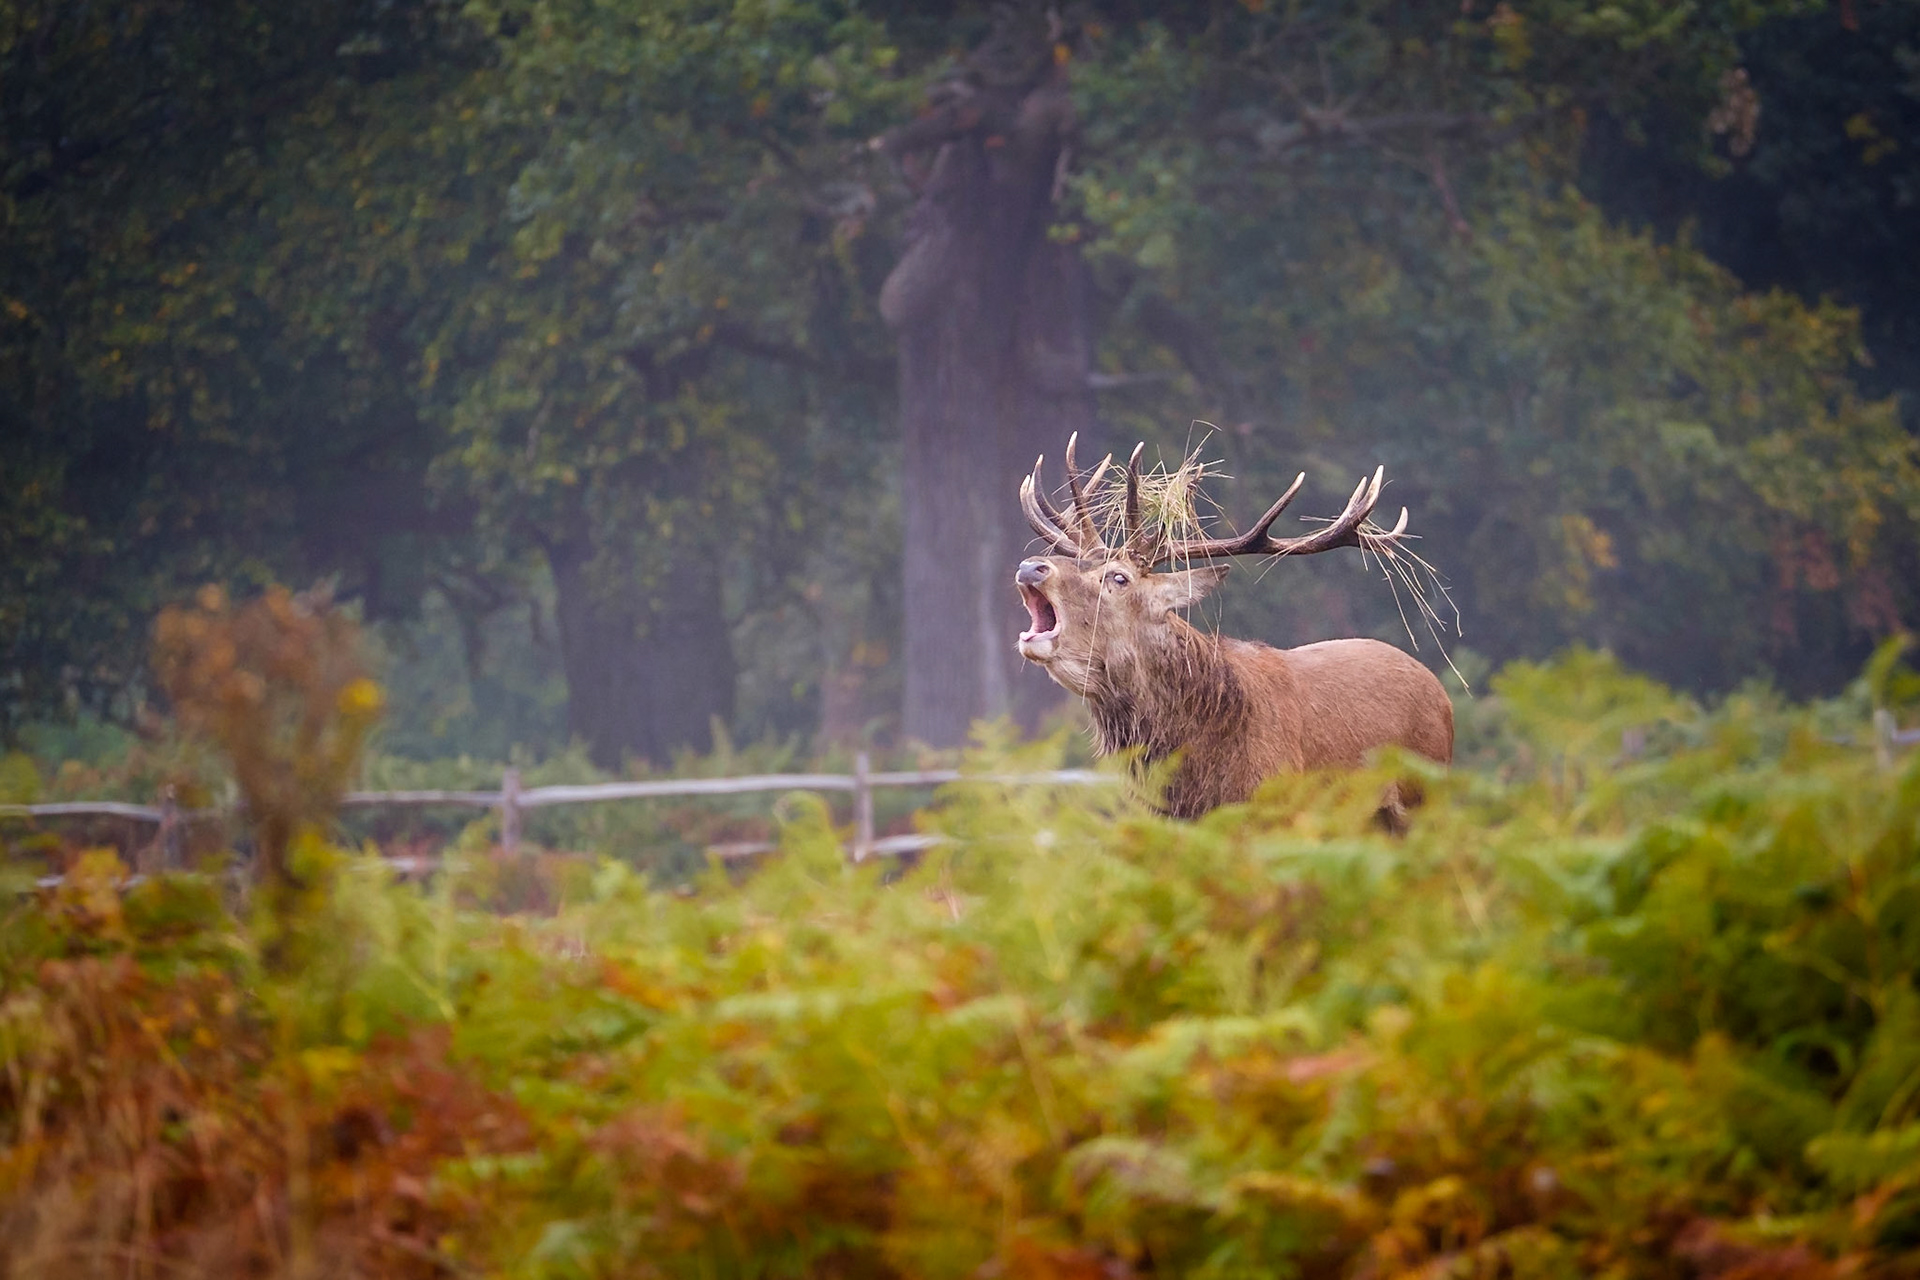
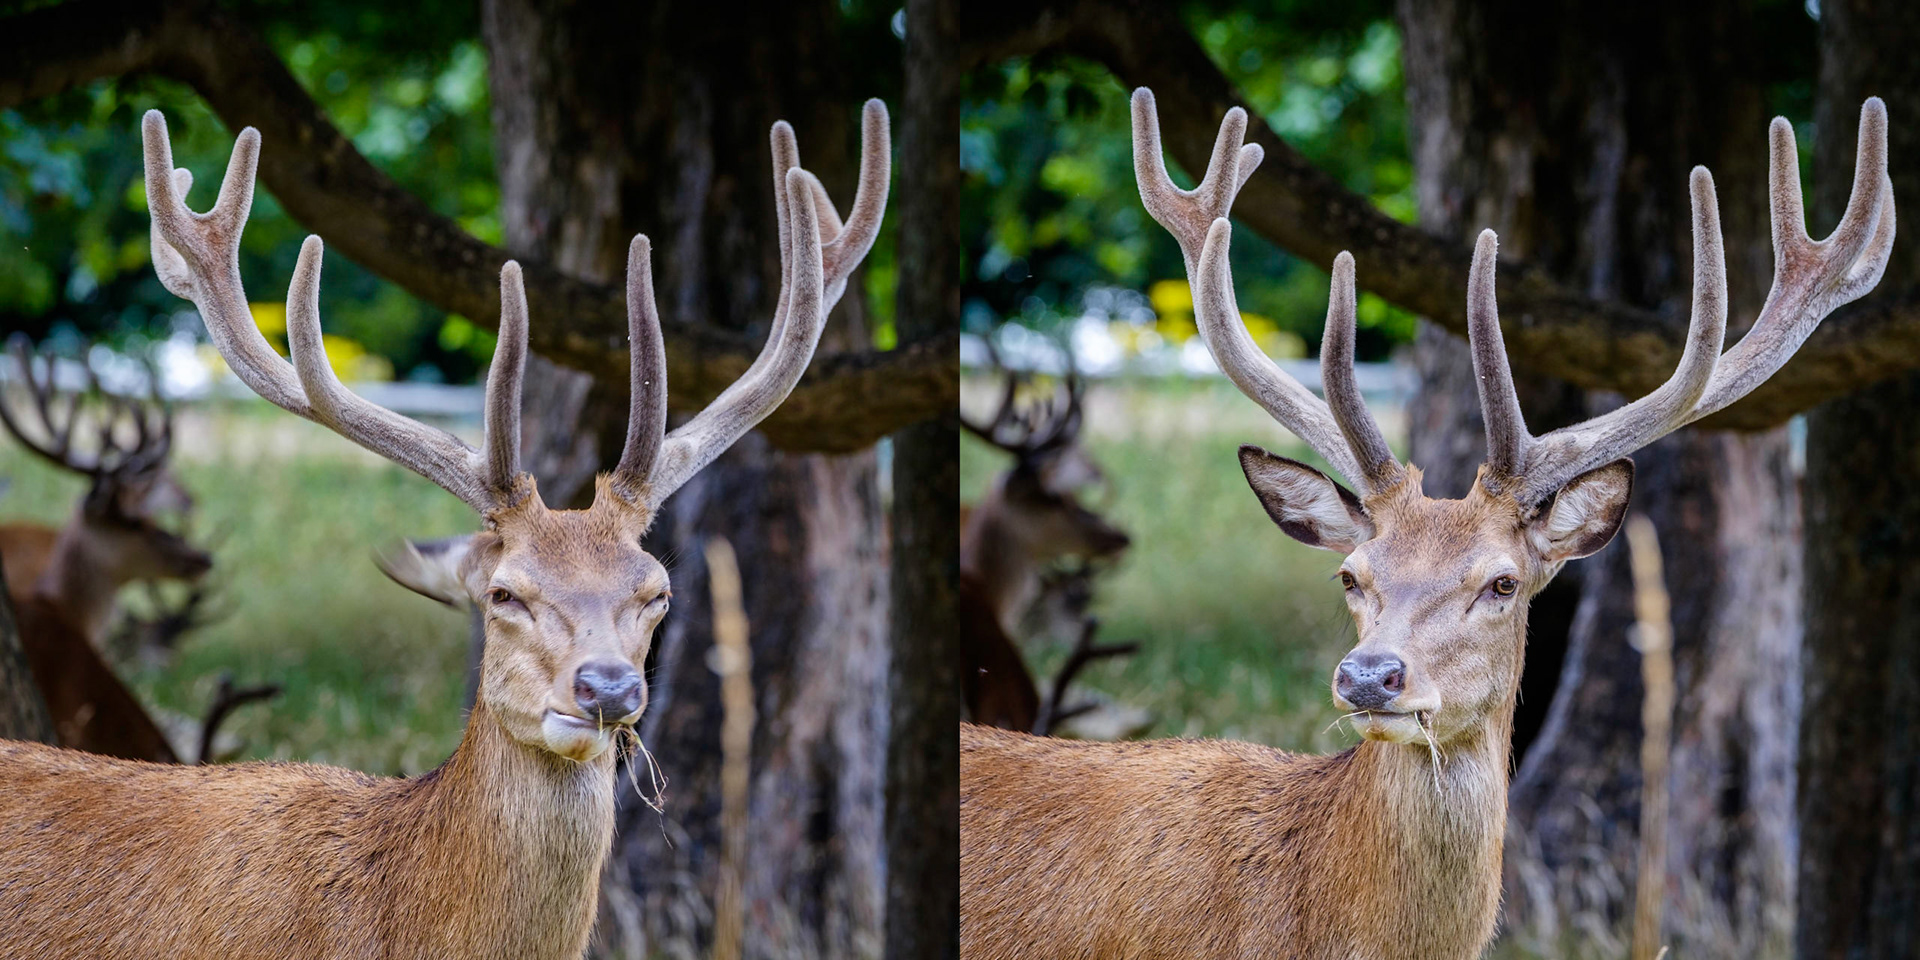
Sample image from 4th November 2019 - even with no sunlight appearing a misty morning can yield worthwhile images. These younger stags can more easily balance a "full headdress" as their antlers aren't quite as broad.
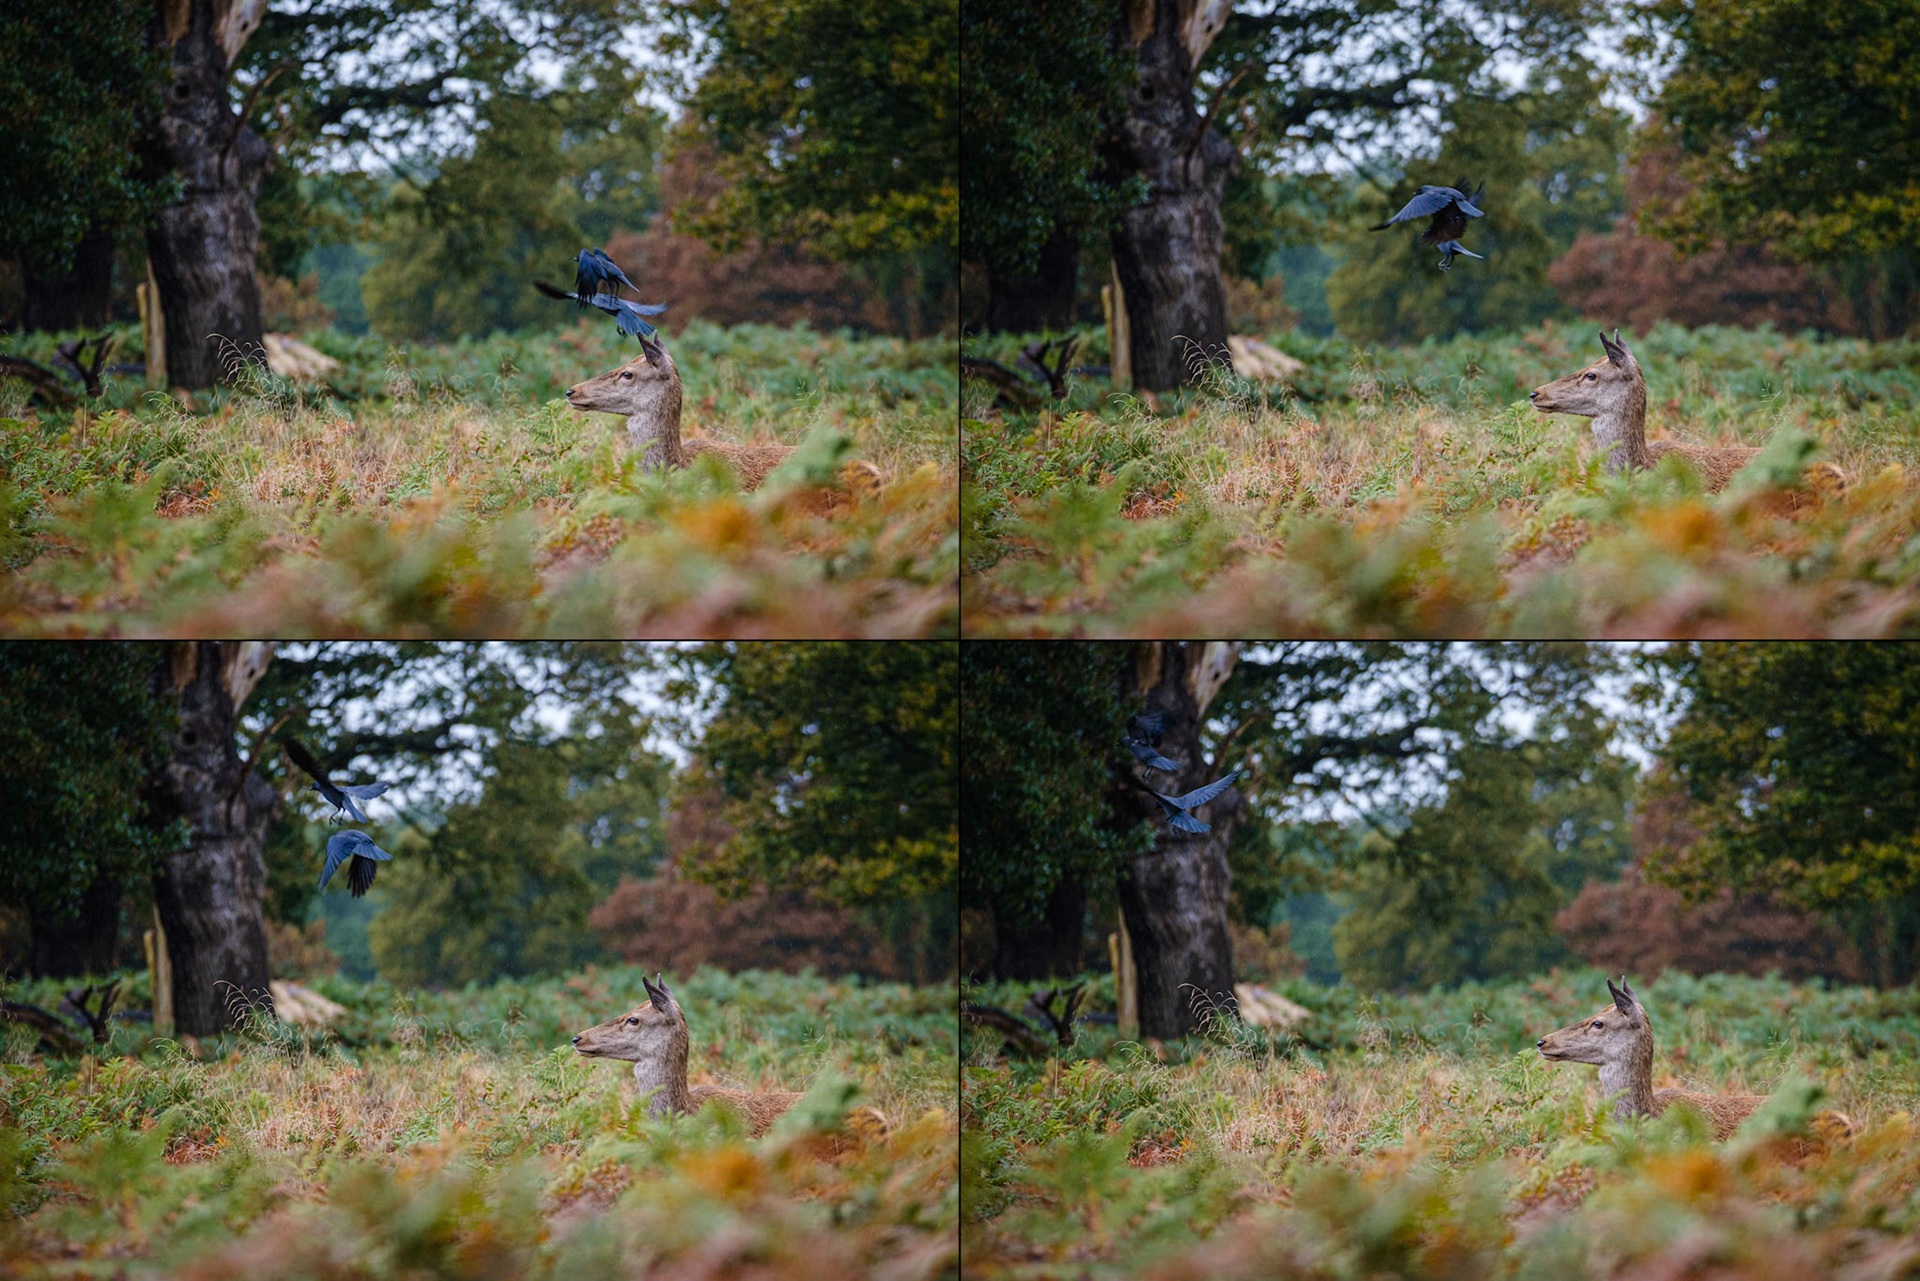
Sample images from 12th October 2019 - it can be fun trying to catch jackdaws in flight. Using burst mode will give you a range of shots to choose from.
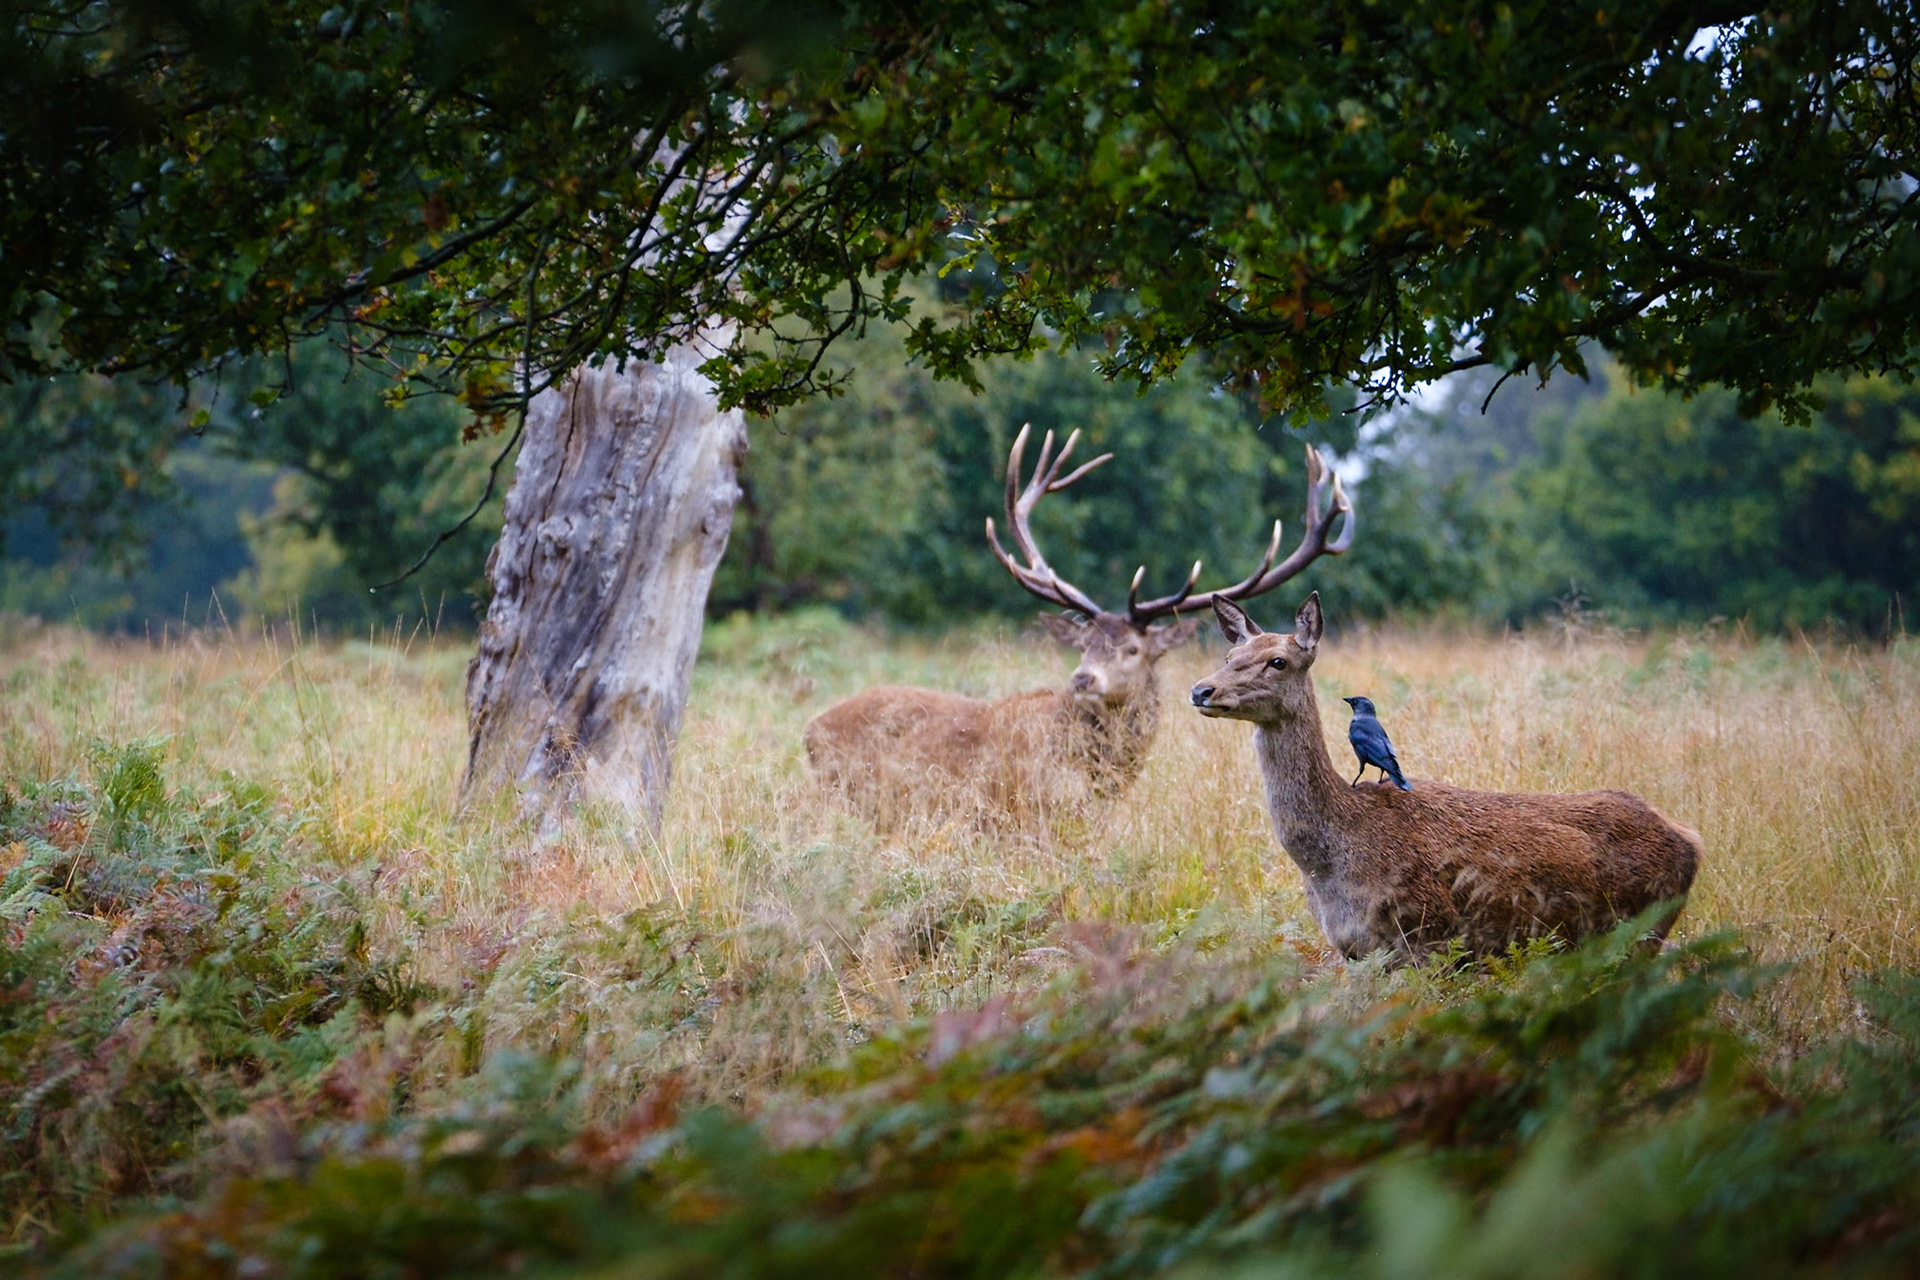
Sample image from 12th October 2019 - juggling moving elements within your composition can be tricky. Here we have the hind as main subject, with a jackdaw constantly hopping around and the stag in the background. I would prefer more separation between the antlers of the stag and the ear of the hind. I achieved that in some shots but then the jackdaw wasn't cooperating and disappeared down the hind's back!
Sample image from 12th October 2019 - sometimes it's worth finding a composition you like, waiting for the deer to move and then crossing your fingers!

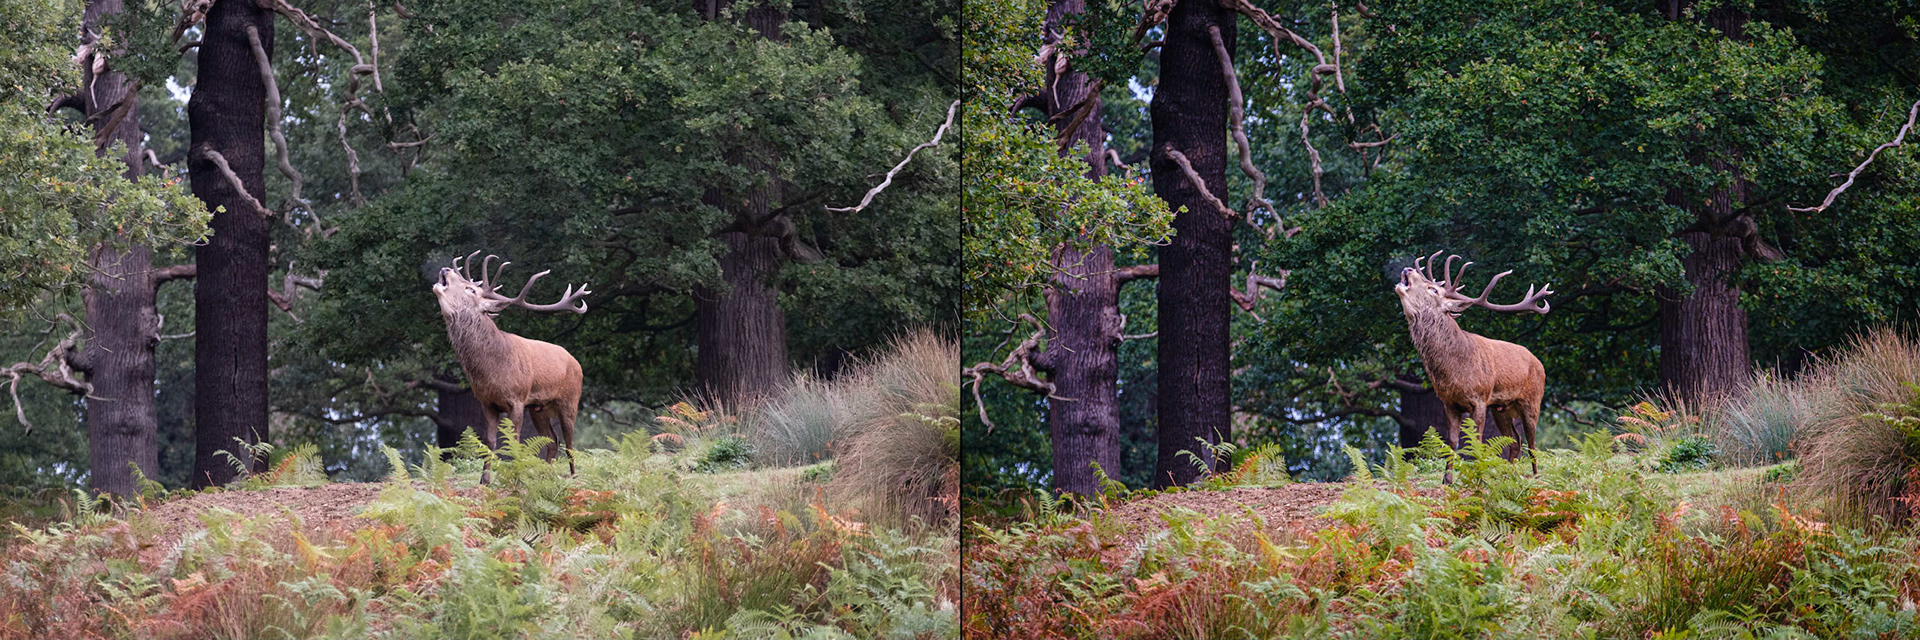
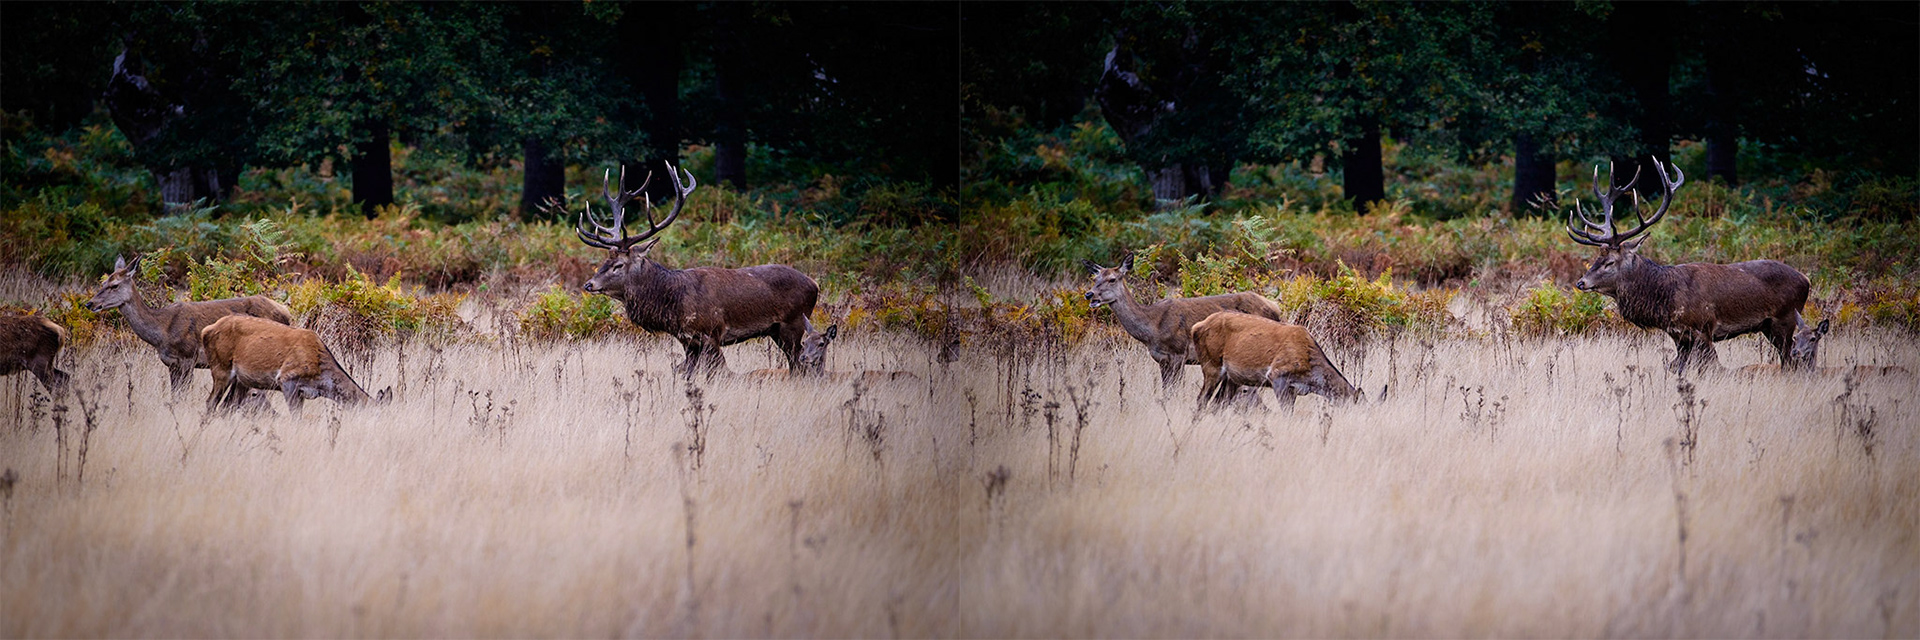
Sample image from 10th October 2019 - small changes can make a drastic improvement. On the left, the stag feels too central and his head is partially hidden in shadow. Just 11 seconds later, some slight movement on his part brought him into the light and I had adjusted my view bringing in the third tree on the right to give a more balanced composition.
Sample images from 5th October 2019 - taken just 7 seconds apart. Those Jackdaws really can add some interest.
Sample images from 5th October 2019 - the power (and speed) of some decent photo editing software. By saving my commonly used settings as a preset in Adobe Lightroom, I can take the unprocessed RAW image on the left to an almost final edit on the right in a single click. I would then probably only need to tweak a couple of settings to achieve the result I want in no more than a couple of minutes.
Sample image from 5th October 2019 - the final edit of the RAW + preset comparison. A small crop and colour tweaks using Fuji's Velvia film simulation and a slight white balance adjustment.
Sample image from 13th July 2019 - an example of "waiting too long" - we spent so long with the hinds & newborns that the stags were disturbed by dogs before we went over, thus limiting our chances. This is heavily cropped as we were some distance away. So, the mantra could be "get the shot while you can"!

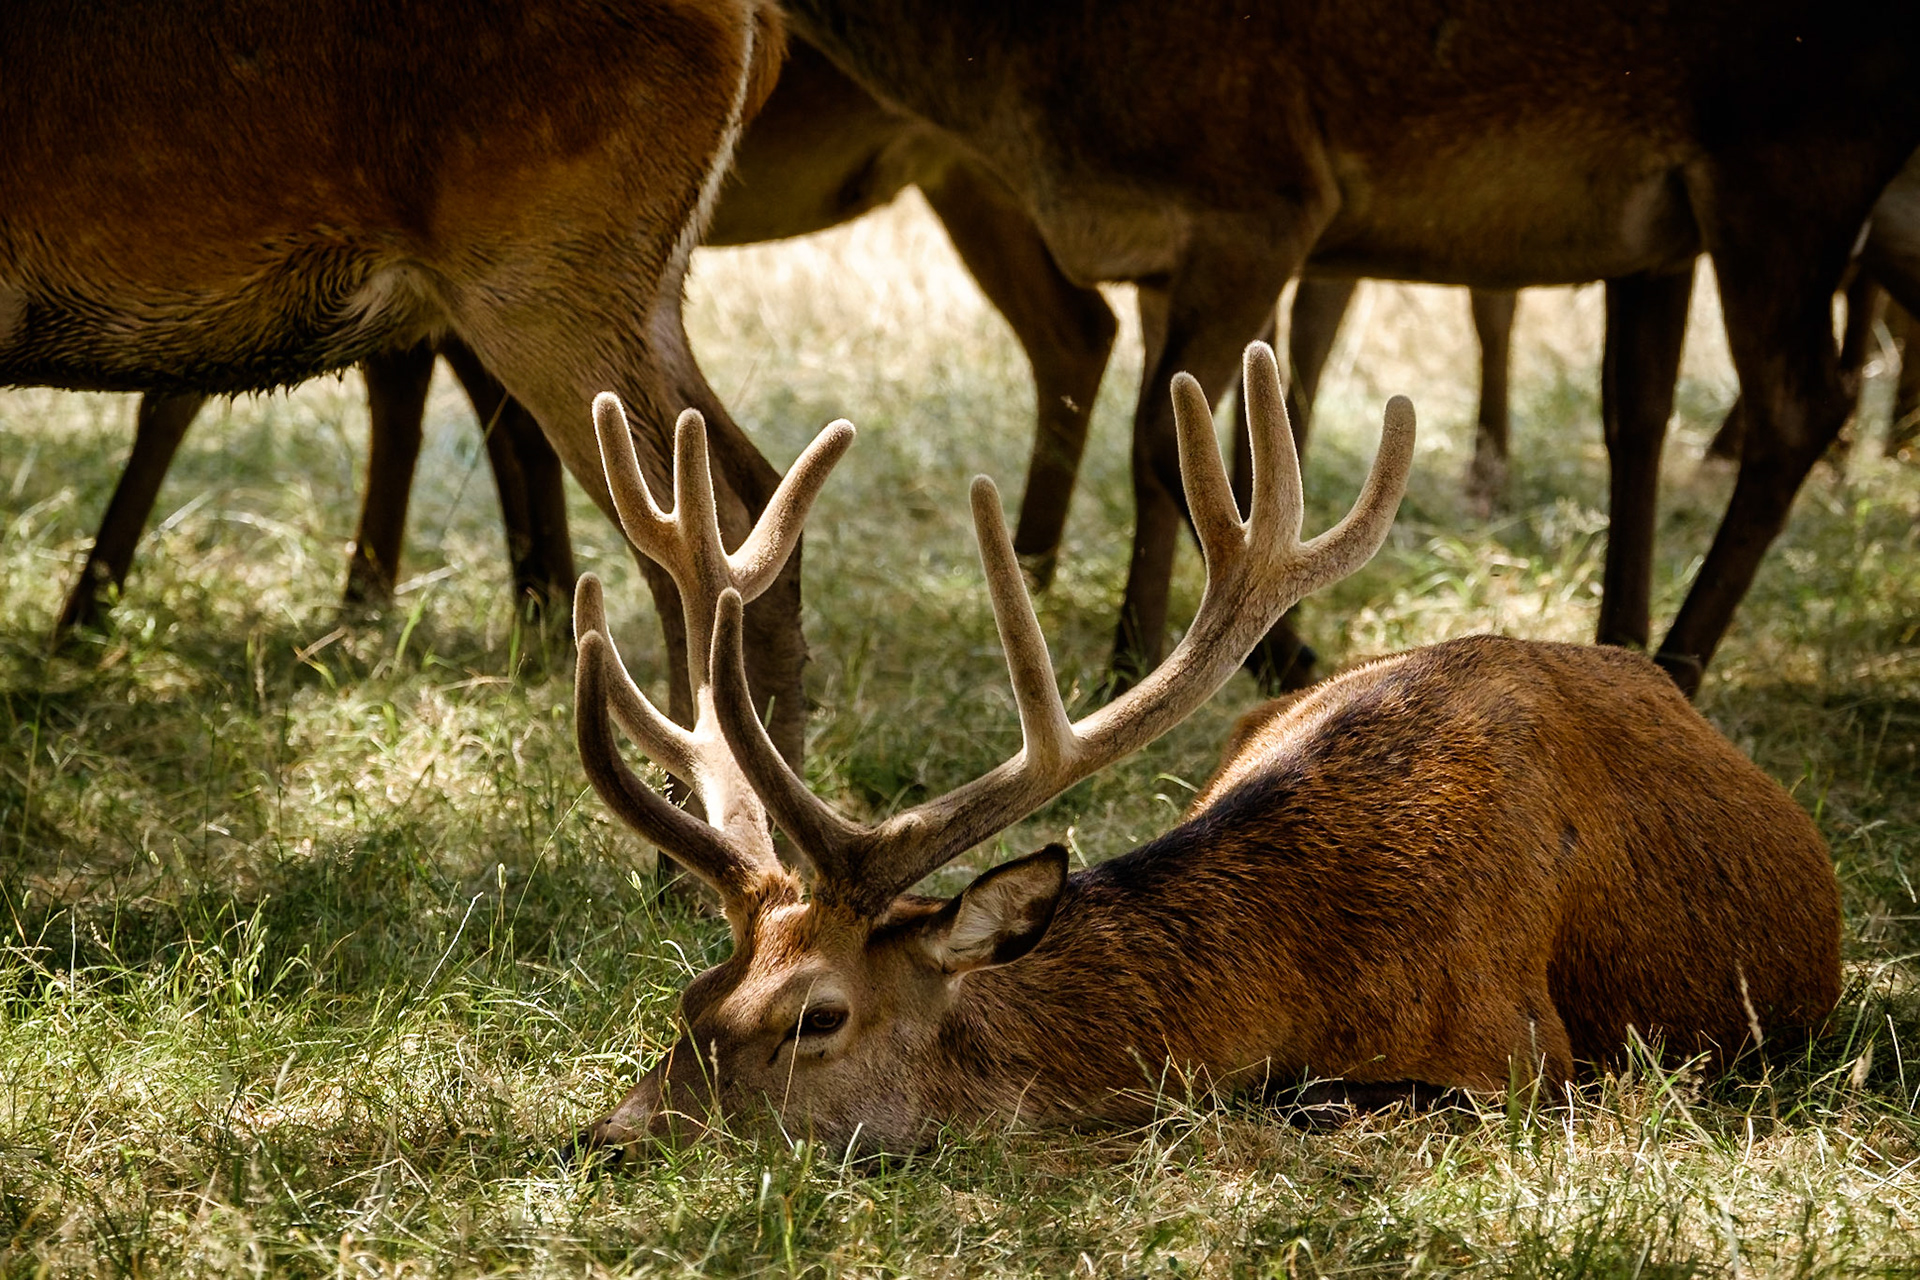
Sample image from a solo workshop on 19th June 2019 - hinds with young will be very wary of your presence around May to July, so approach slowly with caution, don't get too close and remain quiet, keep still and move slowly if you have to.
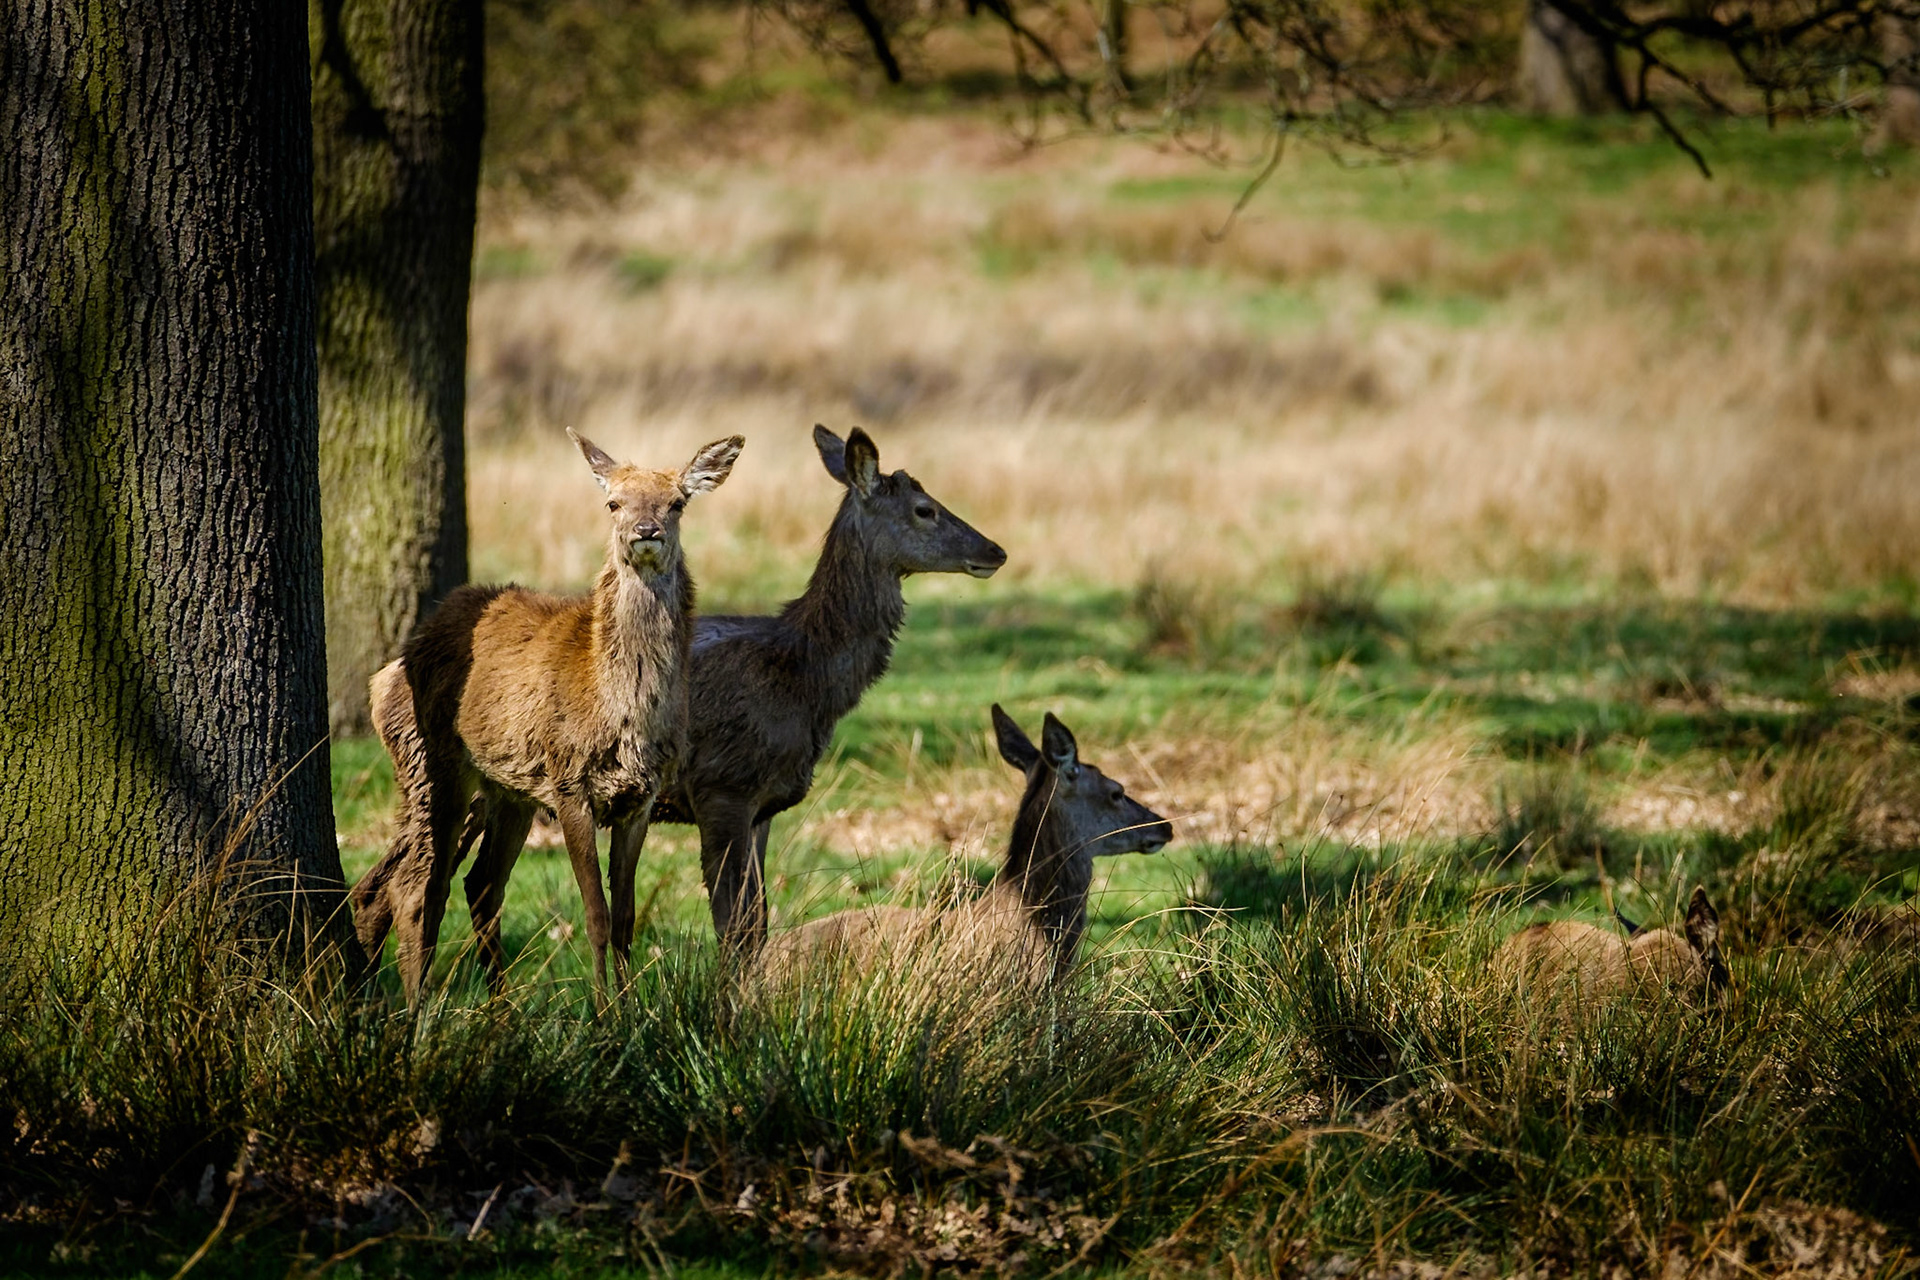
Sample image from 17th November 2018 - try to add a bit of intrigue. With the hind and her calf both gazing in the same direction, it makes you wonder what it is that has caught their attention. This is another example of a soft, misty looking background actually caused by backlighting. Watch out for small details that could be improved - I should have taken a step to my right to move the distracting stalk of grass away from the calf's eye, but I only noticed this when viewing large on my PC.
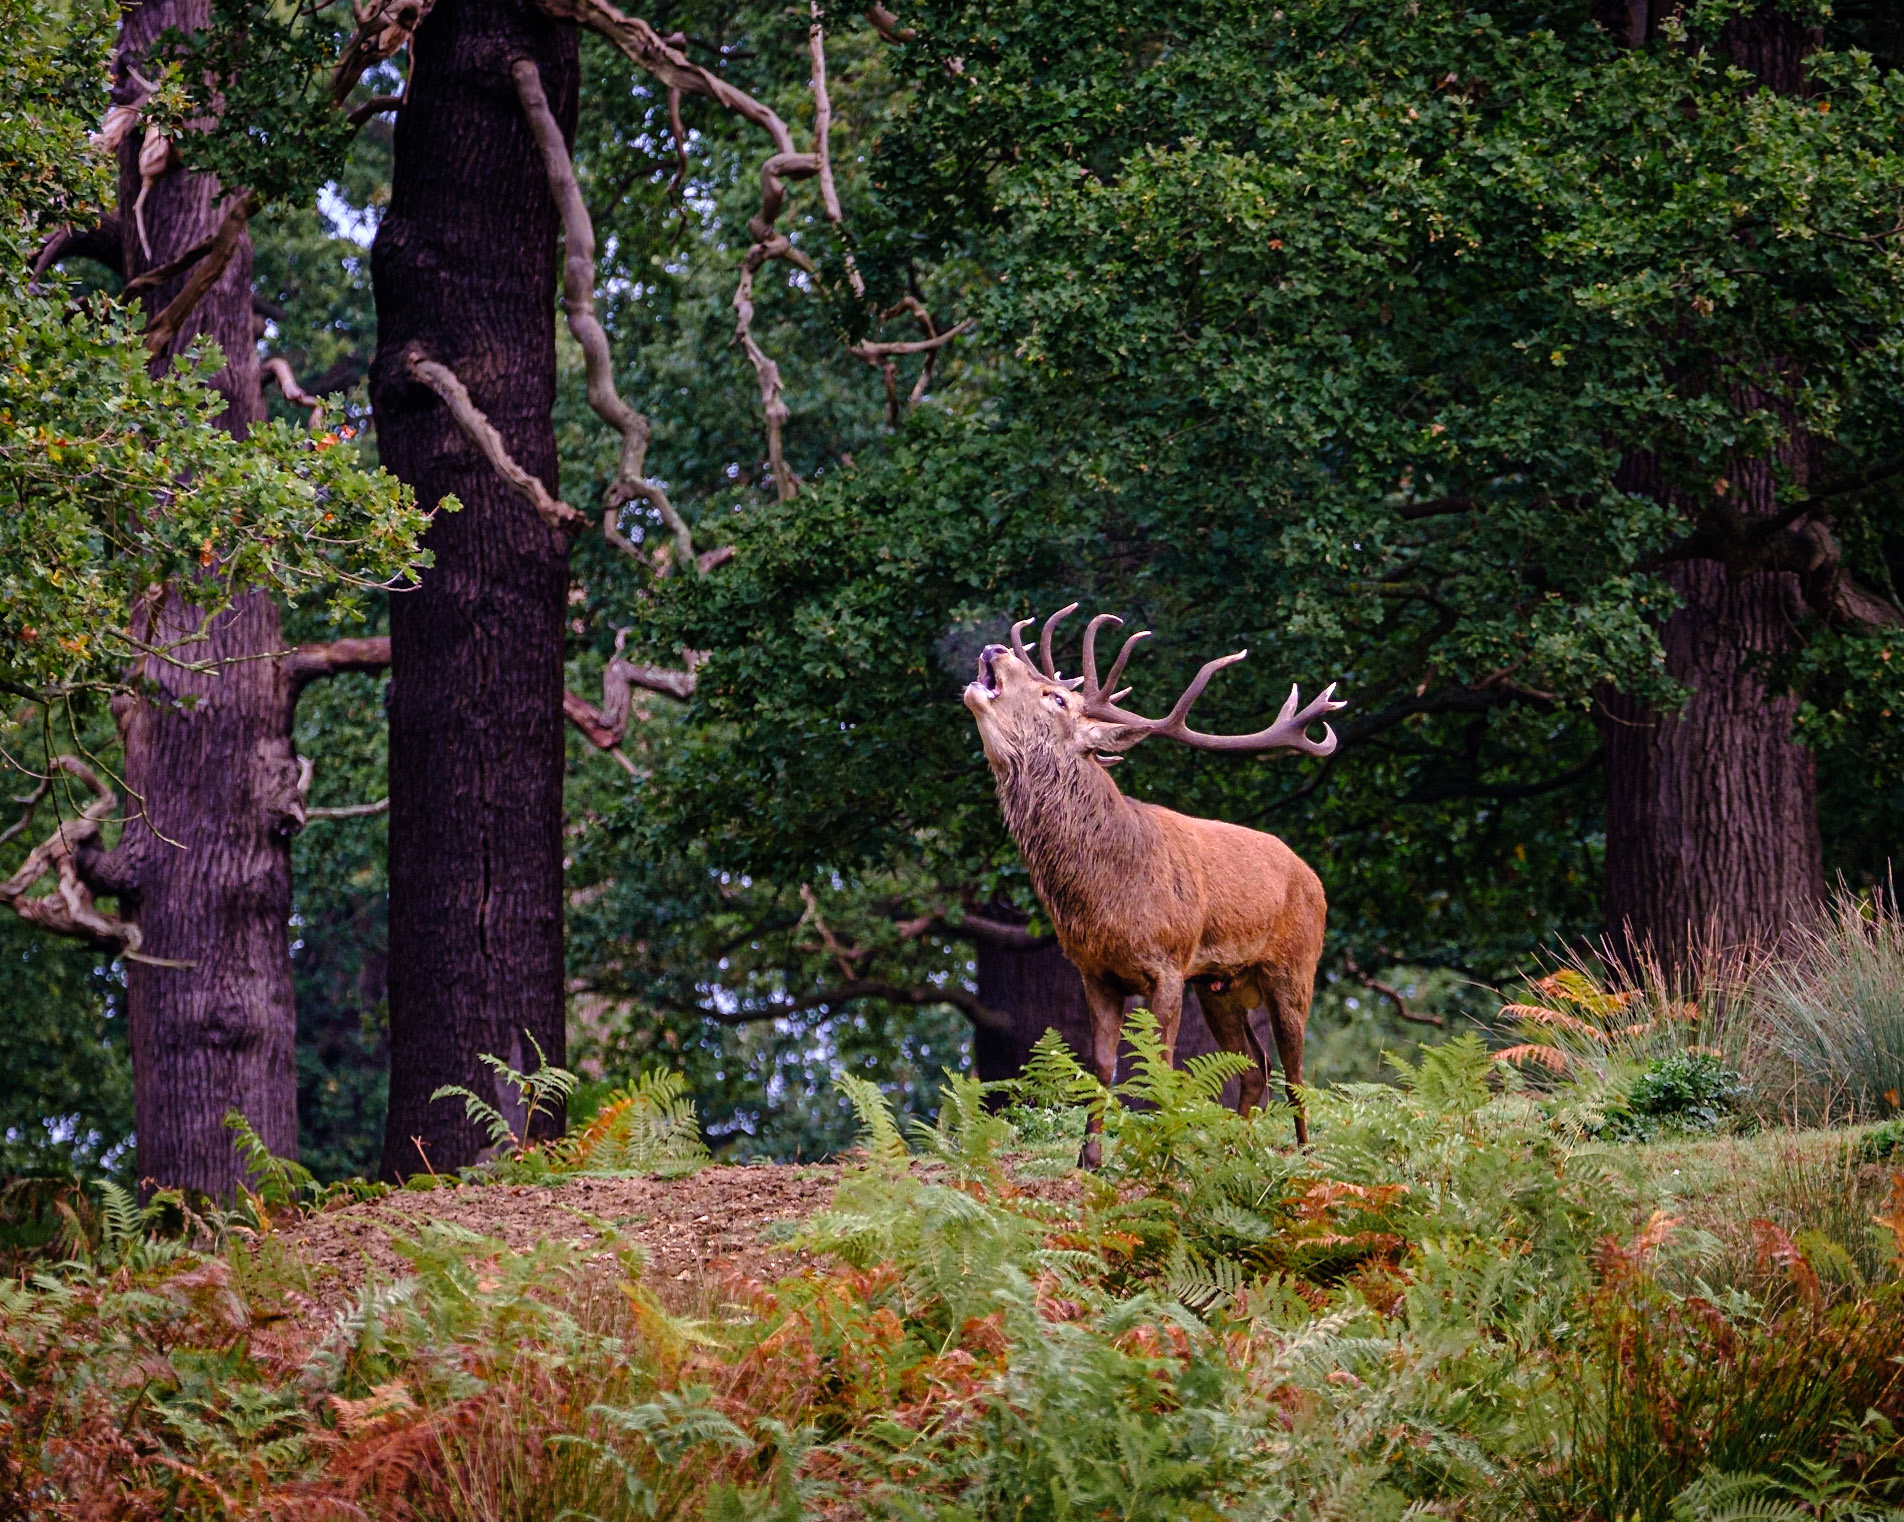
Sample image from 17th November 2018 - look for (and sometimes wait for) the light, it really does bring an imge to life and the slight "haze" caused by the high contrast of backlighting can look just like mist in the background (it wasn't misty on this morning and we had to wait just over an hour for decent light).
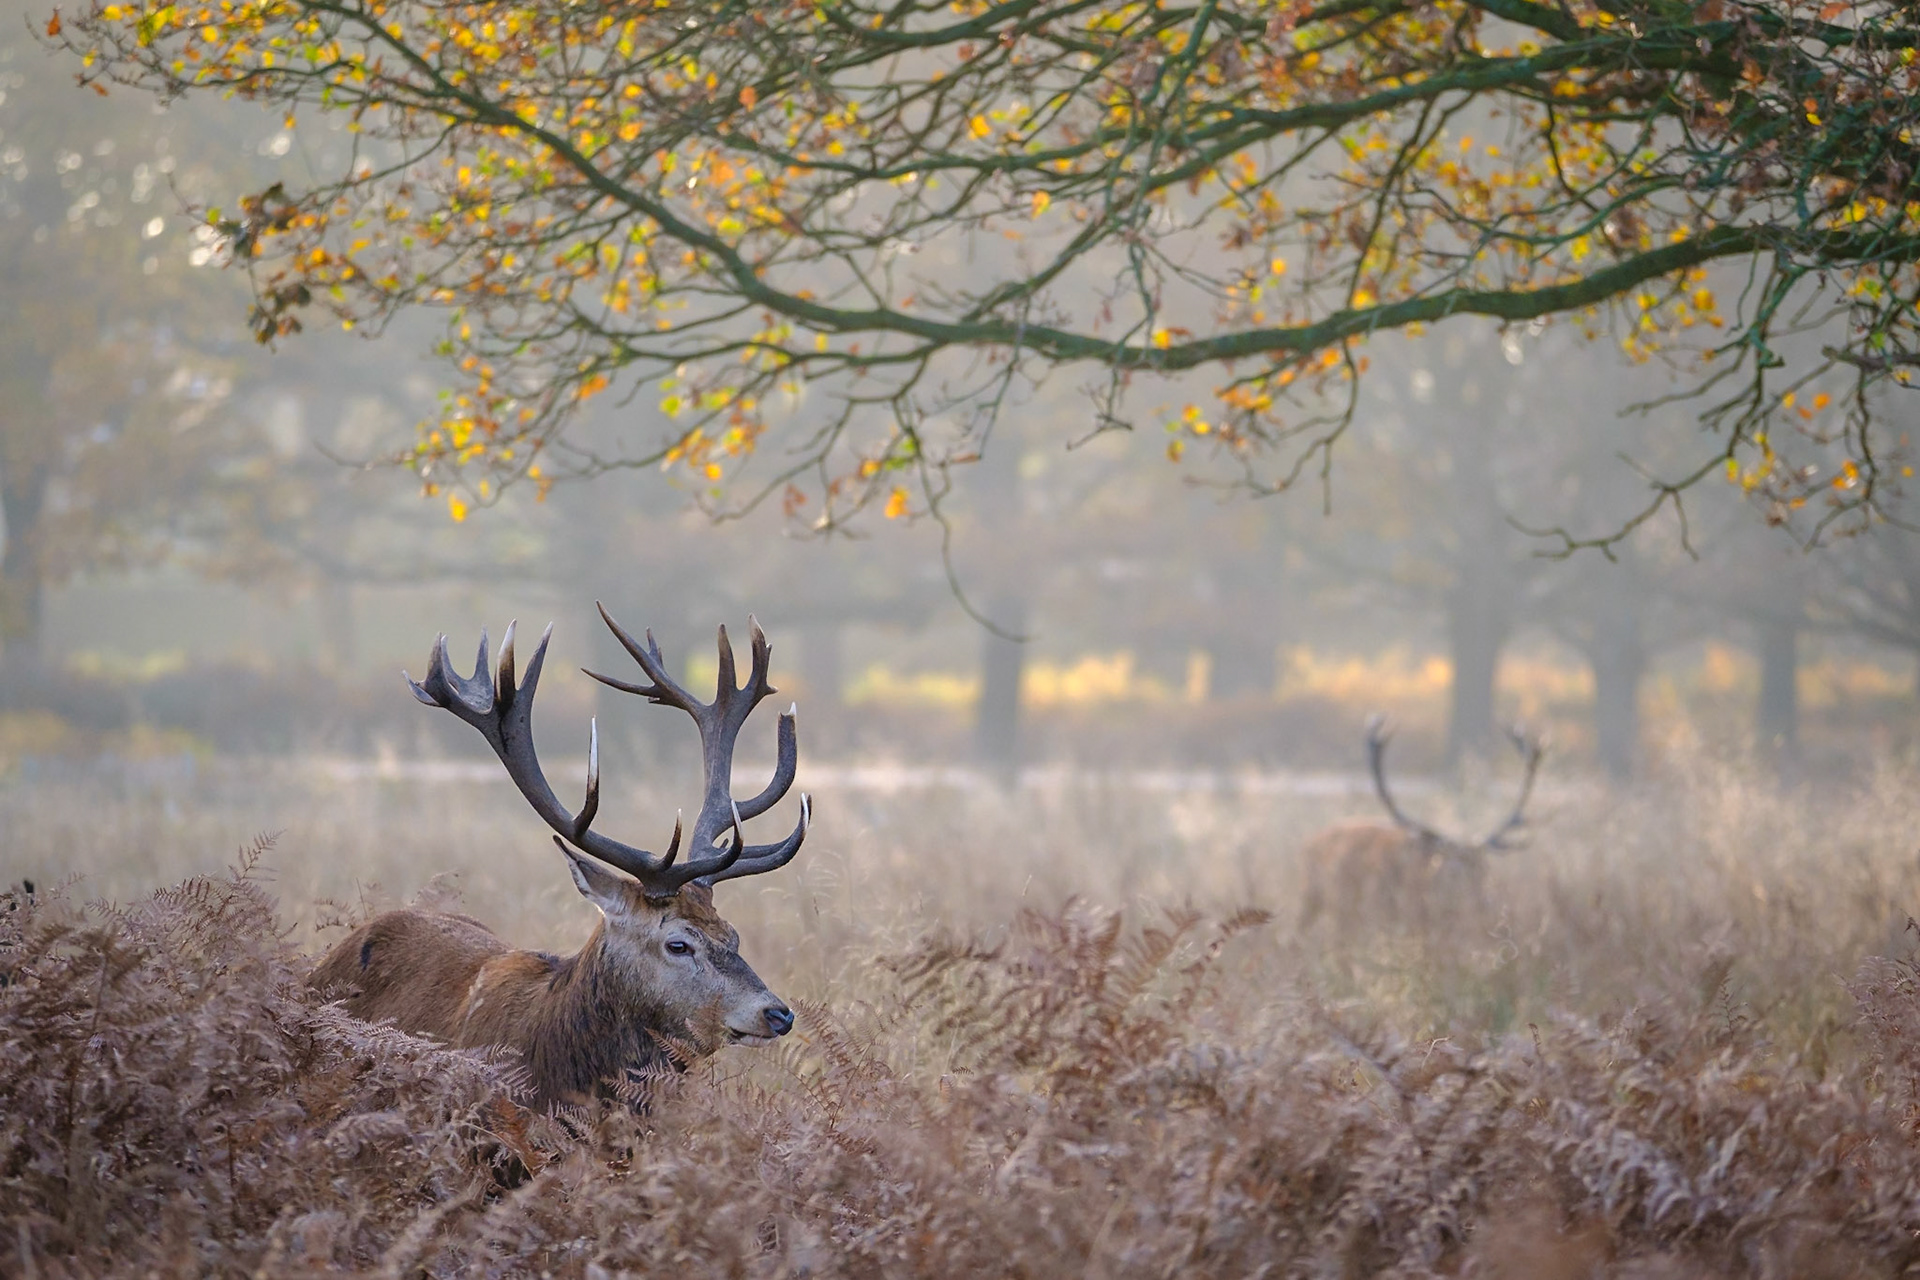
Sample image from 17th November 2018 - use deer in the background to balance your composition and add additional interest & context.
Sample image from 27th October 2018 - the power of editing RAW image files. The dark foreground and bright background here makes it difficult to get a perfect exposure in-camera. With selective edits in Lightroom, adjusting exposure and white balance, coupled with the Fujifilm Velvia film simulation, the original RAW image has been vastly improved. And be careful with alignment of deer behind each other - the ears behind the stag are distracting!
Sample image from 27th October 2018 - watch out for Jackdaws flying in, they can add an extra element to your image. This was slightly mistimed, using a burst of 3 to 4 shots would have given me more options to select from.
Sample image from 9th October 2018 - with the right (or wrong?) timing, you can occasionally achieve some comical moments! Burst mode can be effective to capture these fleeting moments, although this was actually a single shot.
Sample images from 6th October 2018 - composition with groups can be troublesome if you "cut a deer in half", but keep waiting and some slight movement can open up possibilities.
Sample image from 6th October 2018 - although I mention that I prefer not to include anything man-made, sometimes when the rest of the setting looks lovely I just have to. At least in this case the fence looks quite rustic!
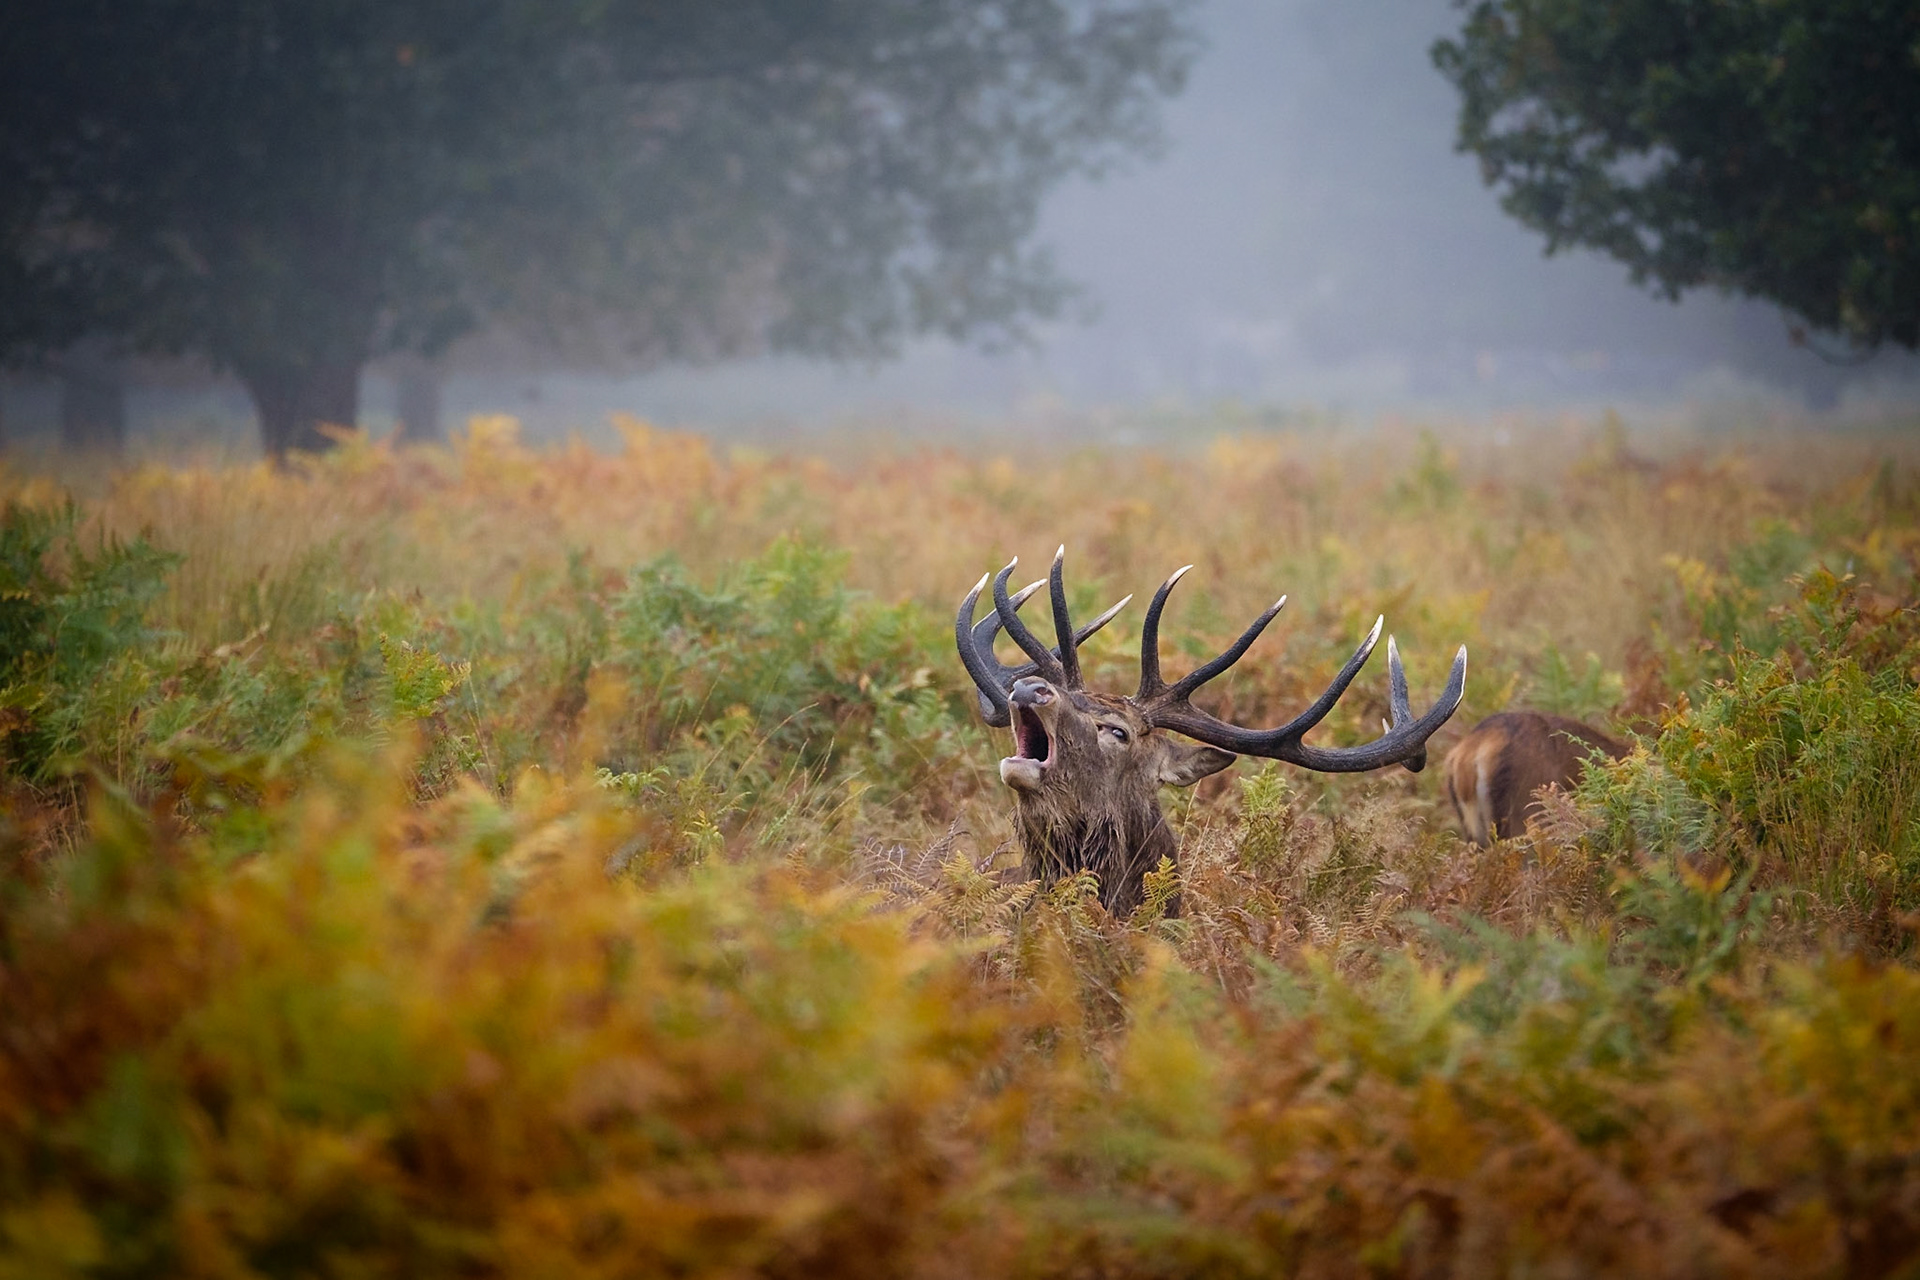
Sample image from 5th October 2018 - I love to find the stags almost hidden in the ferns. I would prefer the hind to either not be there or have her head up, but sometimes you just have to shoot when they bellow!
Sample image from 30th September 2018 - I've completely cropped out the distant treeline to give a uniform feel and blurred the hinds with a wide aperture of f/4 to focus attention on the stag, who appears to be keeping one eye on his harem. The Jackdaw in profile adds a little bit of interest.
Sample images from 30th September 2018 - walk around your subject to alter your position, changing the foreground & background. Here, I moved about 10 feet to achieve a different foreground.
Sample images from 30th September 2018 - change your perspective, three shots taken from the same spot - standing, kneeling & lying down - see the effect on the foreground grass and how the amount of blur varies.
Sample image from 30th September 2018 - (not from the session but I was out early beforehand), this is just to illustrate the benefits of checking the weather forecast to see how the conditions might develop and getting out around sunrise.
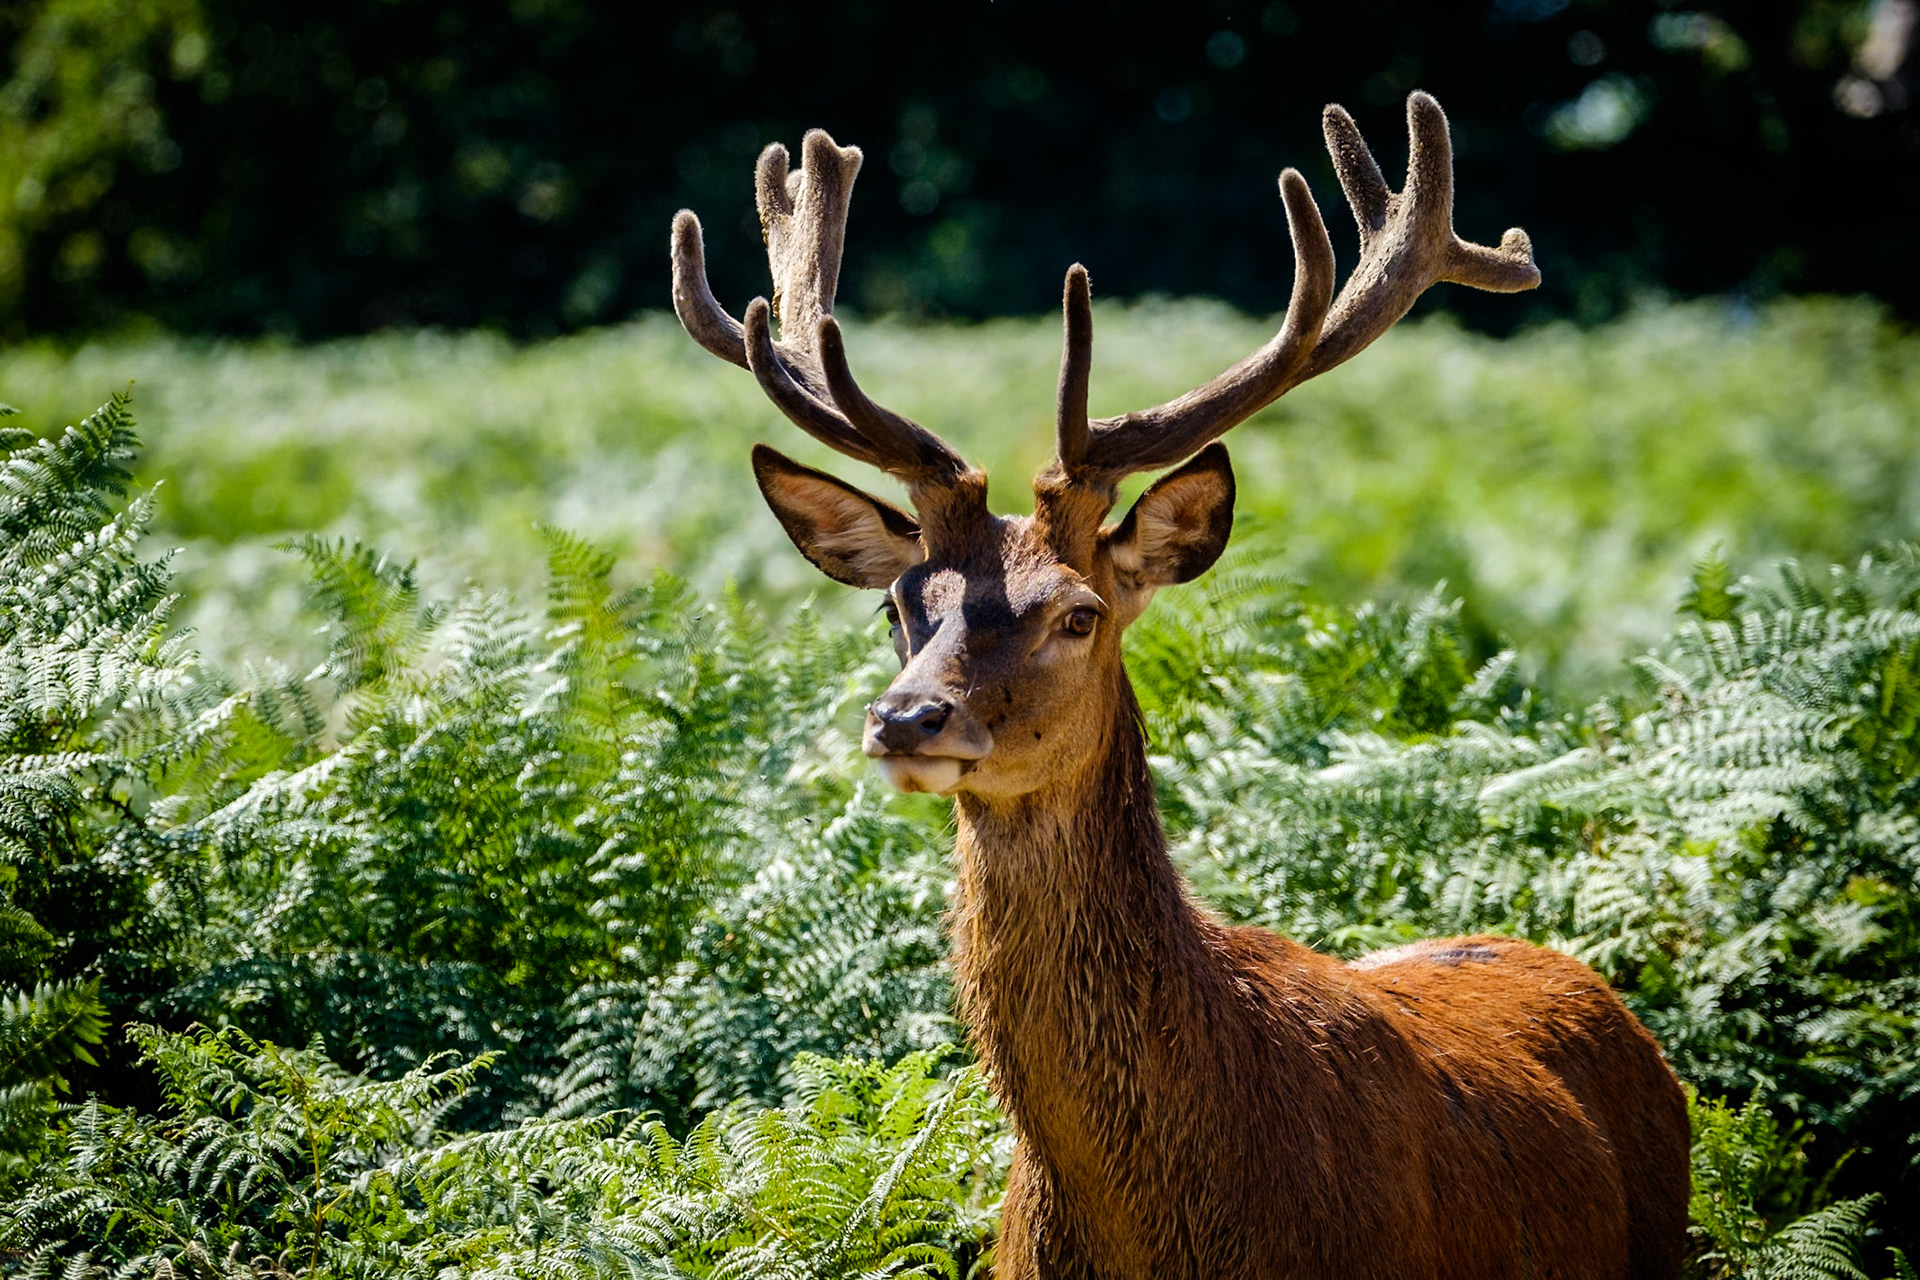
Sample image from 22nd September 2018 - the cloudy, drizzly conditions give a different feel to this study of a mature stag.
Sample image from 17th August 2018 - even with nature you can use a bit of symmetry in composition.
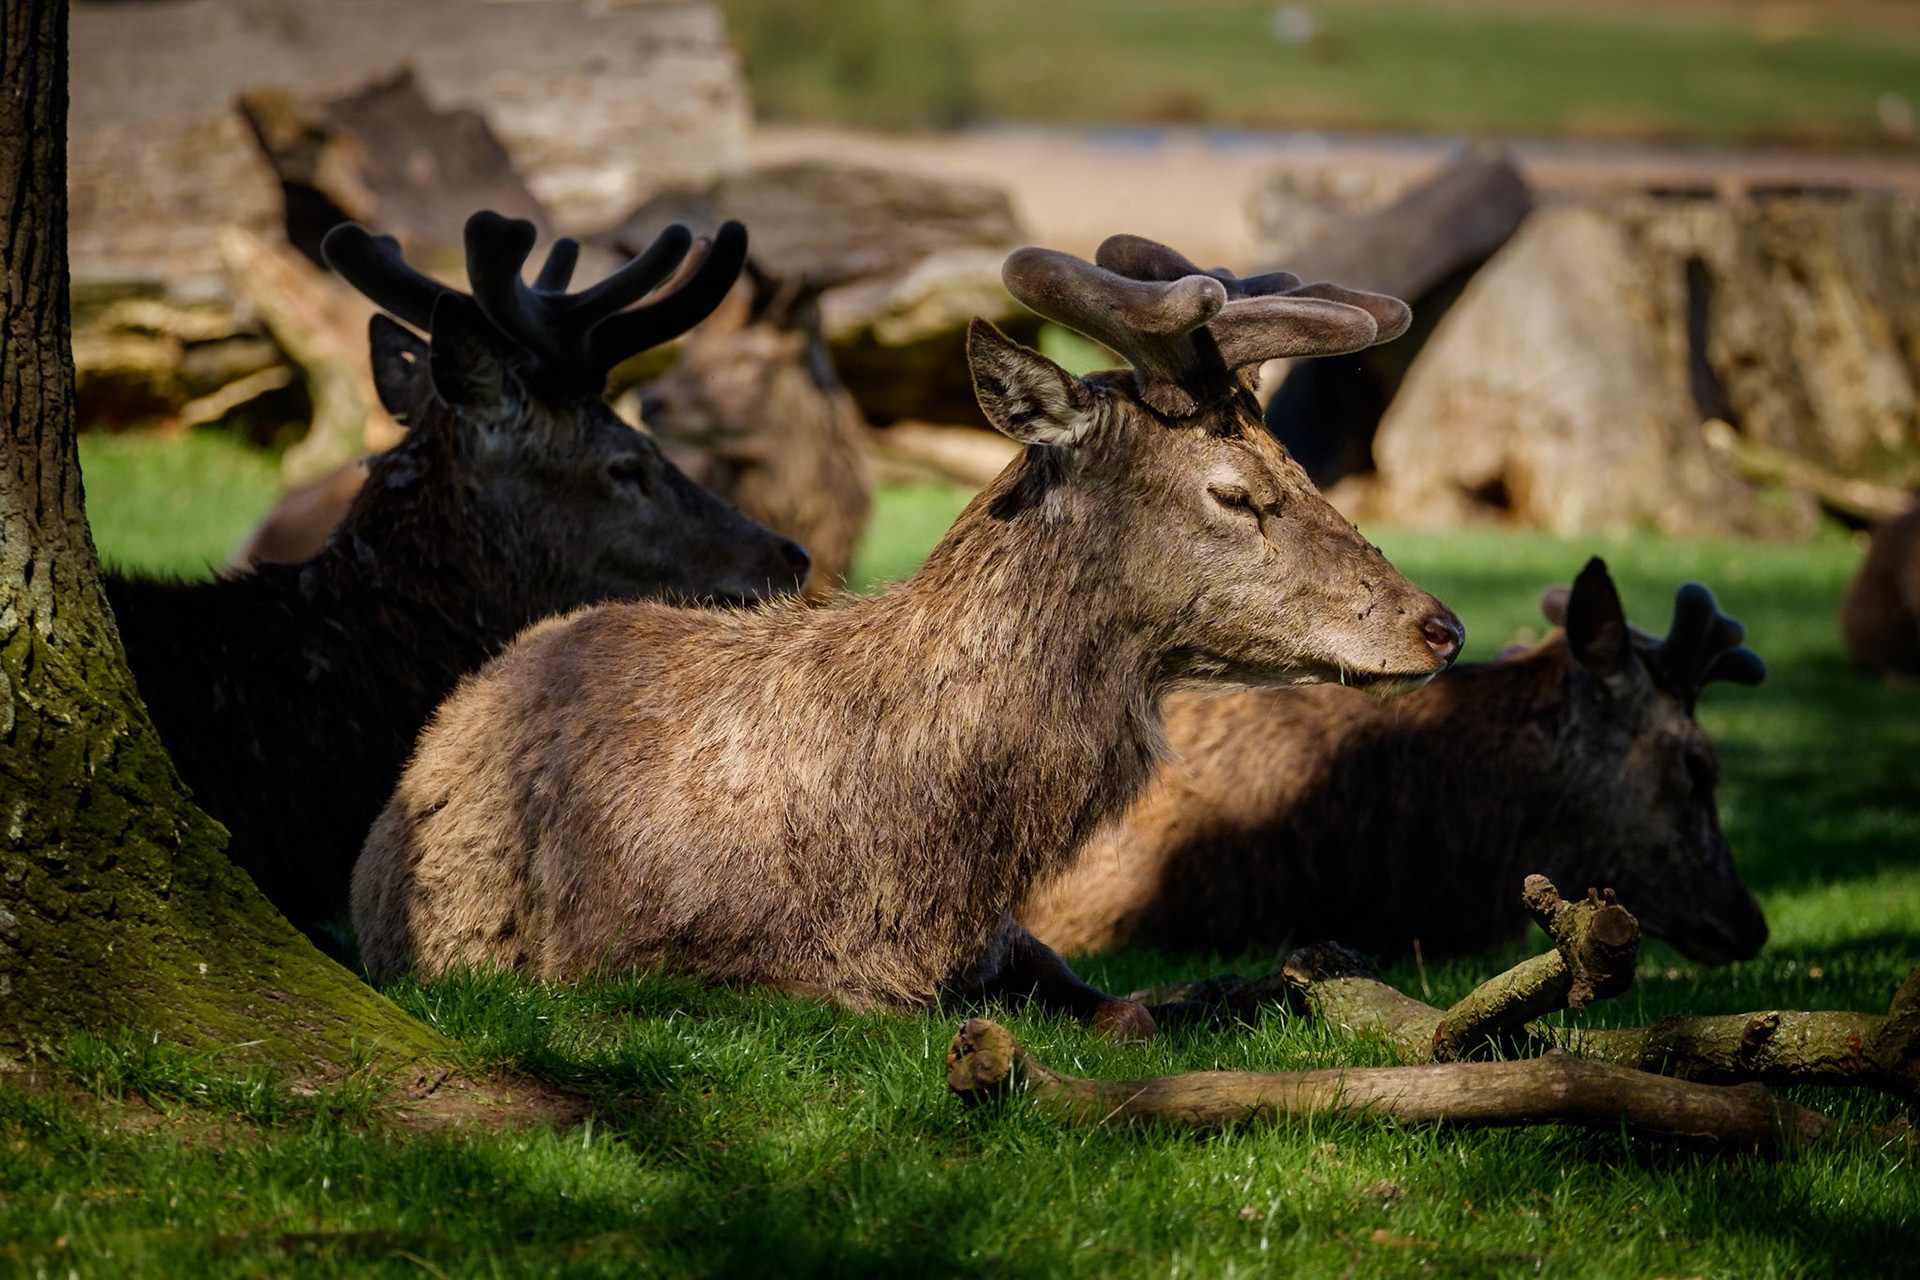
Sample image from 17th August 2018 - watch out for ear tags which are becoming more common!
Sample image from 17th August 2018 - with careful timing and plenty of patience you can capture the Jackdaws as they take flight, in this case from the head of this hind.
Sample image from 5th August 2018 - a fairly standard image, no special technique, just a lesson in observation and behaviour. This young(ish) stag is not quite as bold and confident as the older stags and I coud see he wanted to move past some ferns but we were a bit close and he was hesitant. By backing away, we gave him room to move past, affording us an unusually close view (always be aware of what is around you so you have room to escape).
Sample image from 5th August 2018 - even when standing just a metre away from a busy road in a managed park, you can still make your setting look natural with careful composition.

Sample image from 5th August 2018 - experiment with compositions. A close crop of this hind's head removes the shape of the body from the image, but the silhouette in the background provides it. Even if later on you decide it doesn't quite work as you expected, it's always worth trying something different!
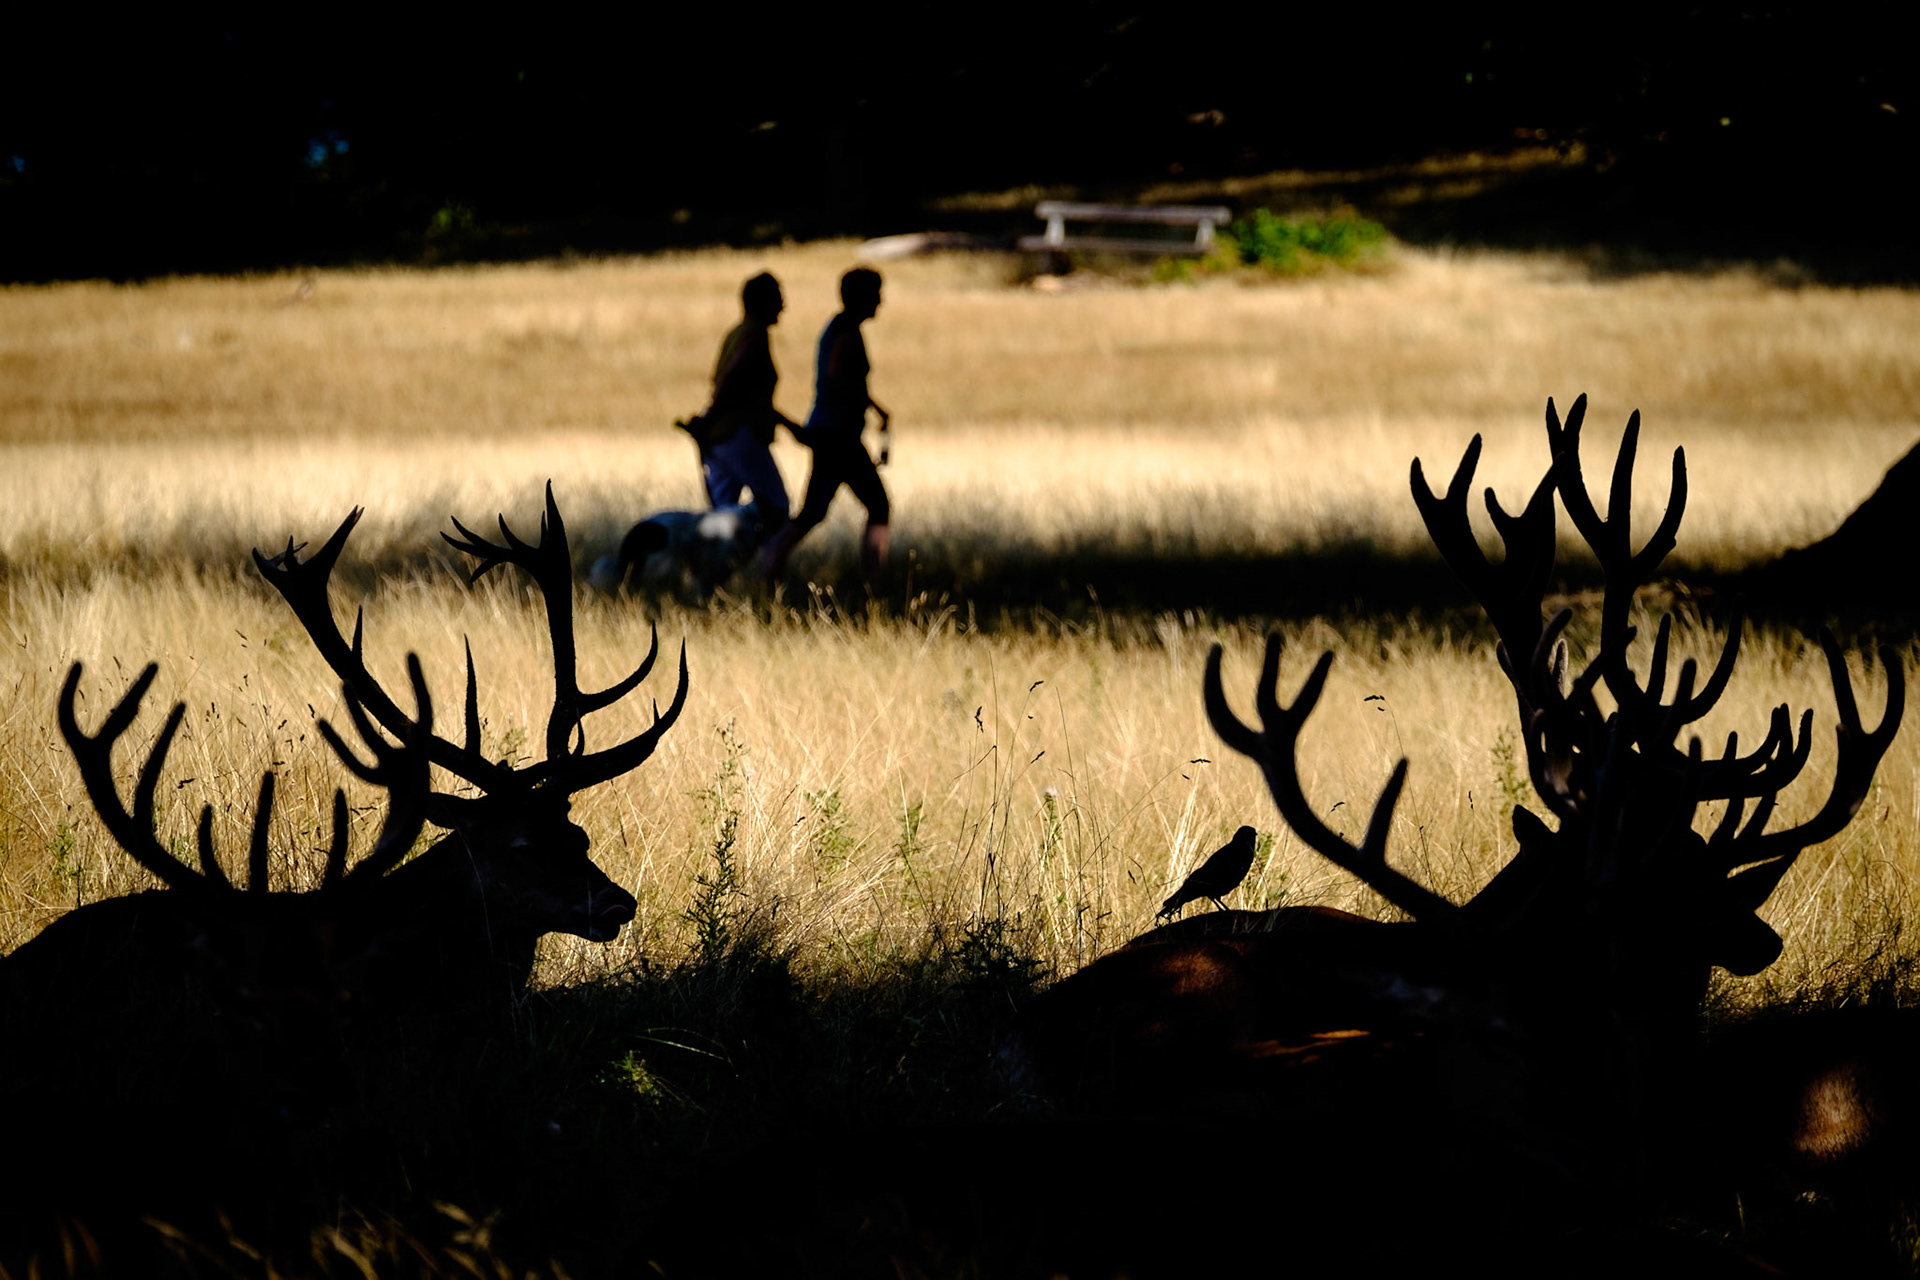
Sample image from 5th August 2018 - juxtaposing people with the deer can provide a different sort of image. Probably not one to hang on your wall, but could produce image sales for editorial purposes.
Sample image from 5th August 2018 - two shots, moments apart, showing how small details can improve images. When dealing with bird silhouettes, try to catch them in profile to add interest.
Sample image from 21st July 2018 - even when dealing with the chaotic movements of a large group of stags, it's still possible to isolate an individual with careful selection of your composition and use the group to add context.
Sample image from 21st July 2018 - two shots, moments apart, showing how the timing of your shot can affect the outcome when the deer are chewing.
Sample image from 21st July 2018 illustrating the use of a bright background to emphasise a strong silhouette - positioning of the camera viewpoint can be crucial.
Sample image from 4th July 2018 - a small change in my position meant I could align the head of this hind in the gap between the background deer, maintaining a clean outline against the pale grass.
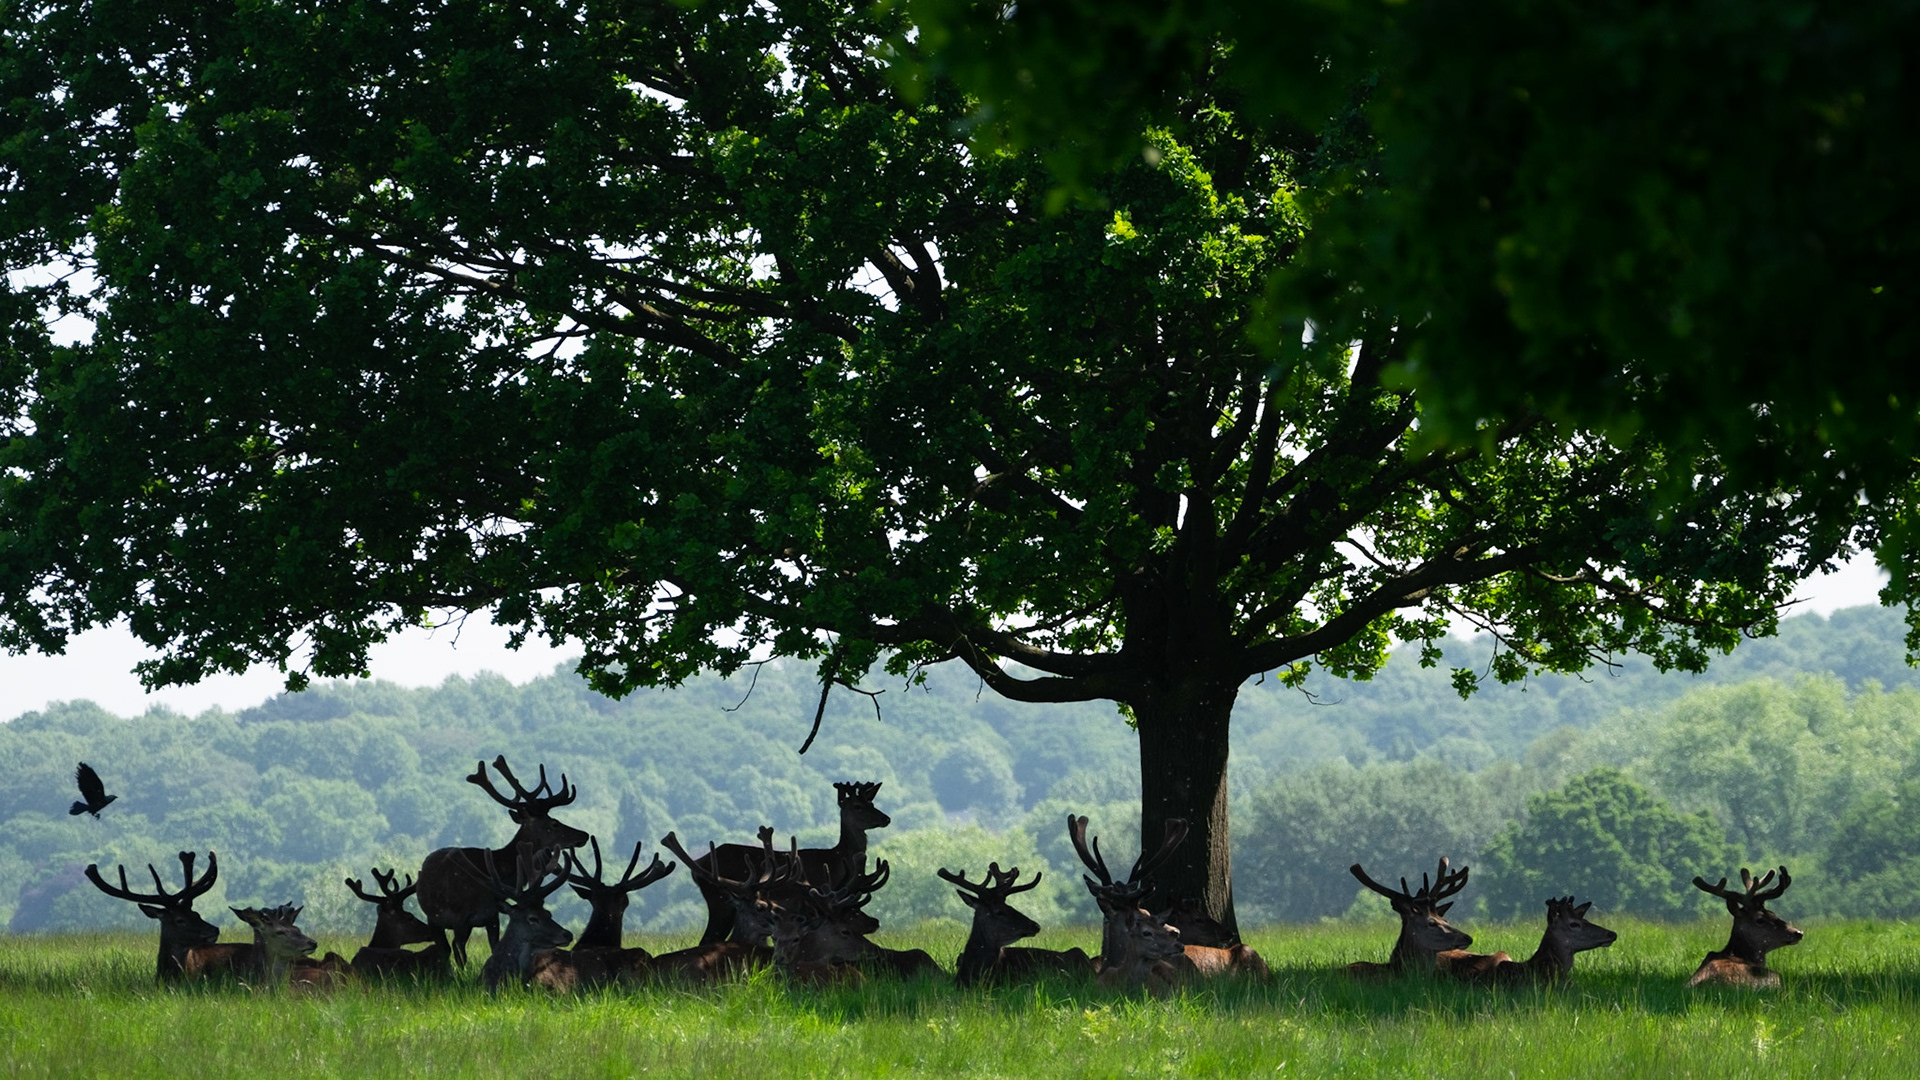
Sample image from 4th July 2018 - even when faced with the disorder of a large group of deer (about a hundred on this walk), if you watch and wait, little moments will appear before you. You just need to have patience and be ready!
Sample image from 1st July 2018 - sometimes you're faced with a scarcity of deer and you just have to make the best of what you're given, as I always say - better luck next time!
Sample image from 21st June 2018 illustrating patience and planning - this young buck was grazing most of the time and his head would pop up for about 2-3 seconds so pre-framing the shot and waiting was the best technique to use.
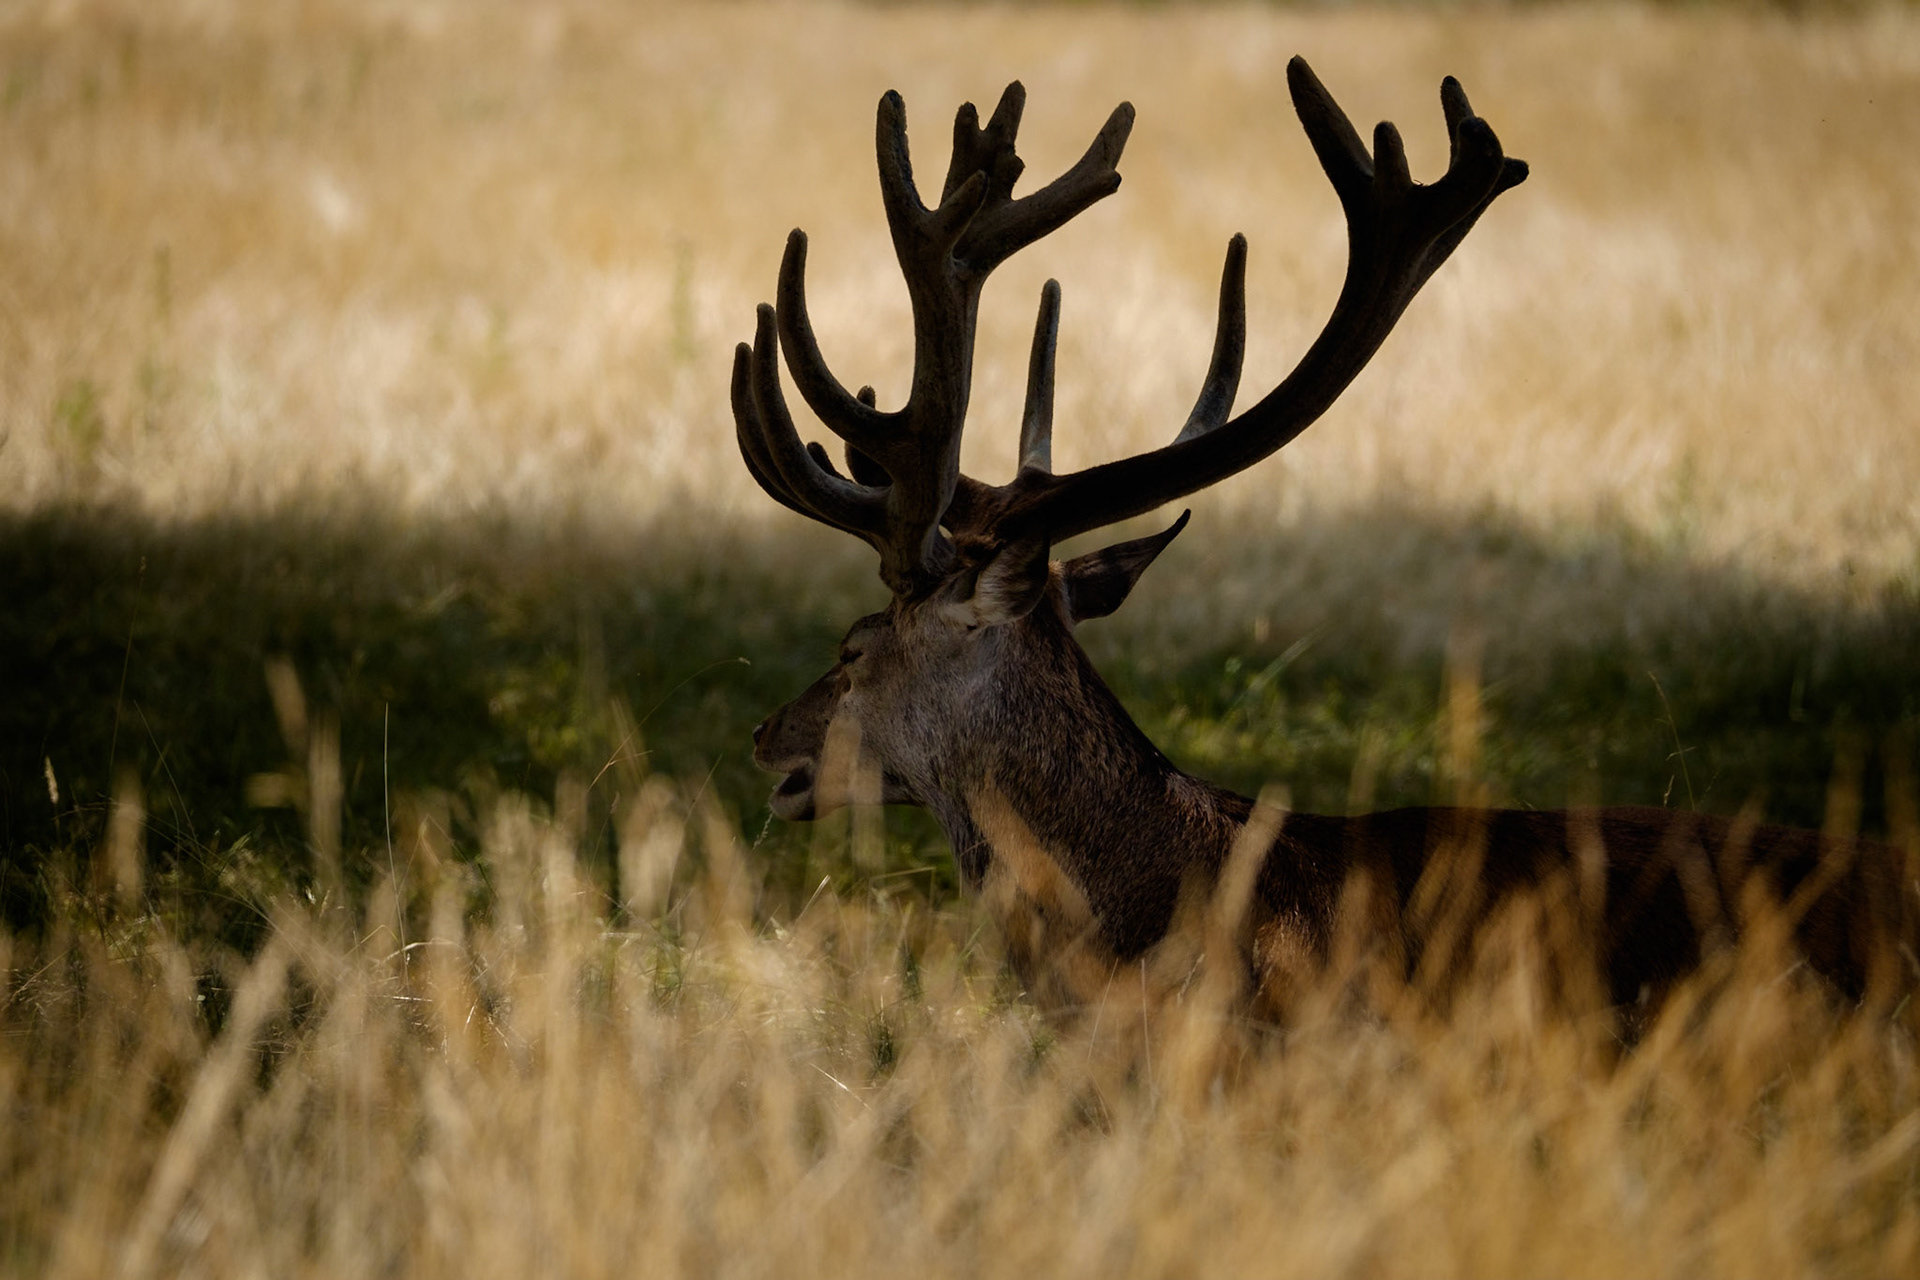
Sample image from 19th May 2018 demonstrating the use of silhouettes when dealing with subjects in shade.
Sample image from 18th April 2018 - wait for some eye contact before pressing the shutter for added impact.
Sample image from 18th April 2018 demonstrating the use of light and shadow to highlight the main subject when the scene is too busy.